
Quaketips Blog Archive

This legacy archive preserves a wealth of information collected by the late earthquake preparedness advocate Dr. Matthew Springer and originally published on his Quaketips blog. Written as a companion to his recurring San Francisco presentations, these informative and entertaining posts document practical experiments, product follow-ups, household fixes, historical observations, and lessons learned before, during, and after earthquakes. For current recommendations, a recorded presentation, and Dr. Springer's biography, visit Earthquake Resources.

“It's important to remember that even though we live in a place that is subject to earthquakes, which are occasionally pretty big, most of the risks associated with California earthquakes can be minimized by taking some precautions ahead of time.”

Matthew Springer, PhD

Quaketips Blog Sections

Quaketips reference section

Warnings, Predictions & Apps

Understand what early warning can do, what it cannot do, and how alerts reach you.

MyShake

Earthquake early-warning and earthquake-information application discussed in the archived articles below.

Availability: Search your device's official app store for "MyShake".

QuakeFeed

From USGS, a unique perspective on earthquakes around the world. Maps and alerts to quickly check on quakes.

Availability: Search your device's official app store for "QuakeFeed".

Watch Duty

Wildfire incident and alert information that can be useful during overlapping regional emergencies.

Availability: Search your device's official app store for "Watch Duty".

Alerts & Apps

3 articles

Early-warning systems, alerts, prediction claims, and practical notification tools.

The western US ShakeAlert system is loudly proclaiming its arrival (A Story of Three Alerts)

I was driving in San Francisco to an orchestra rehearsal about three months ago and listening to music on the car stereo from my iPhone, and then something unusual happened in the middle of the music: there was a jangling noise and a disembodied man's voice said something like "Earthquake!  Drop, cover, and hold on.  Shaking expected."  A  MyShake  app notification was on the screen saying something about a 5.0 in Sonoma County.  I thought that was odd because a 5.0 in Sonoma County would be unlikely to cause a problem in San Francisco, but I pulled over and turned off the car and waited to see what would happen.  And then a few seconds later, it happened!  The car moved!  It moved back and forth about 3 times... by a distance roughly the length of an ant.
The western US ShakeAlert system is loudly proclaiming its arrival (A Story of Three Alerts)

This exciting experience, while "ant-iclimactic," got me thinking about what would happen if a bunch of cell phones on stage and in the audience suddenly started blaring alarms in the middle of a concert, especially if followed merely by an ant-sized movement.  I contacted the folks over at UC Berkeley who administer MyShake (which taps into the ShakeAlert earthquake early warning system for the West Coast of the US), and asked why the alert had gone to a place with such little shaking.  They told me that actually, most of the complaints that they received were from people who did experience shaking and were not warned, so this gives you an idea of how hard it is to thread such a needle.  I wrote about this issue in an earlier Quaketips post in late 2019.

A month later, I got another MyShake alert on my phone while at home in the late morning, a loud noise, which startled me quite a bit, about a 5.1 down near San Jose.  Several seconds after that, we indeed started moving (enough to be unnerving), and thanks to the alert, I was expecting it and didn't have to waste time going through the "is that really an earthquake?" routine.  Between already knowing it was just a 5, and feeling the mild beginning of the shaking, I actually did not get under my desk but I was ready to do that if it got worse, and I already knew there were no lit stove burners or candles, etc.  That alert was really worthwhile.

Well, just a few nights ago, they had a nice medium-large one (6.4) up in Humboldt County, about 250 miles north of San Francisco.  A BUNCH of people in Northern California got a MyShake alert about this one, which actually caused a lot of damage up there.  Down here in San Francisco, we got the alert and depending on where people were and what they were doing, we either felt a slight shaking or no shaking, again making people ask why we got an alert for a quake that was so far away.  Here's an interesting fact: I inquired with the Berkeley people again and was told that the app is supposed to send an alert for any California/Oregon/Washington quake over 4.5 on the Richter Scale to the zone that is expected to experience shaking at level 3 of the Modified Mercalli Intensity scale (weak shaking), and San Francisco might not have gotten an alert for this 6.4 in Humboldt except that the quake was initially estimated at a 6.6, which would have shaken a larger area.  (Because this is a log scale, the difference between a 6.4 quake and a 6.6 quake is actually pretty substantial.)  The alert went out on that basis so it overestimated who should get it.

This is a great example of one of the unavoidable ironies of such a system: because the alerts are based on shaking at the epicenter that then radiates outwards to where most of the alert recipients are, those who are at the epicenter where the quake is strongest and thus are most in need of an early warning will not be the ones who get the warning early.  And indeed, there were reports on the news about people in the strongest shaking area saying they got the alert after the quake was already in progress, which must have felt like a Homer Simpson " D'oh! " moment but you can see why it's a natural part of the system.  Between the people who get shaken the most without warning, and the people who barely feel the shaking and have an early warning a nice long time beforehand, is the "sweet spot" of the people who will benefit from the system the most: those who are close enough to the epicenter to experience substantial shaking but far enough from the epicenter to not experience shaking until several seconds after the warning is received.

At any rate, I don't think anyone would argue that having an early warning system is not worth the occasional "false alarm" for some locations.  Still, I continue to be concerned about the two biggest problems that I can see resulting from such overestimated alerts: harm and complacency.  

By harm, I mean that having one's phone make a noise even when set on "do not disturb," or having many phones make those noises, can create problems and hazards that would be moot if an actual earthquake was occurring but will be trouble if there's no quake.  For example, as I mentioned in my previous article about ShakeAlert and MyShake , a bunch of phones squealing all of a sudden during a performance of acrobats doing death-defying stunts could make them no longer death-defying if someone gets startled and doesn't successfully grab something they are supposed to grab.  Less consequential but more likely, if my phone goes off while I'm in the audience at an orchestra concert or ballet (not followed by a quake), I will be universally hated by everyone (except for anyone else whose phone went off and is also being universally hated).  And if my phone goes off while I am PLAYING in an orchestra concert with no quake, that's an absolutely unacceptable situation and I'm actually concerned about that.  Here's one more: having your phone go off during some little kid's first-ever piano recital; think about it!

I typically set my phone to "Do Not Disturb" when playing a concert, but now I may have to also turn off the sound of Emergency Alerts on my iPhone (currently for iOS 15, Settings -> Notifications -> Government Alerts (it's all the way at the bottom) -> turn "Always Play Sound" to off), or resort to turning off the phone altogether, at times like that.  (One caveat, this seems to change with every OS update, so I'll have to figure it out over and over again, or just turn the phone off.)

"Above all, do no harm" does not apply here, as it is incompatible with "protect as many people as possible from dangerous effects of earthquakes."

The other problem is complacency: if MyShake keeps interrupting people and possibly even causing some of the hassles described above, with hardly any shaking, lots of people will simply delete the app if they don't have the ability to turn it off when in do-not-disturb mode.

Here's one suggestion about how to find a middle ground, at least for those with iPhones.  Remember that there's a difference between "notifications" and "alerts," whereby notifications are after-the-fact news flashes that tell you when a quake above your magnitude of choice has occurred in a geographic location of your choice (a nice recent added capability), whereas alerts are the actual early warnings that tell you the ground might shake soon.  Currently, the alerts are themselves of two flavors: those that go to your phone's location and those that go to your default "Home Base."  If you have location services turned on, then wherever you are, MyShake will know where the phone is and will alert you if the phone is in a region that is expected to shake.  On the other hand, your Home Base is a location that you set manually so that if that region is expected to shake, your phone will get the alert, regardless of whether the phone is in that location or elsewhere.  However, you don't have to set a Home Base location.  If you only want to be alerted if your current location is about to shake, and don't want the early warning if your home base location is about to shake if you are not there, then leave the Home Base location unset (or delete it if you have one already).  Your phone will still sound the alert if you are in that location right before a quake there (assuming location services are on), and will sound the alert if you are somewhere else right before a quake in that place, but won't sound the alert if your home is about to shake but your current location is not.

This solves some of the problem, because if my phone sounds the alert when my current location is expecting shaking, then presumably, lots of phones in the area will sound the alert as well and interrupting the concert won't be MY fault.  However, with my Home Base set for San Francisco, if it comes to pass that San Francisco and the area north of it is about to shake, and my phone and I are in San Jose 50 miles to the south where shaking is barely felt (or for that matter, if I'm in Los Angeles or New York or Paris), then I'd be the only one causing a disturbance completely irrelevant to everyone else within earshot.  Not having a Home Base set at least prevents against this undesirable situation.

However, there does not seem to be a feasible way to prevent occurrences when lots of phones in a US West Coast audience will squeal about a coming local earthquake, either followed by significant shaking or not.  I suggest that orchestra and choral conductors, theater and ballet directors, and directors of acrobatic shows like Cirque du Soleil, plan ahead and decide what their response will be when the chorus of phones in the audience starts squealing.

Oh, and secret agents who are sneaking around hiding from the bad guys should probably turn off those emergency alerts also.  James Bond might like things shaken, but he wouldn't want his phone to cause a stir.
Link to this article Back to top

The Western United States finally has an earthquake early warning system, but you have to order your own milkshake
[12/27/22 note: some of the information in this article is now out of date; a new article that describes recent developments has been posted]
"MyShake" is:  (A) The name of a line dance from the '70s, (B) an earthquake early warning system interface on your phone, (C) an app that places orders for home-delivered milkshakes, or (D) a truly major typo for "asparagus."  The answer is… B!  Yes, after lagging way behind several other countries that have had earthquake early warning systems for years (like Japan, Taiwan, Mexico, Romania, Italy, China, and Turkey), the western United States is rolling out its ShakeAlert™ system, which sends alerts to enrolled cells phones using the MyShake™ app from UC Berkeley that is available for iPhone and Android phones.

At this point, there's a lot of information available about the MyShake app, but I was unclear on a few points and contacted the folks at the Berkeley Seismology Lab to clarify.  I figured that it would be worthwhile to pass along what I learned.  So this is not a comprehensive description of ShakeAlert and MyShake, which can be found online, but instead covers these extra points of info.

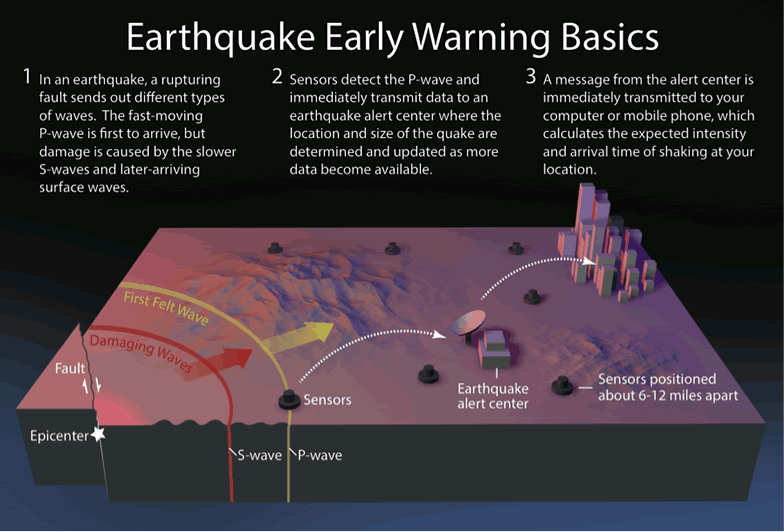
The short description of how it works is that it is not really a prediction that a quake will occur; it's a notification that a quake has already occurred somewhere and will reach you soon.  Unless you are right over the epicenter, this should give you at least a few seconds of advance warning to extinguish candles or other flames and to drop, cover, and hold on (getting under something if possible, NOT getting next to something , NOT under a doorway, NOT running out of a building ( see also here )).  The US Geological Survey (USGS) has a nice graphic and description that I've reprinted here:

The Western United States finally has an earthquake early warning system, but you have to order your own milkshake
"Earthquake early warning systems like ShakeAlert™ work because the warning message can be transmitted almost instantaneously, whereas the shaking waves from the earthquake travel through the shallow layers of the Earth at speeds of one to a few kilometers per second (0.5 to 3 miles per second). This diagram shows how such a system would operate. When an earthquake occurs, both compressional (P) waves and transverse (S) waves radiate outward from the epicenter. The P wave, which travels fastest, trips sensors placed in the landscape, causing alert signals to be sent ahead, giving people and automated electronic systems some time (seconds to minutes) to take precautionary actions before damage can begin with the arrival of the slower but stronger S waves and later-arriving surface waves. Computers and mobile phones receiving the alert message calculate the expected arrival time and intensity of shaking at your location. USGS image created by Erin Burkett (USGS) and Jeff Goertzen (Orange County Register)."

This system, which has resulted from a collaboration between the USGS, UC Berkeley Seismology Lab, and several other seismic networks, foundations, and west coast universities ( here's a complete list ), has gotten a lot of press coverage in California, Oregon, and Washington as it has taken shape over the years.  The MyShake app itself was created by the Berkeley Seismology Lab and delivers alerts from the ShakeAlert system courtesy of the USGS and the California Governor's Office of Emergency Services.

Getting the app is easy; just download it for free from the App Store for iPhones or Google Play for Android phones.

One common point of confusion is the difference between "notifications" and "alerts," since MyShake has both of them.  Alerts are specific to your phone's location and come from the ShakeAlert system augmented by built-in motion sensors in the enrolled phones. They are sent to any phones in the region that is expected to soon have significant shaking.  Notifications are user-specified and let you know when large earthquakes happen anywhere in the world; they are basically just news. So you can choose to have the notifications turned entirely off, and still get the early warning predictions from the app if you are about to experience shaking.

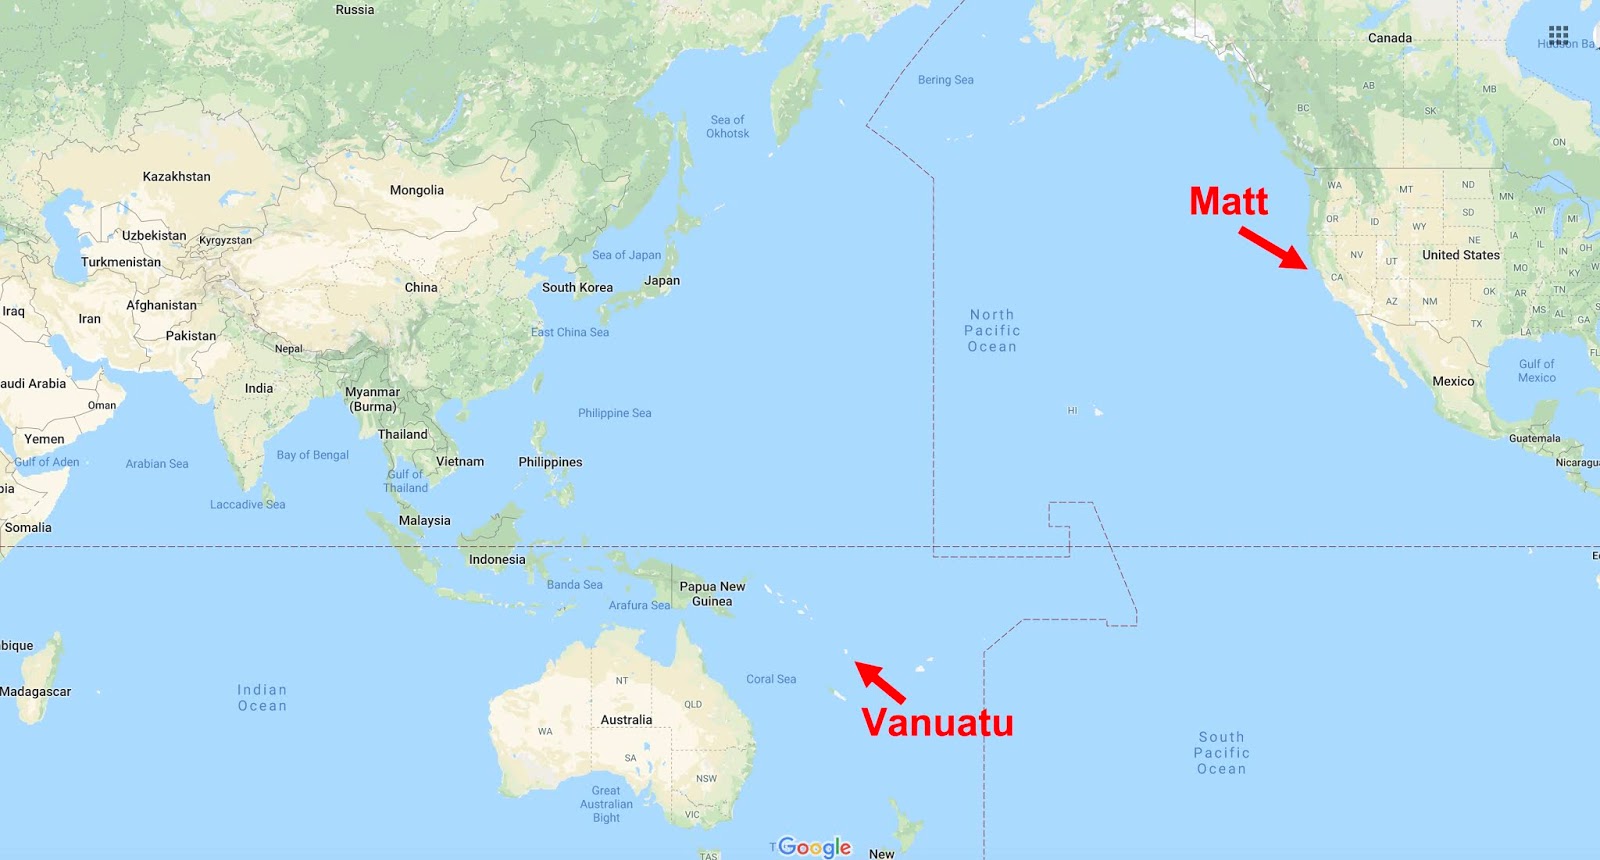
The Western United States finally has an earthquake early warning system, but you have to order your own milkshake As is pretty obvious from reading the reviews of the MyShake app for iPhone on the App Store, many people are confused about this point, especially since you can set a location preference on Android phones to be notified when quakes hit in specific regions of interest, but on iPhones, you can just have global notifications turned on or off, with no control over the location.  That makes the notifications aspect pretty useless on iPhones (after being notified by my phone that an earthquake had hit Vanuatu, I turned off notifications).  The MyShake folks hope to be able to change that on iPhones; no guarantee. [12/27/22 update: they fixed this; now iPhone users can also tailor the location of these notifications, as described in my 12/27/22 article ]

For more information on this point, here's what they told me: "Earthquake early warning alerts will only be sent to phones in the estimated area of shaking in California for Magnitude 4.5 or higher quakes. Those are automatic and you don't need to set anything. You just need your location services enabled (so we know the phone is in the shaking area). Notifications are a separate service we have, which you can turn on or off. For those, you can be notified when earthquakes that interest you are published in the global USGS catalog (after they occur). On iOS you can choose to get global alerts, for Android you can also set custom alerts by clicking the green plus button at the bottom of the notifications setting tab."

Why the strange limitation to only global notifications on iPhones?  "…Apple's OS is very different from Android. We do not want to have to register people with a traditional login that requires email and other personal identifiable information. We don't want that because we want to protect people's privacy. Because we do not require a traditional login like that, we also cannot save user preferences on our backend. I don't know if phone A likes to know about earthquakes in Vanuatu, or if they only care about Florida. All I know on the backend is that phone A was at some location at some point in the last two hours."

[Matt note: "Earthquakes? In FLORIDA???  Mooooo…. " (Let's see if anyone gets that reference from an old Berkeley Farms commercial …)]

"So, on Android, I can send a bunch of earthquake notification information to the phone, the app will wake up and decide whether that information applies to the user settings on the phone, and then if it does, the notification will pop up telling the user about an earthquake of interest. Apple does not work that way. You cannot send a bunch of information to the phone and have the phone decide whether it applies. You cannot on iOS have the phone run a bit of code and make decisions if the phone is asleep or the app is not in active use. Thus, no custom notifications possible using the current setup we have."

"Alerts are different. There are no user settings customizing the experience. We just determine which phones are in the area and send an alert to all of them. The phones do not have to decide if the alerts apply to them, because we already did that on the backend."

Another point that had concerned me was that even if we have Notifications turned off, I was worried that earthquake alerts, if sent out in situations that the shaking was not going to be terrible, could cause sudden distractions with terrible consequences.  The Amber alerts on my phone got turned off the first time it ever squealed loudly due to a reported kidnapping hundreds of miles away; we don't want to do that to concerts and to situations like Cirque du Soleil shows where a bunch of sudden alarms could cause a surprised acrobat to fall, or while the dentist is holding the drill 1 mm away from your tongue.

The MyShake folks answered my query as follows:  "We do not override user phone volume settings, so if the phone is on vibrate, it will just vibrate.  People hate it when Amber alerts go off when they don't want them to, so we did not want to start messing with overriding people's settings. It also will not override a do not disturb." [12/21/22 important update: this changed a while ago; currently, the MyShake app DOES make your phone sound the audible alert even when Do Not Disturb is turned on.]

So it's good to know that we can have this active without risking those sudden audible interruptions.  On the other hand though, if only activated when a large quake is actually about to occur, one could argue that the quake itself is already going to have those negative effects, so we might as well all be forewarned.  Perhaps the wisest course is for dentists and surgeons to not have these alerts armed in their immediate procedure space, but to have someone in the next room able to receive these alerts who has the capability to notify the person holding the knife in a gentler way, such as an overhead announcement.  Taken to technological extremes, the alert could even feed directly into such an announcement system, in much the same way that the alerts are envisioned to automatically open fire station doors, slow down public transit trains, etc.

One point that I think is important is that they are not going to be able to satisfy everyone.  When the Ridgecrest quakes hit Southern California on July 4-5, 2019 (magnitudes 6.4, 5.4, and 7.1), ShakeAlertLA had already been rolled out but it did not warn people about the shaking in LA, which was far enough away from the epicenter that the local shaking was under the magnitude for which the app had been set to activate.   As reported by the LA Times on July 15, 2019 , "But after the blowback that followed the Ridgecrest quakes July 4 and 5, officials agreed to lower the mark.  By the end of July, the app will send alerts for local quakes with a magnitude of at least 4.5 and for any quake that results in 'weak' shaking locally despite officials' concern that too many warnings could lead to complacency.  'We want you to see the alert and immediately drop, cover and hold on,' said Robert de Groot, the USGS' ShakeAlert national coordinator.  'If you see 30 of those a day, you're either going to get incredible muscle tone and a core workout, or you're going to stop reacting altogether.'"

(I love that quote and simply had to include it.)

I mentioned this earlier, but I'll say it again here because I think it's really important:  If you get an advance warning of an earthquake, or even if you don't and suddenly there's an earthquake, you are indeed supposed to drop, cover, and hold on, but if you have a candle or other active flame, your #1 priority before all else is to put it out!

By the way, if you go to shakealert.org , you'll see that seismologists love acronyms.  The page looks like people were playing scrabble when an earthquake hit, and you're looking at the floor afterwards.  Notably, the USGS and the ANSS with the PNSN and the CISN, which is made up of the SCSN and the NCS (no mention of CSI or NCIS) are sending special messages like CAP for IPAWS/WEA in this EEW system.  I feel better already.

Back to article index

Link to this article Back to top

Thoughts about the much-publicized North American earthquake prediction for late March 2011
This is what I wrote on my website in late March about the prediction from an ex-USGS scientist and made popular by Fox News.  The predicted quake did not occur, which of course doesn't mean that it won't happen tomorrow; but these thoughts are still worth considering for the future:

Many people are talking about a prediction for a large earthquake to hit North America this week, from a geologist who allegedly predicted the 1989 Loma Prieta quake, Jim Berkland.  I can't comment on the 1989 story, as I am having trouble finding details about it from reputable sources, but here are some thoughts about the widely-viewed recent Fox News interview in which he makes his current prediction.

Mr. Berkland makes several points in the interview about beaching of whales, etc., that may or may not be valid.  I am not in a position of expertise that allows me to judge.  They are certainly interesting, but aren't much on which to base a geographical location.

Similarly, it is true that some large quakes have occurred near the full moon, and it is also true that some large quakes have occurred closer to the new moon than to the full moon (like the 9.0 Japan quake, 6 days after new moon and 8 days before full moon).

Thoughts about the much-publicized North American earthquake prediction for late March 2011 The interview gives the impression that there has been a clockwise progression of major quakes around the "Ring of Fire," the seismically active zone surrounding the Pacific.  The graphics showed recent notable quakes in Chile (8.8 last year), New Zealand (6.3 last month), and Japan (9.0 last week), and implied that if one continues the clockwise progression, one ends up at North America.

First, while the 6.3 New Zealand quake did considerable damage, the real seismic event was the 7.0 earthquake several months earlier; so let's say we are talking about a 7.0 in this progression.

Still, earthquakes around magnitude 6-7 happen quite frequently.  What made the New Zealand quakes notable was that they took place close enough to population centers to have caused damage.

In fact, in 2010 alone, twelve earthquakes occurred over magnitude 6, including three >7 Ring-of-Fire earthquakes on the same day in the Philippines and one in Sumatra...and a 7.2 in Baja California and a 6.5 off the shore of Northern California (we didn't hear about the latter because it didn't affect us here).  The 6.5 occurred 1.5 months before the massive Chile quake, and the 7.2 occurred a month after the Chile quake.

Therefore, trying to demonstrate a clockwise pattern of earthquakes based on Chile, New Zealand, and Japan strikes me as trying to see a pattern by ignoring most of the data.

To be fair to Mr. Berkland, he never said in the interview that this clockwise progression including New Zealand pinpointed North America to be next; that was the Fox News graphics playing while Mr. Berkland spoke.  Still, that aspect, had it been accurate, would have been the most compelling part to me.

So is Mr. Berkland wrong about a large quake hitting North America this week?  I couldn't say.  Perhaps his other information is solid. In any event, if no large quake occurs here this week, he won't have been wrong; he said only that there's an increased chance of one.  And so should you be prepared for a sizeable earthquake if you live in an earthquake zone?  Of course!  Whether or not it is a result of this week's prediction is less important.

Back to article index

Link to this article Back to top

Quaketips reference section

Before an Earthquake

Preparation is the most effective way to reduce preventable earthquake injuries, damage, and disruption.

Start Here

10 articles

Broad preparation, workplace readiness, household planning, visitors, retrofits, and practical preparedness habits.

Helping Hands: A Field Trip to Japan’s Earthquake Preparedness Store
Many countries that possess seismically active areas have some regions that are more prepared for earthquakes than others, such as San Francisco being far more earthquake-conscious than Miami in the USA.  However, as a country that basically is one entire large quake zone and prepares/builds accordingly, it’s hard to beat Japan.  
While it might sound like I’m writing this article about the New Year’s Day Noto Peninsula earthquake , I had actually already started to work on it before the quake.  In fact, I’m really surprised at how much damage there was because Japan is essentially the gold standard for seismic construction and personal preparedness and behavior.  It still fared quite a bit better than many other countries have in comparable or smaller quakes , presumably because they take quake preparation so seriously at every level.  At any rate, while this article is not about the recent earthquake there, I do send my best thoughts to people there including my friends and their families.
Helping Hands: A Field Trip to Japan’s Earthquake Preparedness Store

(Click to enlarge). You can’t see it, but Matt’s eyes are

wide open and his jaw is on the floor. Shoppers probably 

assumed he was an artificial garden gnome statuette

that had been misplaced in the wrong section.

I try to remain pretty up-to-date on what kinds of quake preparation devices are out there, at least that I know how to purchase.  I keep running into impressive surprises though and they almost always are from Japan (such as the Murakoshi cabinet latch , and the ceiling bracing stilts for tops of tall furniture , about which I’ve written in previous articles).  Thus, when my wife and I took a trip to Tokyo earlier this year, I made it a point to visit the massive Tokyu* Hands store in Shinjuku to see their earthquake preparedness section (*not a typo; there are several of these stores in Tokyo but this is the one with the impressive earthquake section about which I was tipped off by a friend).  If you want to read about Hands, here’s a cute description of them at Buzzfeed , including the description that “It shares Hobby Lobby's love of crafts, Walmart’s size, and Amazon’s broad selection of both the normal and the weird. Then it takes it all up 10 notches.”
Helping Hands: A Field Trip to Japan’s Earthquake Preparedness Store
(Click to enlarge).  Bracing rods and shim strips.
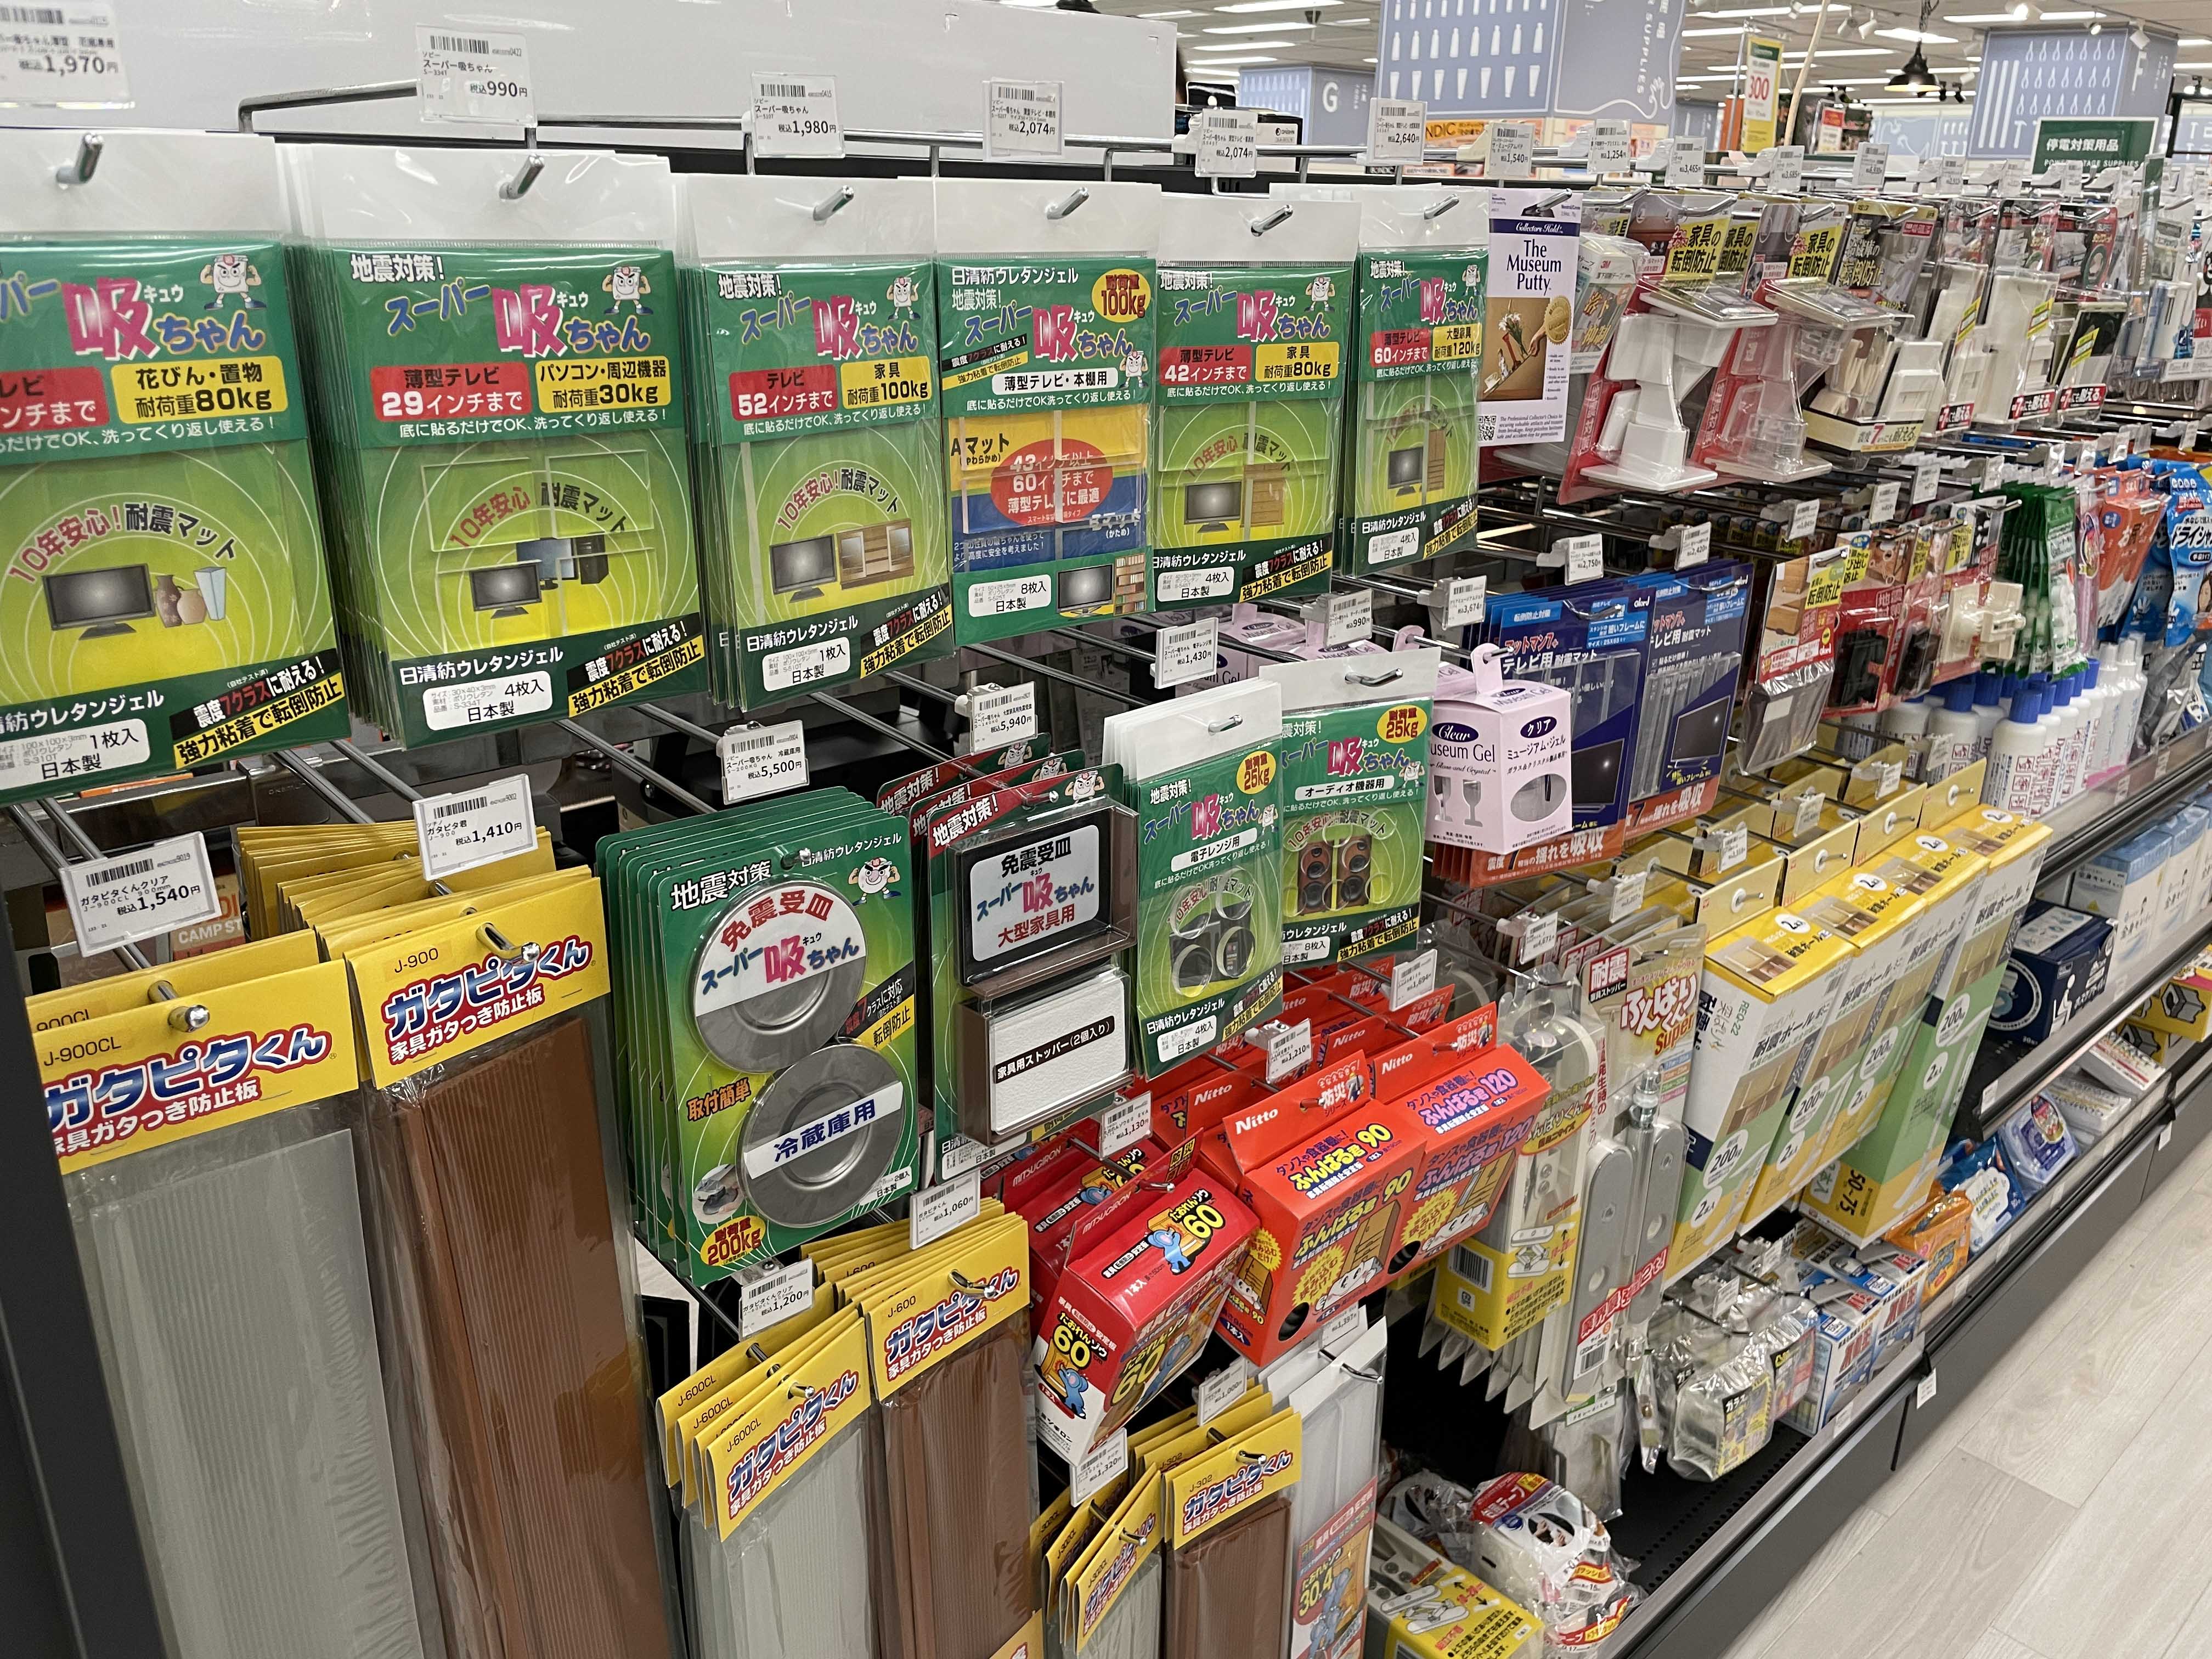
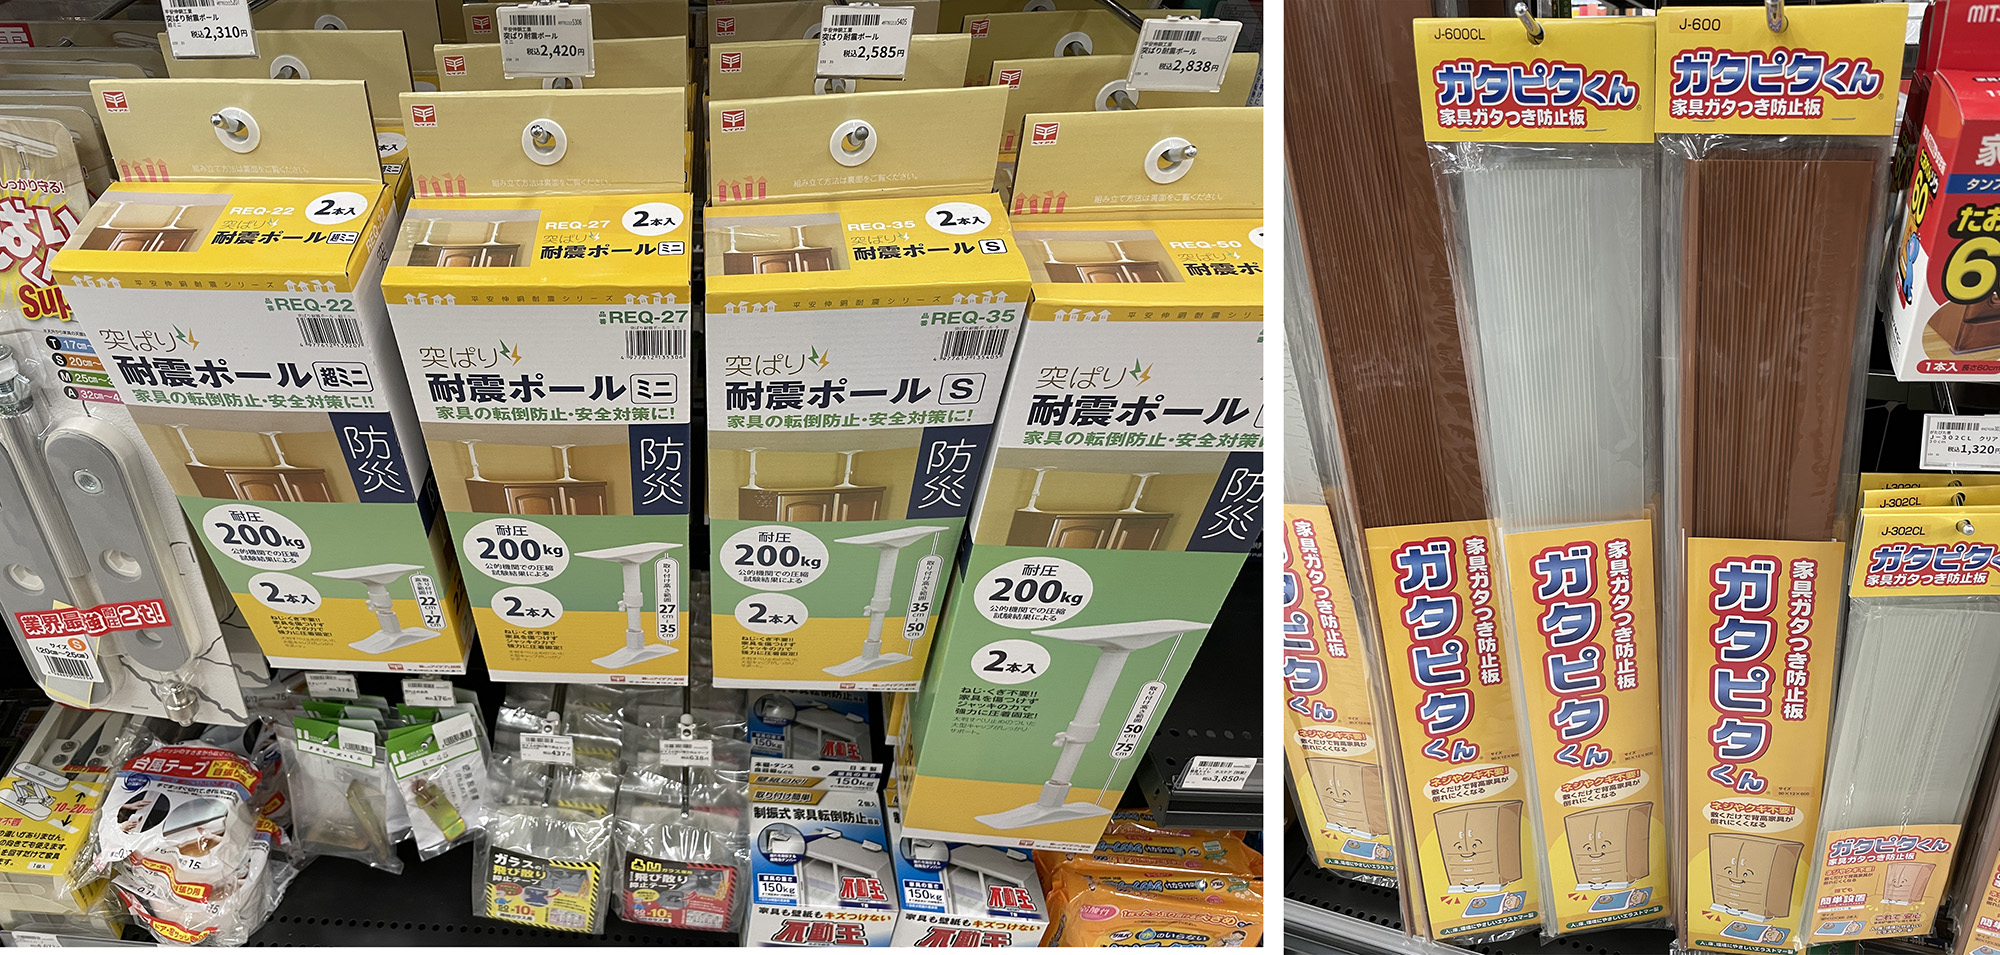
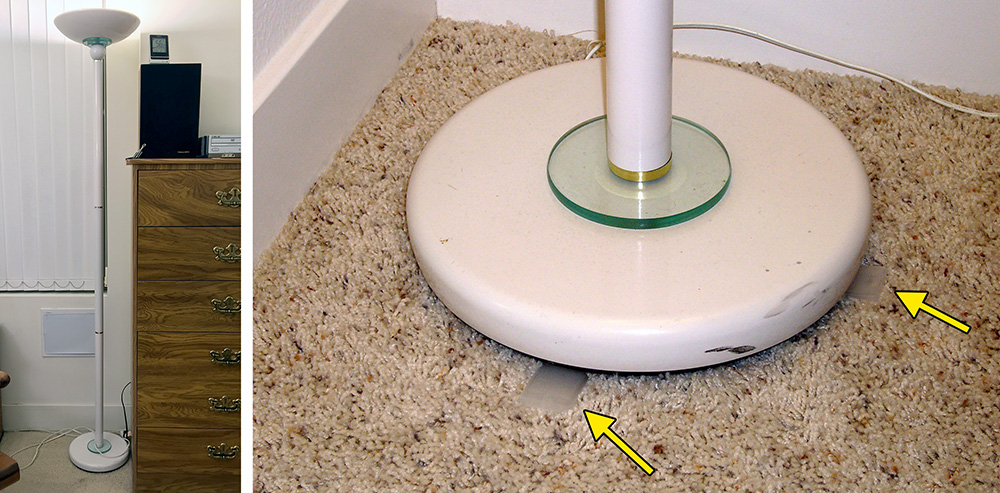
I was initially a bit disappointed at how small the section was (just a couple of short aisles) but then I realized that they didn’t have very much of any one product out on the shelf, so that small area actually contained many different kinds of products.  Looking over the available products, I saw several versions of things we can get in the US from companies like Ready America (a.k.a. Quakehold) .  I saw some clever variations on what I’m used to seeing; for example, I have long used small plastic shims (that is, wedges) under objects that might be otherwise unstable but are hard to appropriately brace, such as floor lamps , and even under a box of emergency supplies to stop it from sliding in a closet to block its own door.  Here, they mean business; they had long shim strips that would stretch across the entire front edge of a wardrobe or bookcase.  I was also delighted to see a whole array of the very wardrobe bracing rods that I had purchased from Japan to brace my massive wardrobe to the ceiling, about which I had written before .
Helping Hands: A Field Trip to Japan’s Earthquake Preparedness Store
(Click to enlarge).
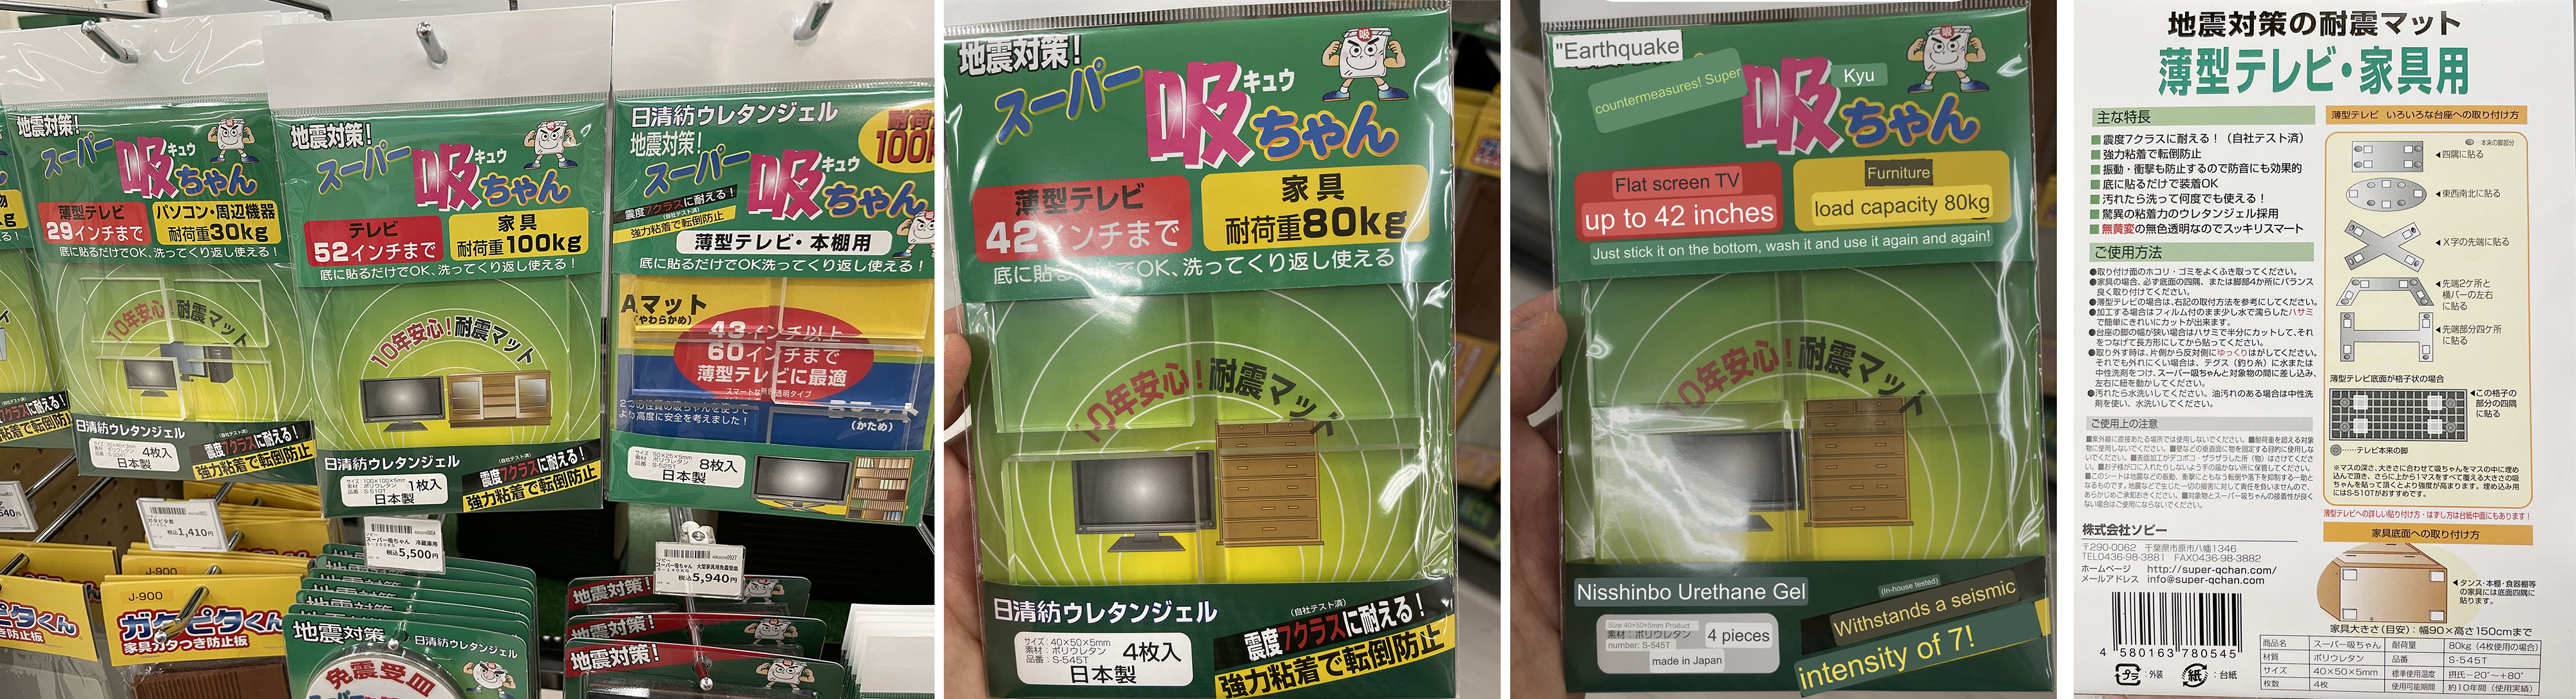
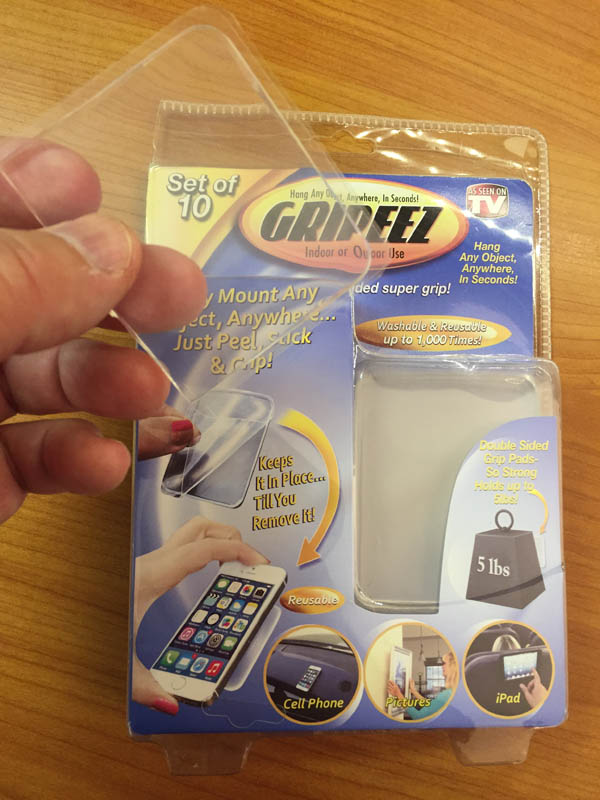
I decided to purchase three products to play around with them at home.  The first one was grippy blocks to be placed under flat objects.  “YAWN” you say, “big deal, you’ve written about Gripeez lots of times for sticking down small light things, so what’s new?”  Well, the strongest of these products there advertises that it braces 100 kg!  ( That’s 220 lb, for us Yanks. )  Check out the photos, including the Google Translate “Lens” screenshot showing what is says in English (for us Yanks).  (Got to take those Google Translate Lens shots with a grain of salt though; on the same trip, it translated the plaque near a statue of a famous person to say his name was “Fast Food.”)  I got one and plan to use it to brace something when the need arises.  As the diagrams suggest, this product is for large flat-bottom furniture on smooth hard floors (although Google Translate Lens initially suggested that this product was intended to stick down bicycles).  Never try using grippy pads of any strength to attach things to vertical surfaces like walls.
What I wonder about is how easy it is to move the furniture again after it’s stuck down.  Many of us have found that if you use too much quake putty on a large flat bottom item so it spreads out at too large of a diameter, it can be extremely difficult to remove the object afterward.  Google Translate Lens says that the back of the product mentions that if it is difficult to remove afterward, slowly peel it off from one side to another, but what if your cabinet that’s already 220 lb is stuck to the floor?  It also says that if the item is hard to remove, use fishing line wetted with water or neutral detergent and slowly move it back and forth between the pad and the surface.  I’m worried...  
(The year is 2358, at the world-famous art museum in massive downtown Bakersfield: “Why is this vintage 21st Century wardrobe on display between the Mona Lisa and Clarke’s famous holopainting of Dame Taylor Swift?” “It’s because someone in 2024 used too many Japanese grippy squares to stick down their wardrobe in a house that used to be on this site, and since they could never remove it, they just built the museum around it.”)
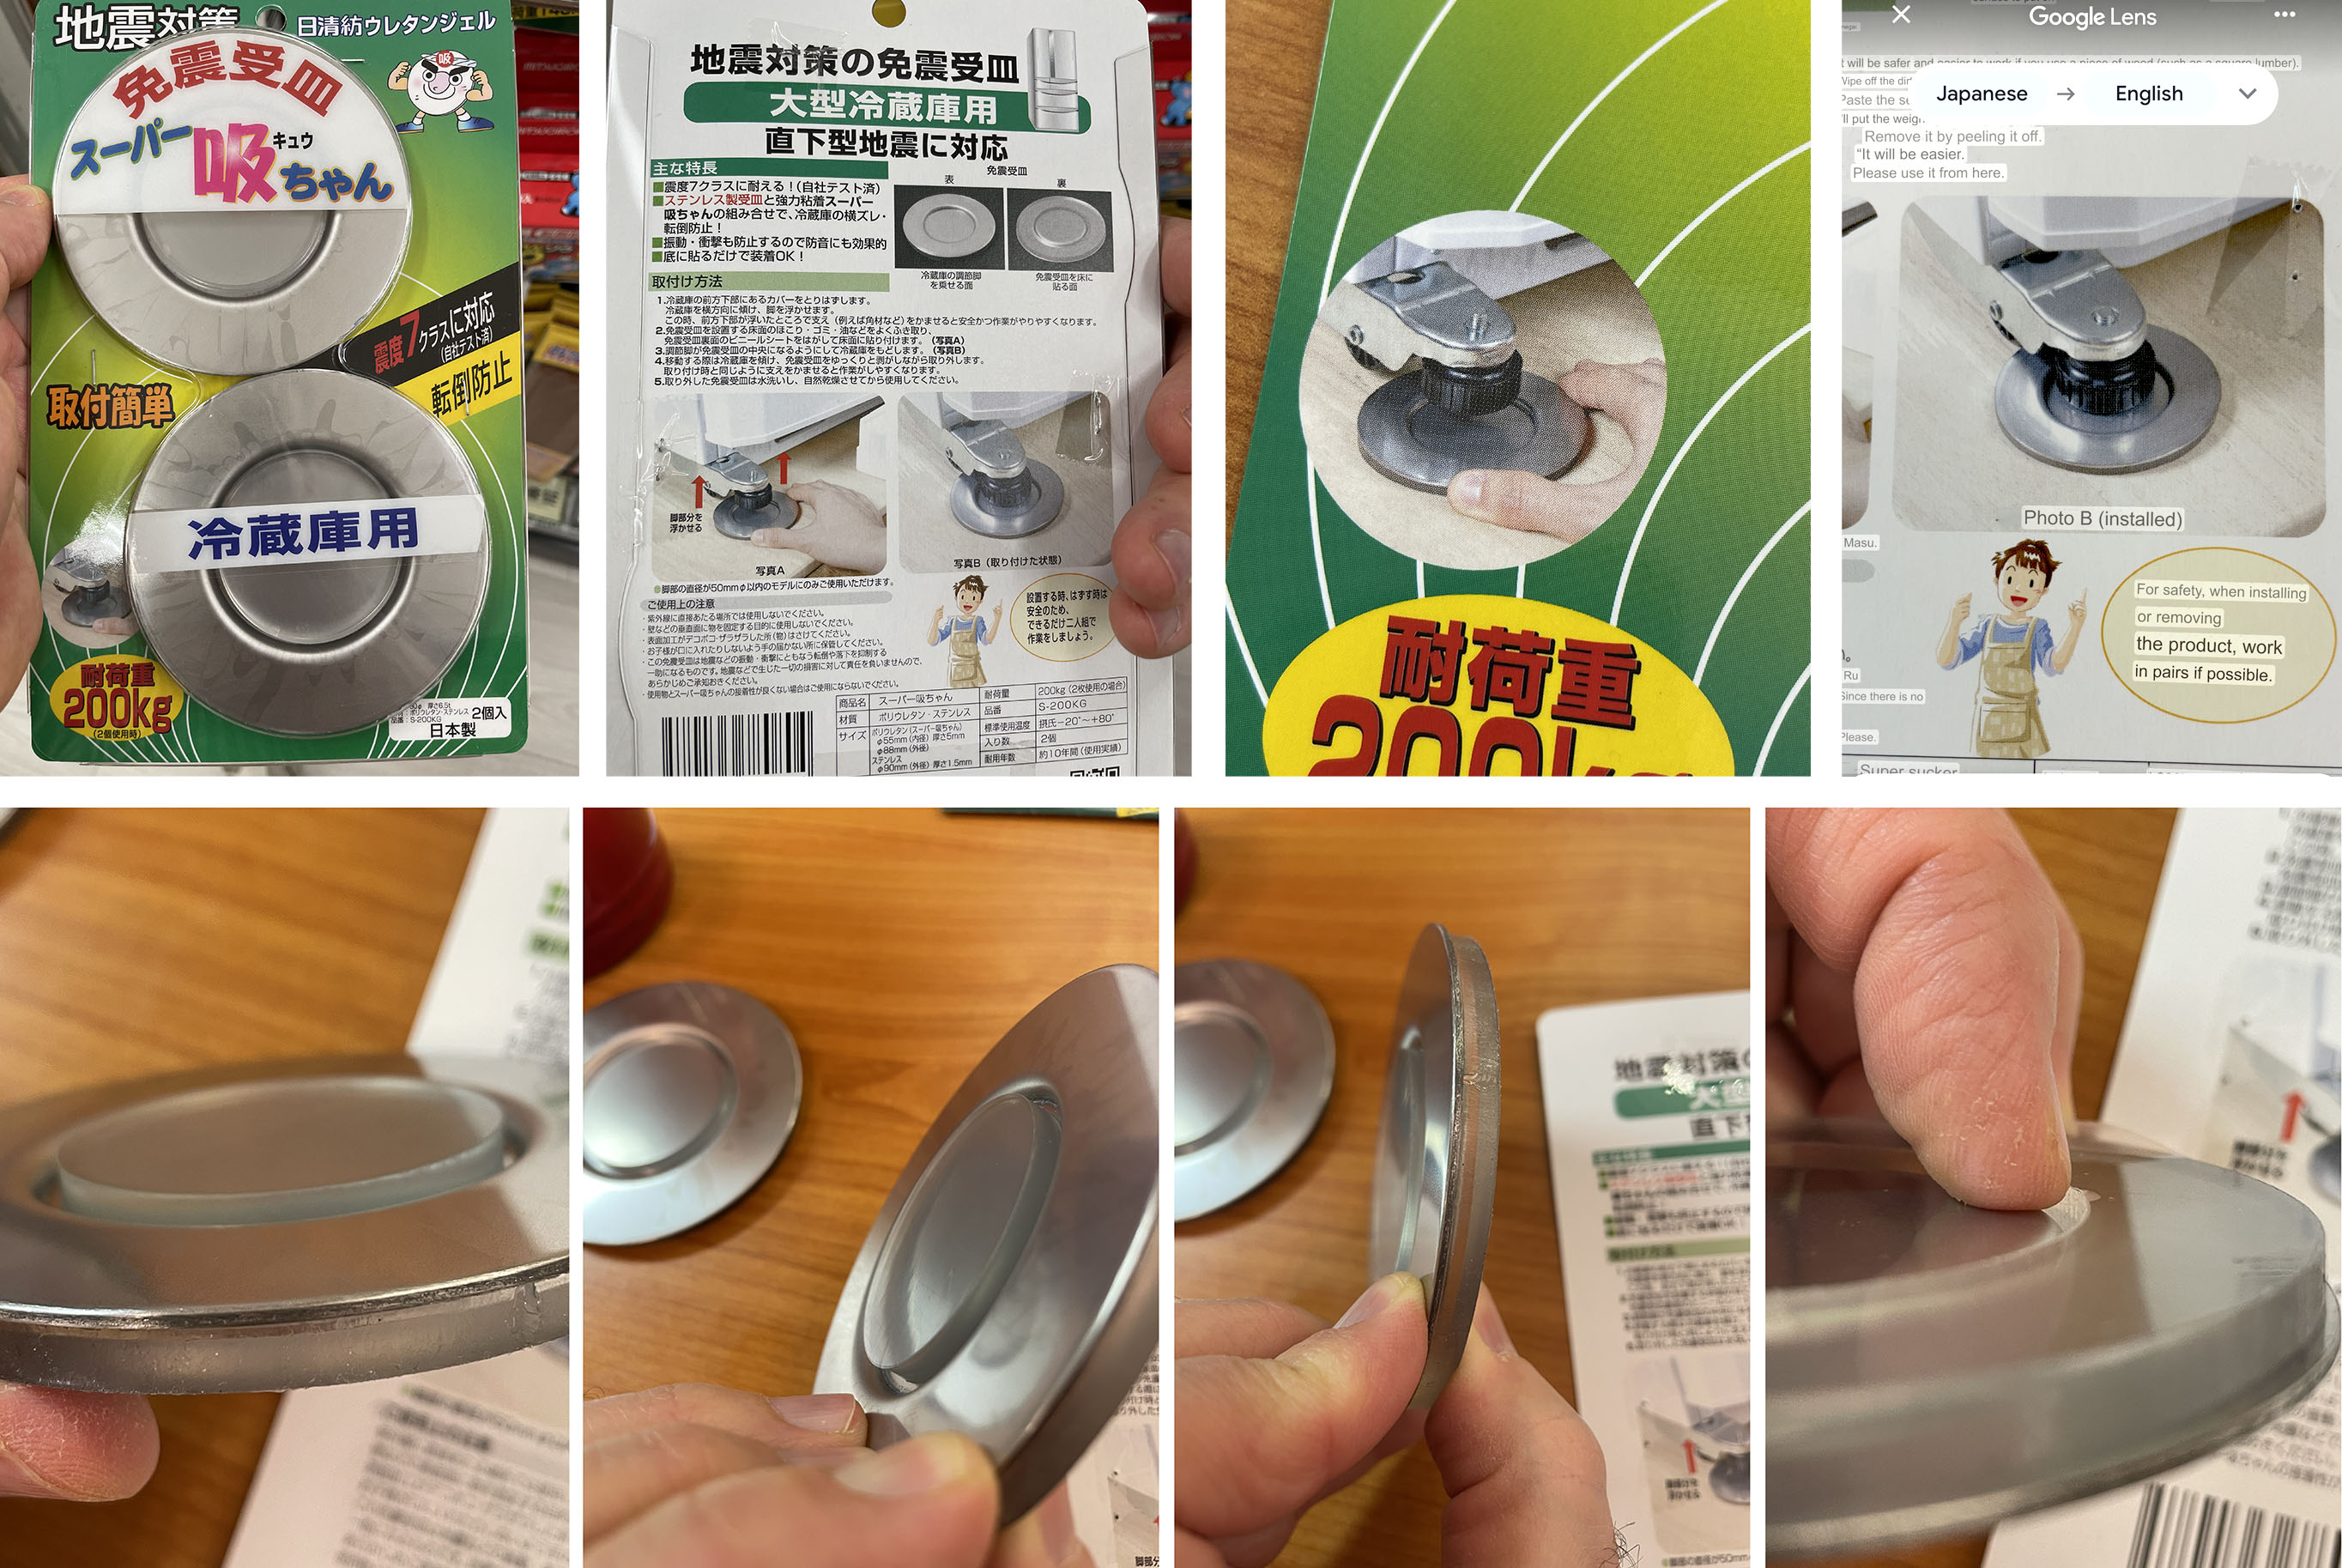
Another interesting product I wanted to get and play with was a refrigerator “seismic isolation” disk; in plain English, a grippy saucer that prevents the fridge from moving.  This is a complicated issue.  Refrigerators have several special challenges for quake safety: first, the doors can swing open causing the contents to scatter.  There are braces that swing into place to prevent full-width doors from opening and have to be manually moved out of the way each time the door is open.  I have had “French Door” fridge/freezer units for a long time and have less concern about those doors, since they are not as wide and don’t have as large of a lever arm (go check your old Physics textbook for that one). Second, they can tip over.  There are braces for fridges to attach them to the wall like other tall furniture, but they are frequently in pretty tight frames in modern kitchens that don’t really give the top enough room to tip over.  The thing that bedevils people still is when they roll out of their cubbyholes, and I THINK that is what these disks are supposed to prevent. 
Helping Hands: A Field Trip to Japan’s Earthquake Preparedness Store
(Click to enlarge).
These disks are basically metal saucers with a grippy outer ring on the floor side, and a grippy inner plug for the fridge side.  I’m a bit confused by the diagrams.  If the fridge has only wheels, then I can see tipping it up and placing the front wheels on the grippy saucers, which come in pairs. However, my fridge has adjustable leveling feet in front of each front wheel, and it appears in the diagram that it’s the leveling feet that go on the grippy saucer.  However, I would have thought that simply by leveling those feet so that they are on the floor and taking the main weight of the fridge rather than the wheels taking the weight, the fridge would not be able to roll.  Unlike my previous refrigerator, which I could easily roll out to retrieve things that fell behind it, the current one does not roll, so I’m not sure I need these saucers and probably won’t use them.  (That’s the cue for my various quake expert colleagues to pile on and correct me... I’ll update this article should that happen.)
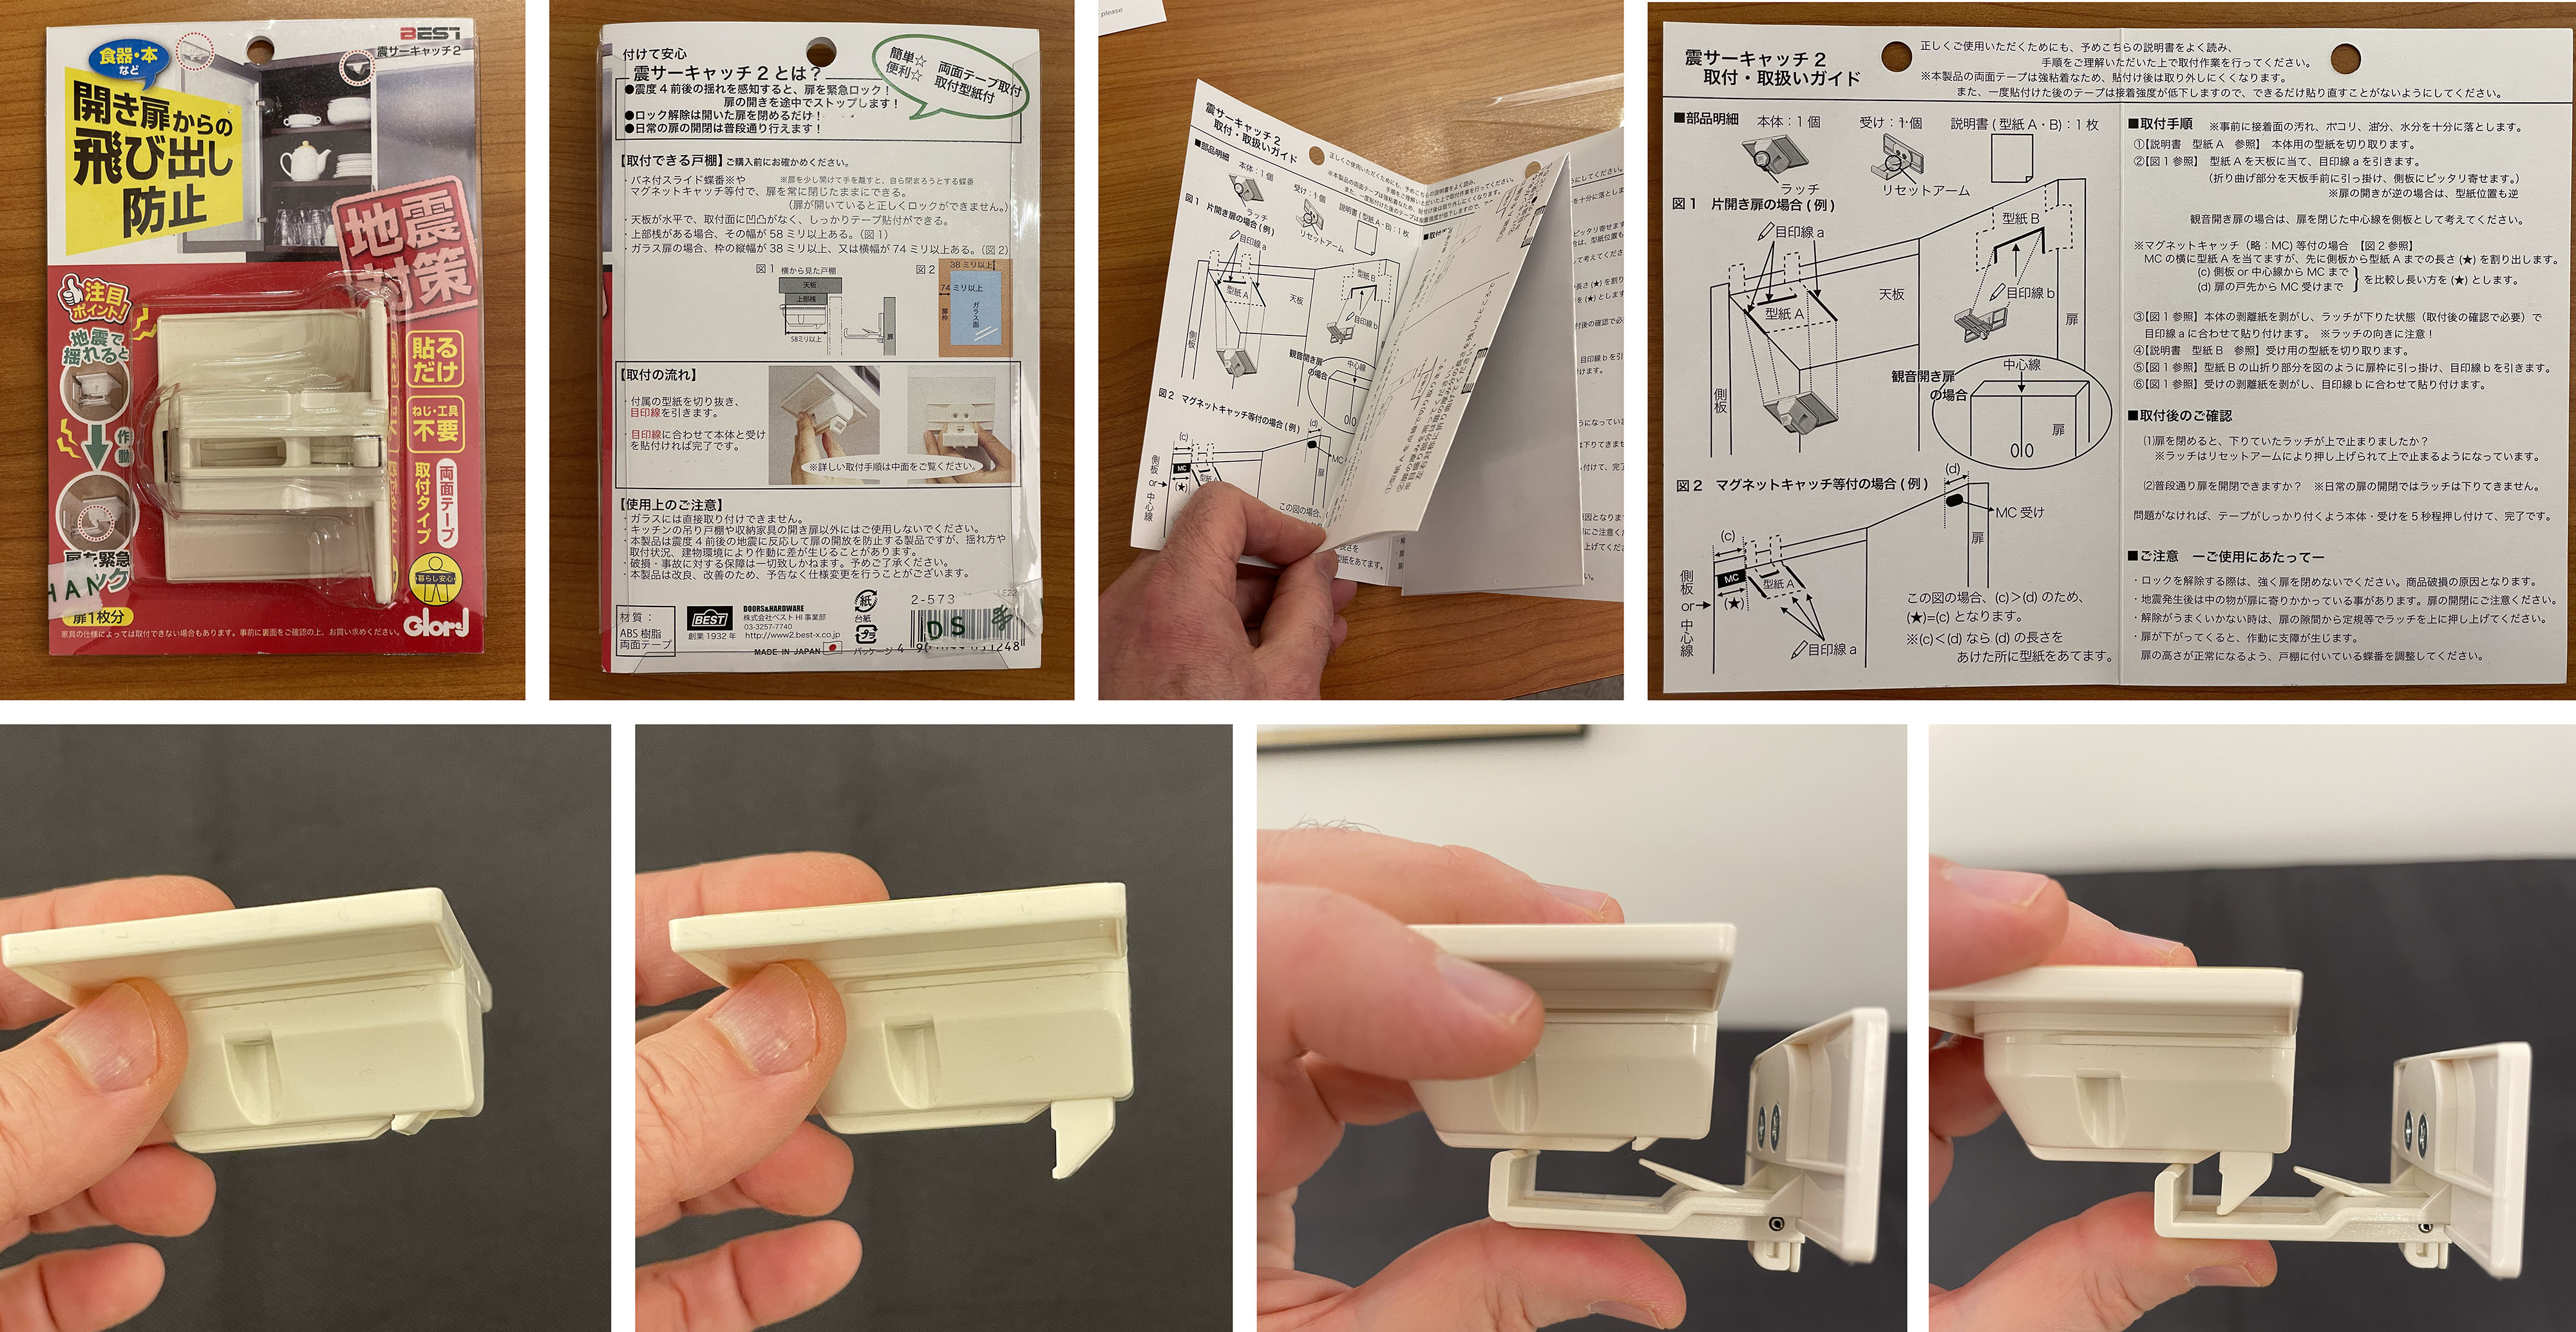
Lastly, longtime readers of this blog know that I’m really interested in quakeproof cabinet latches, so when I saw a new cabinet latch I hadn’t seen before, I had to get it.  I tend to not like motion-activated latching mechanisms where something has to fall into place during an earthquake to prevent the cabinet from opening; I’ve seen that kind of latch fail many times.  The ones I’ve liked have been push latches (touch latches) , and the relatively recent Murakoshi latch (yep, from Japan) in which a small pendulum inside the mechanism needs to be perfectly straight for the latch to open; in other words, motion-DEactivated unlatching.  Well, here was another motion-activated latch but instead of something having to fall in place, the slight motion in the outward direction makes a spring-loaded latch shoot down instantly, very effective.  
Helping Hands: A Field Trip to Japan’s Earthquake Preparedness Store
(Click to enlarge). (Warning: reading the instructions can cause seizures)
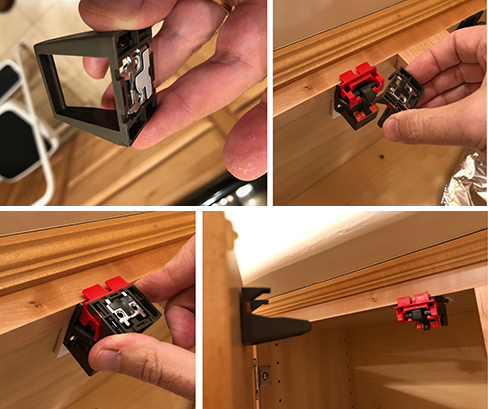
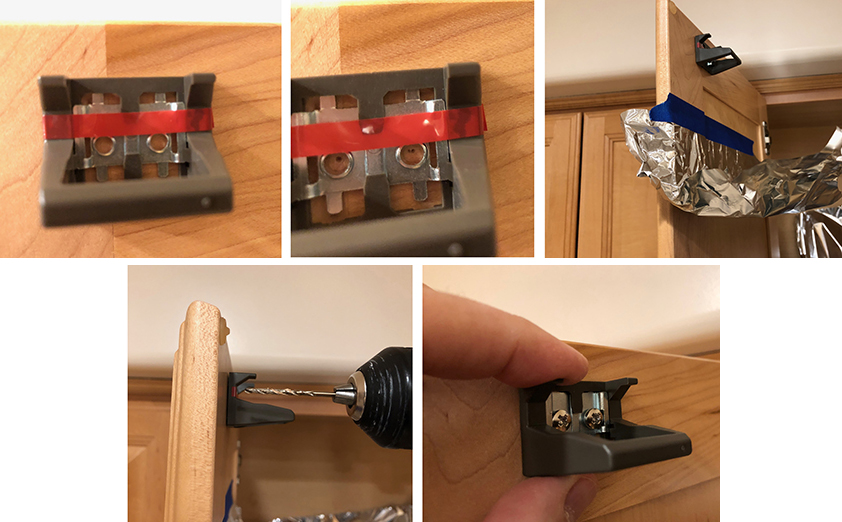
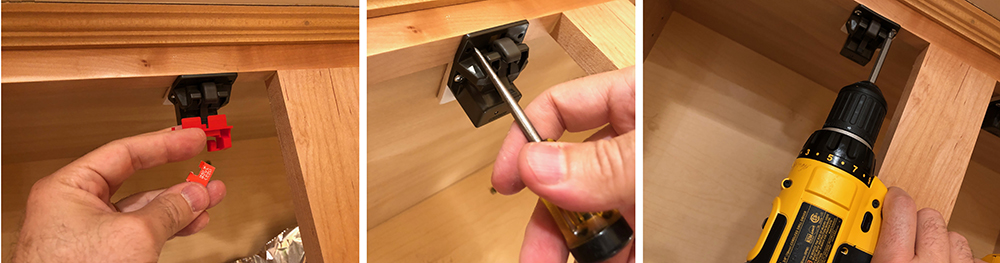
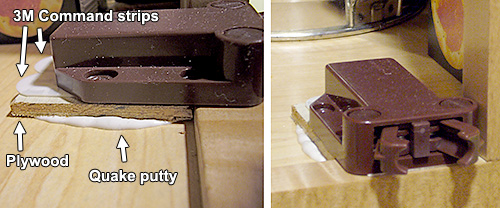
Things to like about this latch: from my limited playing around with it, it seems like the mechanism will be very effective and reliable.  Unlike any of the others I’ve tried, there’s no drilling or screws; it’s all done with wide pieces of adhesive tape (good if you never plan to remove the latch, bad if you want flexibility to put it elsewhere.)  With the supplied templates for installation, it seems like there’s no guessing as to position.  And, there’s a nifty extra arm that swings into place after it activates that will push the catch part back up out of the way the next time you push the door into place, restoring the ability to open the door.
Helping Hands: A Field Trip to Japan’s Earthquake Preparedness Store
(Click to enlarge).  Stepped cabinet frames present
challenges for many types of latches.
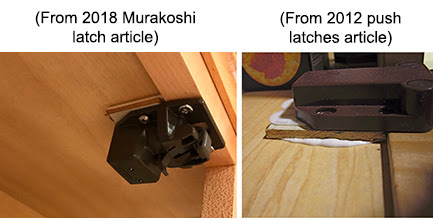
Things to not like: As mentioned, it can’t be repositioned or reused unless relying on different adhesive if you trust it. The thing that worries me, though, is that if you have a cabinet in which there’s a little step, as shown in this figure lifted from my earlier articles about latches, you still have to either build up extra material to fill in the step, or, you might be able to put this latch’s main part further back behind the step (see figure at right). However, if the latch is too far back away from the cabinet door, then even though it will still activate and stop the door from opening, it looks like pushing the door closed won’t push the moving catch back up because that little nifty swinging arm I mentioned won’t reach it.  It’s hard to describe, but I’d be worried that a door with such a recessed latch could be permanently latched after a quake.  Also, just like the other latches, they won’t work on cabinets in which the ceiling of the cabinet is much higher than the top of the frame, which is common in lower cabinets.
Ok, the fatal flaw in this article is that while I’ve seen various references to the ability to purchase from Hands online, I’ve been unable to find a way to do it.  The online store exists but currently has a note saying that overseas delivery is not available.  The Buzzfeed article that I mentioned earlier says that there’s a company that purchases from Hands and then sends to people overseas but the link doesn’t appear to work. I had managed to purchase the wardrobe bracing rods via Rakuten online, but that site appears to be gone.  But these products are out there, hopefully available somewhere in the global online economy; and if you happen to be around Shinjuku, go check it out.  (Omitting my typical more lighthearted endings out of respect for the current quake recovery effort in Japan.)


Link to this article Back to top

Masks for fires and earthquakes aren't necessarily good for pandemics
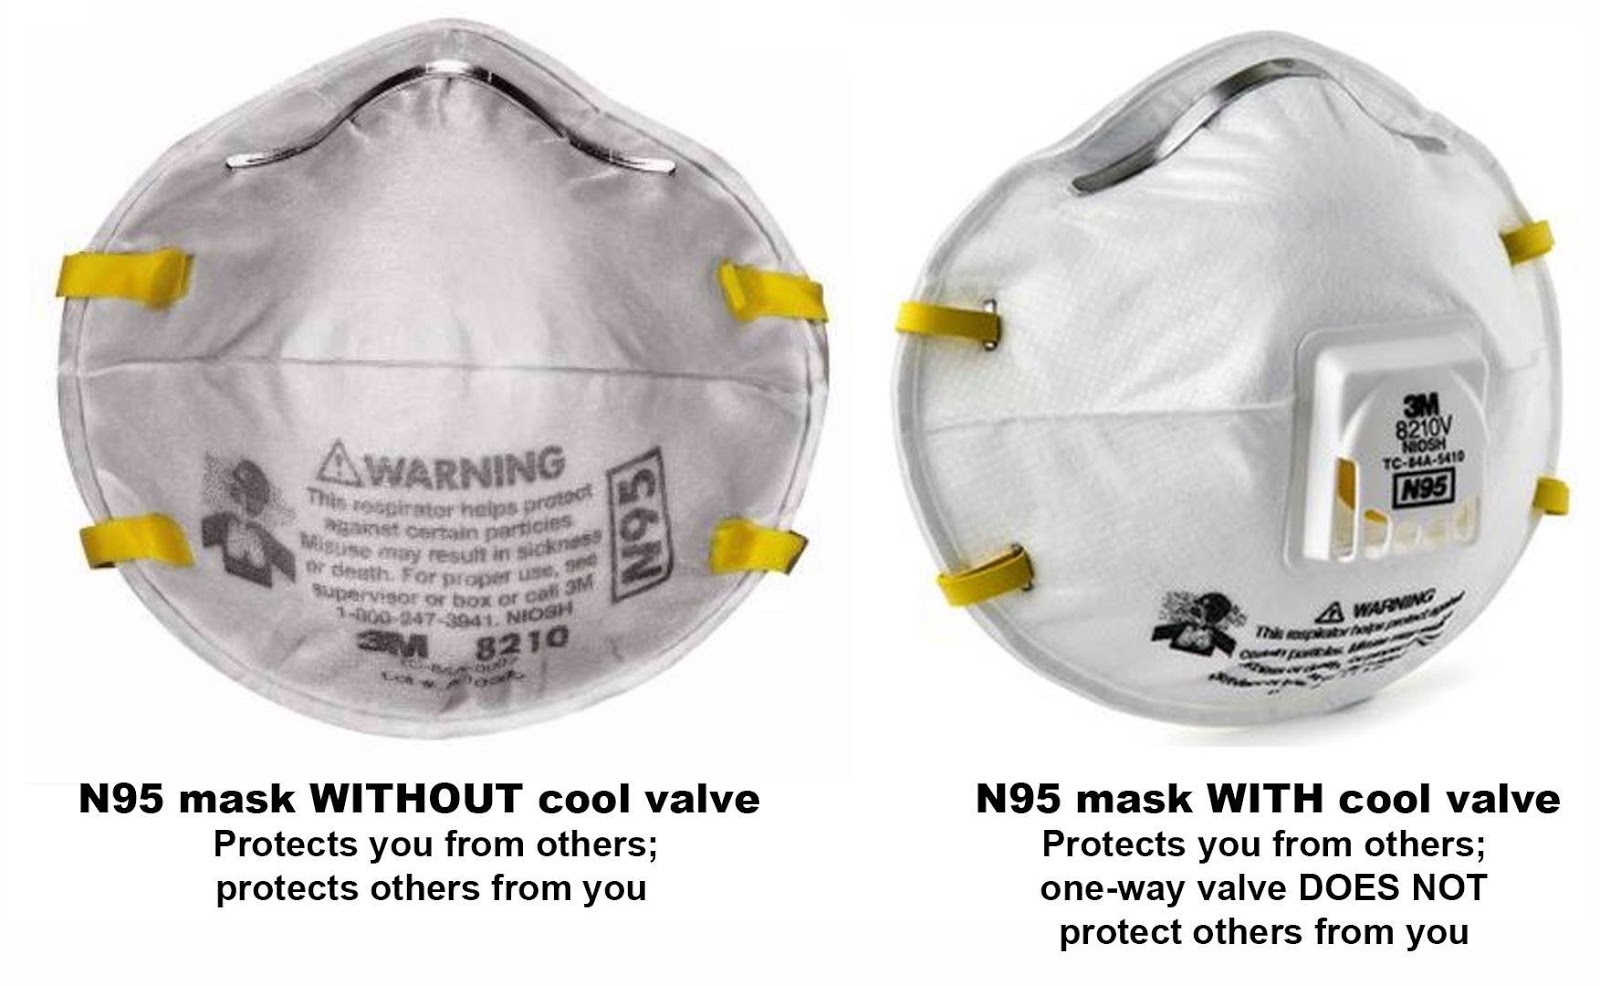
I haven't posted an article in a while because I've been spending a lot of time handling various impacts of COVID-19 on my "day job" research, but I wanted to surface briefly to mention an important point.  Many people have face masks in their emergency kits in case they need to deal with rubble and dust after a quake.  In places like California that have had major wildfires recently, even many people who don't prepare for quakes have N95 respirators left over from those smoke episodes, and many of those masks have a "cool valve" one-way vent that opens outward and makes breathing more comfortable.

It's important to realize that these masks protect the wearer from outside hazards (including germs from other people), but do not protect other people from the wearer.

Masks for fires and earthquakes aren't necessarily good for pandemics
Click image to get full sized version suitable for sharing
This is crucial because the point of wearing face coverings in public, which is becoming common guidance around the world, is not so much to protect you (they don't do a great job of that) but more to protect other people from you if you are infected but don't know it, and are producing large respiratory droplets full of virus.  Many people who have the virus don't have any symptoms and don't realize they have it, but can still be contagious, and this is now being estimated to account for a huge amount of community spread.

If you are exhaling virus, and you wear a mask with a one-way vent, then you are exhaling that virus unimpeded at anyone else who is nearby, and most of the point of wearing the mask is wasted.

(This is not a concern if a healthcare worker is wearing a mask to protect them from an infectious patient; then it's appropriate.)

So please, even if you feel fine and are wearing a mask out in public (and especially if you are wearing a mask because you are sick and want to prevent exposing other people in the home), do not use masks with one-way valves!  Please share the graphic that I put together.  Better to spread the word, than to spread the virus.

Back to article index

Link to this article Back to top

Moving for reasons other than seismic events: A diary of undoing quake precautions before moving out of a home
I have something shocking to tell you.  Today, August 25, 2017, I have absolutely no earthquake precautions in place whatsoever.  No, I have not simply cracked under the pressure; it’s because I have recently moved to a new home, and since the whole concept of moving one's possessions is the opposite of the concept of preventing one's possessions from moving, seismic bracing and other quake precautions need to be undone.

We spend all of our time discussing earthquake precautions in the context of implementing them (that is, bracing, fastening, arranging, etc.), and spend very little time talking about tearing it all apart!  So for a change of pace, I am keeping a mini-diary of my thoughts as I start undoing my earthquake precautions while preparing for the move.  You will read about it when completed after the move [10/21/17: haha, that’s an understatement…], but I am keeping track in real time.  The move will be August 4th; movers are packing me up on August 3rd, and I plan to have everything ready to go by the end of August 2.

Various dates in July:  As home inspections and buyers’ mortgage lender inspections have taken place, I have made sure to inform the inspectors and appraisers that the top row of cabinets are using push latches so they should not attempt to pull those doors open.  I have also mentioned that many objects are stuck down.

July 22:  I had friends over for dinner and I unstuck some of my good quality wine glasses that were protectively adhered in my cabinet using quake putty .  When I washed the glasses and put them back, I just placed them on the shelf without re-sticking them down.  Then I pulled the others up as well; now none of my wine glasses are stuck down and they are ready to be packed by the movers.

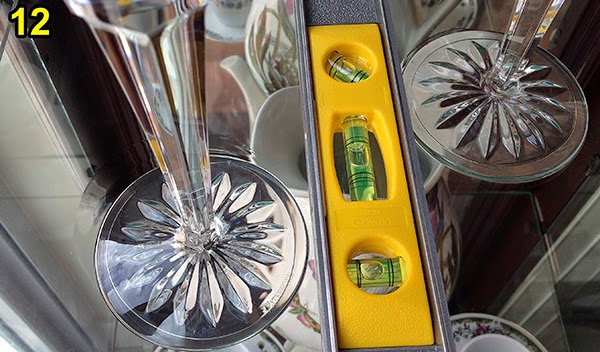
Moving for reasons other than seismic events: A diary of undoing quake precautions before moving out of a home July 25:  Starting to remove some small objects stuck to surfaces of minor furniture that I plan to discard.  Quake putty is coming off of things without much trouble, although there is usually a bit that doesn’t come off right away that I pull off by dabbing at it with the putty that I have already removed.  I am pulling off the clear objects stuck to clear glass shelves, including the Waterford crystal glasses that were featured in my article about quake gel and how objects will slowly slide over a period of months if the surface is not perfectly level, leaving a snail trail.  I’m happy to report that these objects were still securely stuck, with no snail trails, which means I ultimately leveled the shelves well!  I’ve pulled up one of the plant pots that had been stuck to the top of a cabinet with putty .

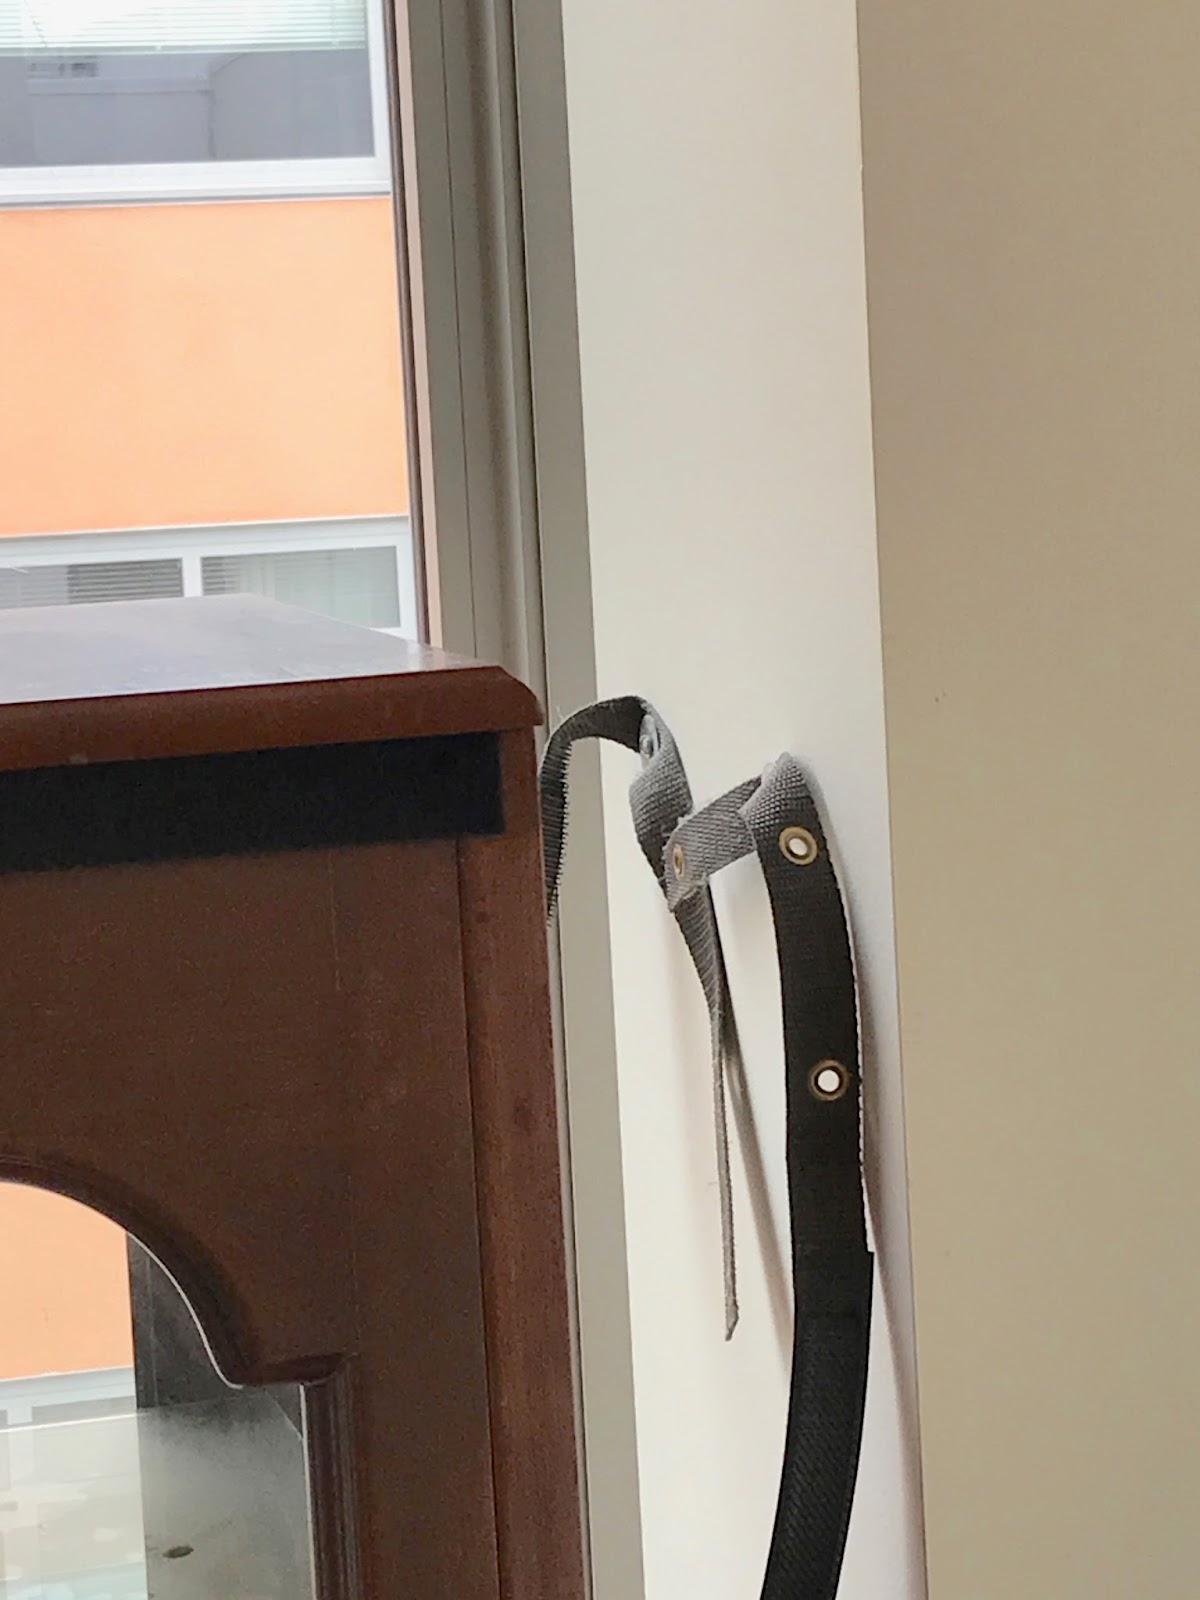
So now, we are entering a period in which more and more objects are NOT braced, and one hopes an earthquake does not choose this next week to hit.  I won’t be unfastening things until I have to, so most furniture and objects are still braced/stuck, but the items I’ve freed up today for discarding/donating/giving tomorrow are sitting freely, including one tall display case and one glass/iron small tall end table that were strapped to the wall.

Well this is distressing.  A large crystal vase that has been stuck with quake putty to the top of a speaker for years came right off as if there was no putty there.  I know it used to be stuck because I tried lifting it once and the speaker came up with the vase.  Hmm, I guess it is worthwhile checking these things every few years!  (It’s worth noting that this crystal vase was not flat on the bottom but was faceted; inherently weaker for putty even if the gaps are filled.  Objects with flat bottoms were sometimes extremely hard to detach.)

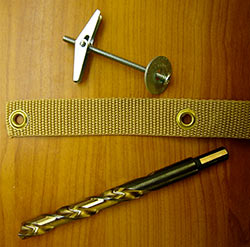
July 26:  Taking out the first bolts from the wall where I’ve removed the first furniture to give away.  Because this is a metal frame home, I didn’t make small holes in the drywall for bolts to screw into wood studs; I made BIG holes in the drywall and in the metal studs so that toggle bolts could fit through them (1/2 inch and larger; see my earlier article about anchoring to wood and metal wall studs).  There were a couple of places where there were no handy studs, so since it is insufficient to bolt directly into drywall, I used toggle bolts behind the drywall in those spaces, so between the toggle bolts in the metal studs and those in the drywall, I have a lot of large holes to fill!  Remember that with such large holes, spackle can still fill them but it is helpful to blow out all dust from the hole, push in the rim of the hole with a blunt object like the handle of a butter knife to prevent the paper in the drywall from sticking out, and pack a thick layer of spackle into the hole but intentionally push it in too far so that it will harden as a backing; then fill in a second layer over the hardened first plug and smooth that even with the wall using a putty knife, to avoid any shrinkage of the otherwise flat surface.  Alternatively, there are drywall repair tapes and meshes that can be used to give more support to the spackle, as well as other kinds of fillers; I won’t digress into that here.  (Oops, guess I kind of already did.)
Moving for reasons other than seismic events: A diary of undoing quake precautions before moving out of a home
July 28:  Been staring for a few days at the tall display case, which it turns out I will give away next week, so it is sitting there totally unbraced with its straps hanging out unfettered.  Such tempting of fate; I am a WILD man!

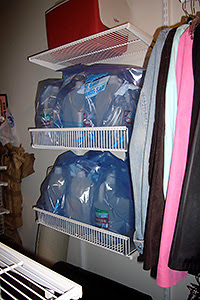
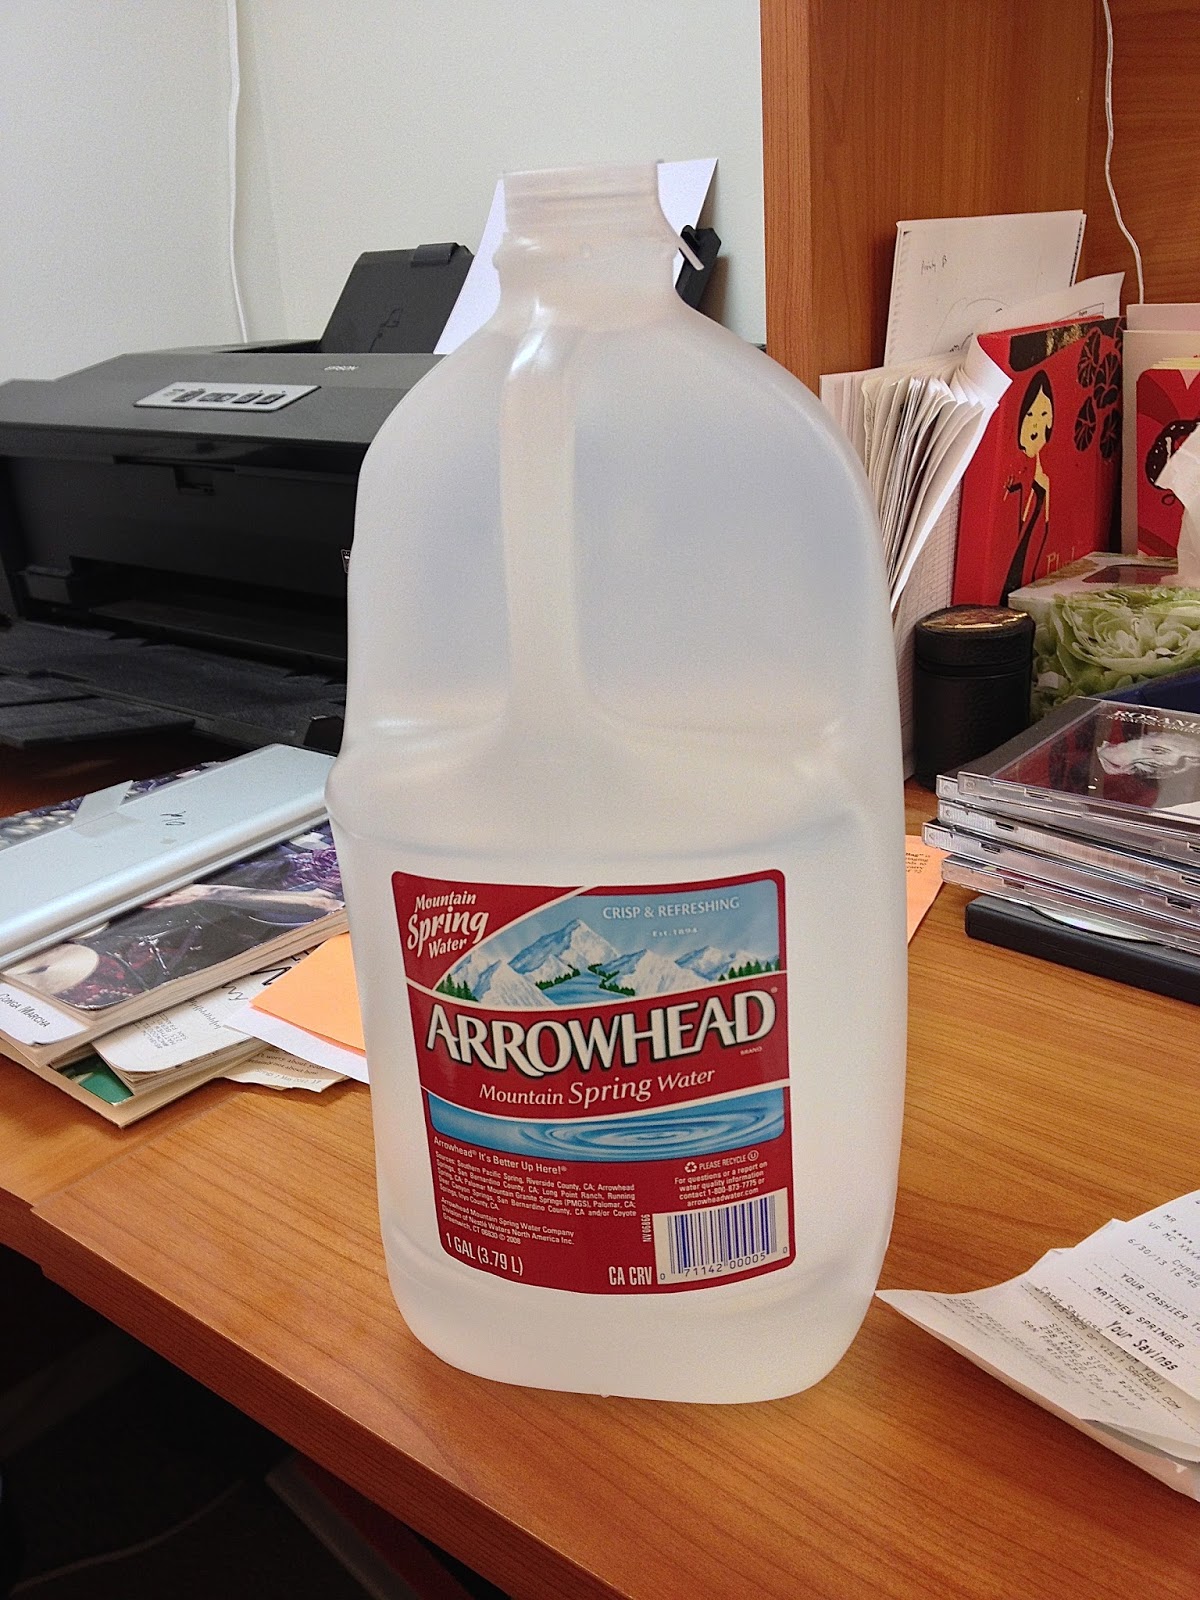
I think I will not have the movers move my 12 gallons of bottled water because there is already a bunch of water at the place to which I’m moving.  I just opened one of these bottles, with a use-by date of 2011.  Remember the FDA said you can ignore that date and keep these unopened commercially bottled jugs indefinitely, but I figured this was a good opportunity to see what it tastes like.  I opened it, poured a little into a glass and prepared myself for an off taste that should mostly go away after I have had a chance to shake up the water and aerate it, but actually, the water tasted fine!   I have updated my article about the water use-by dates to include this 6-year experimental result.

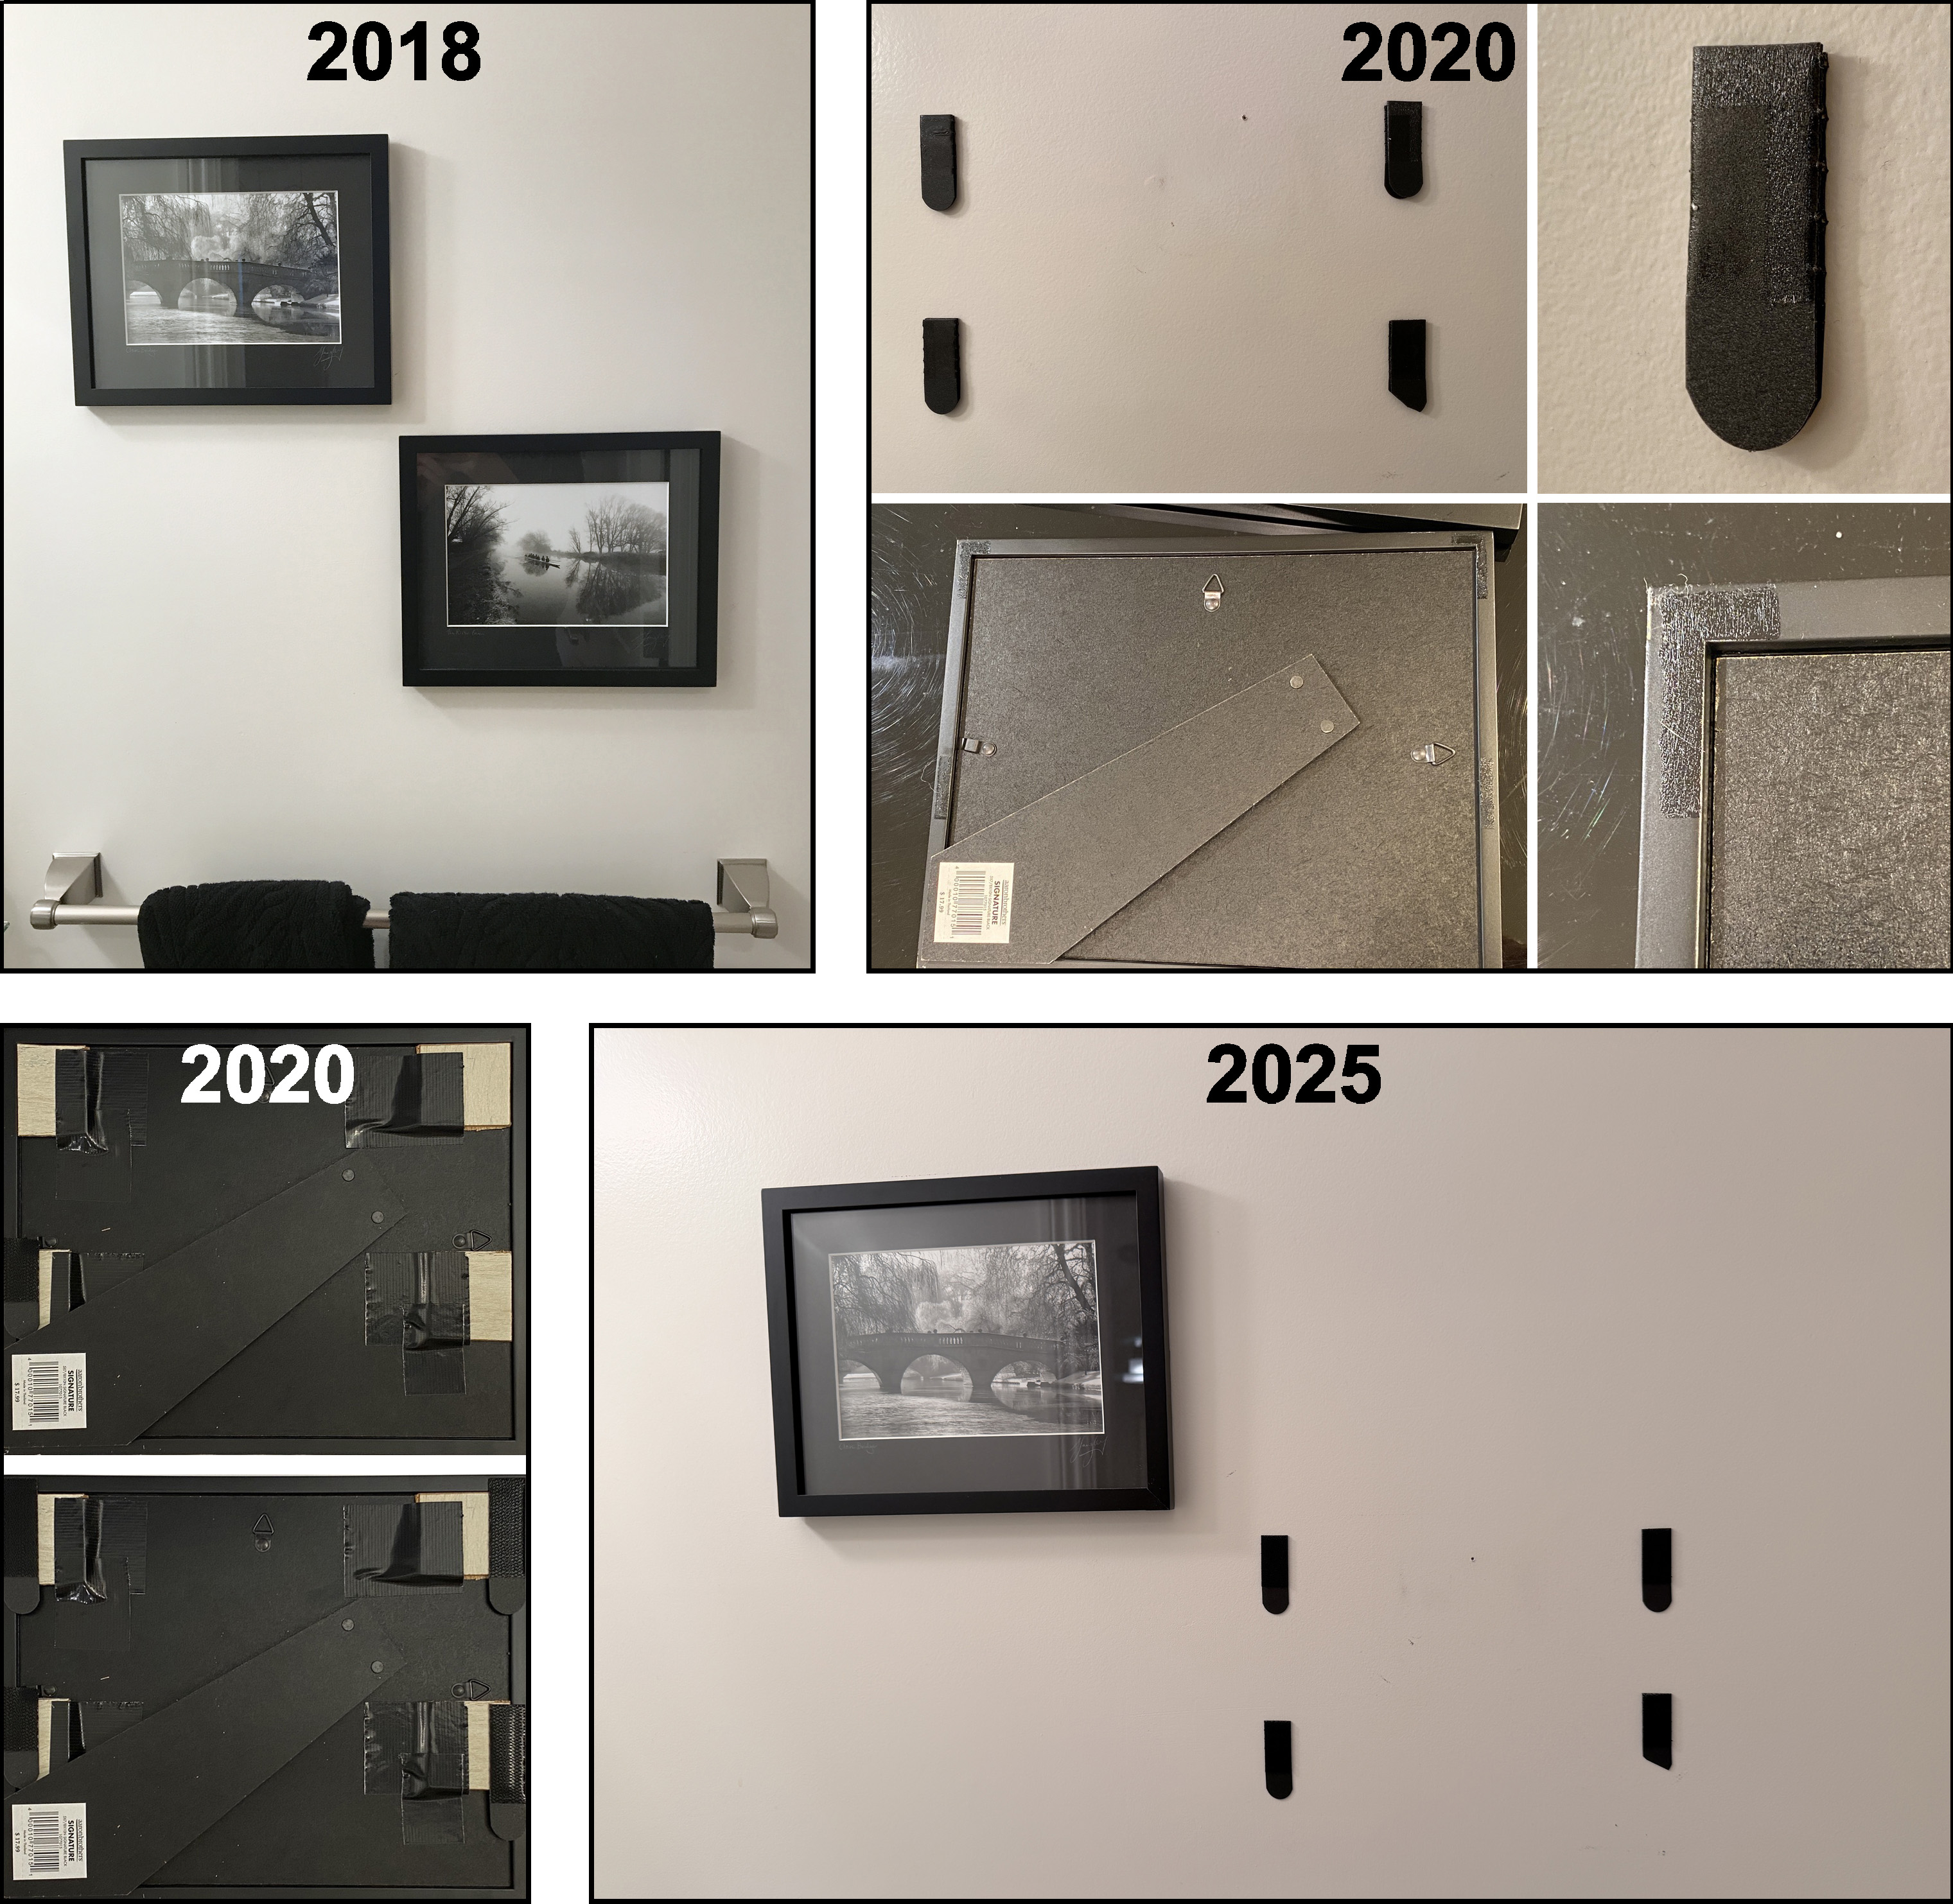
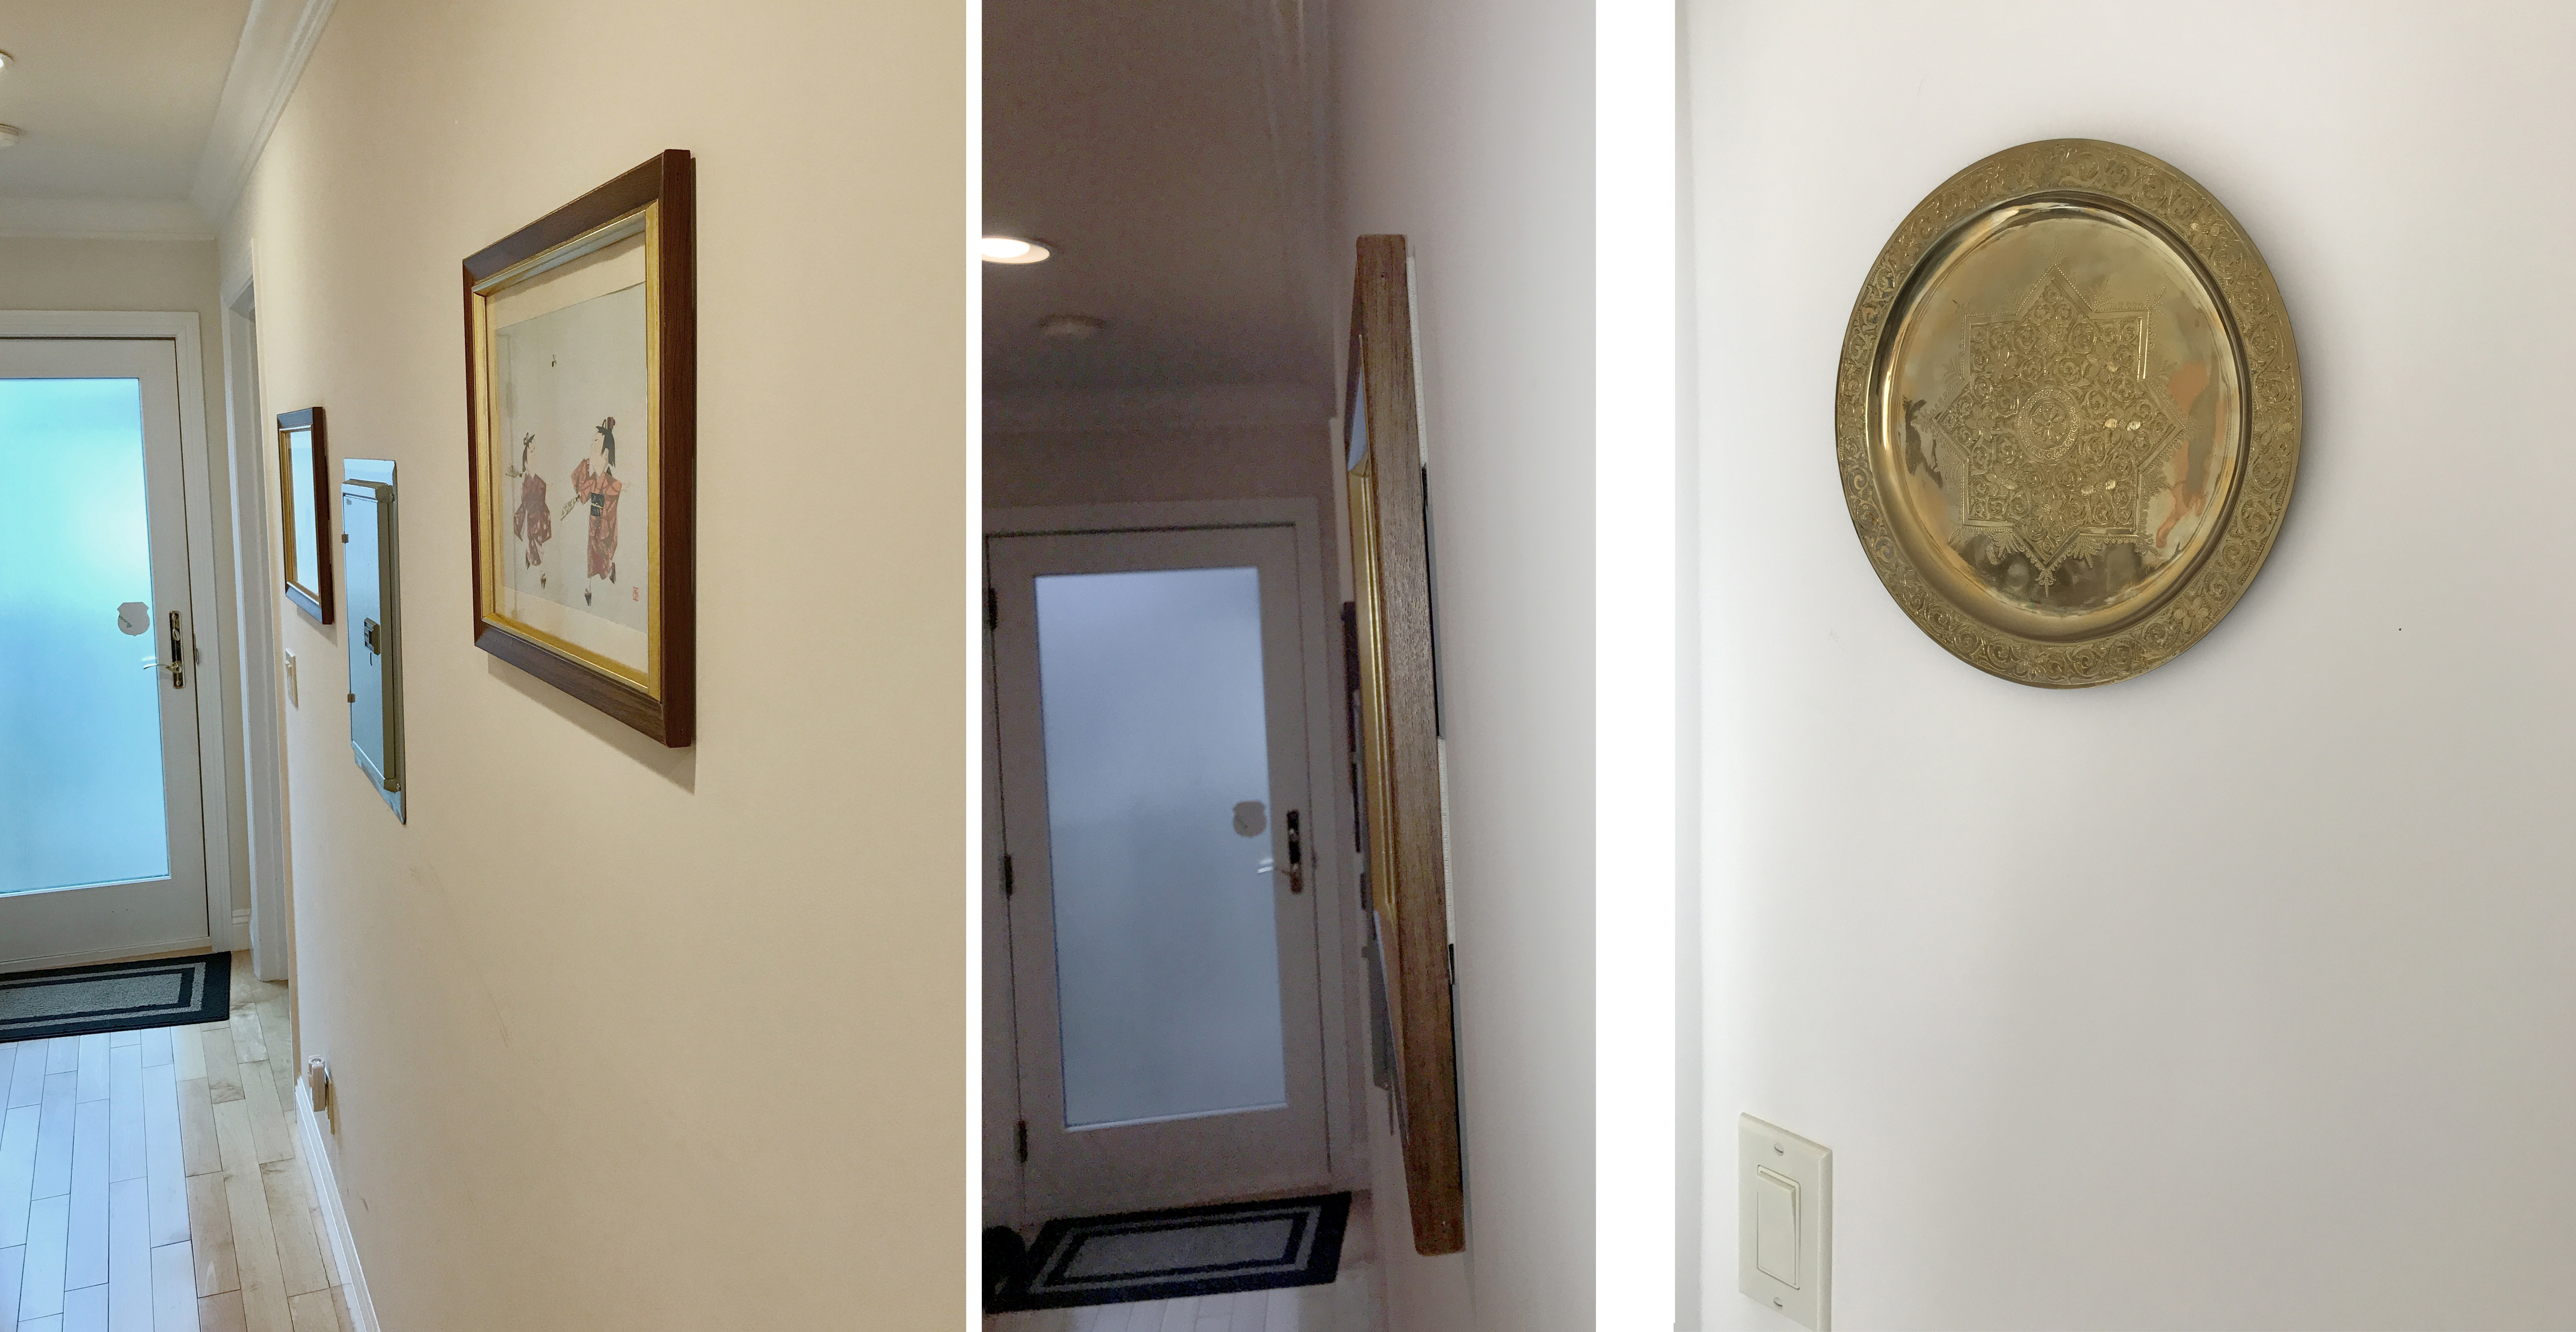
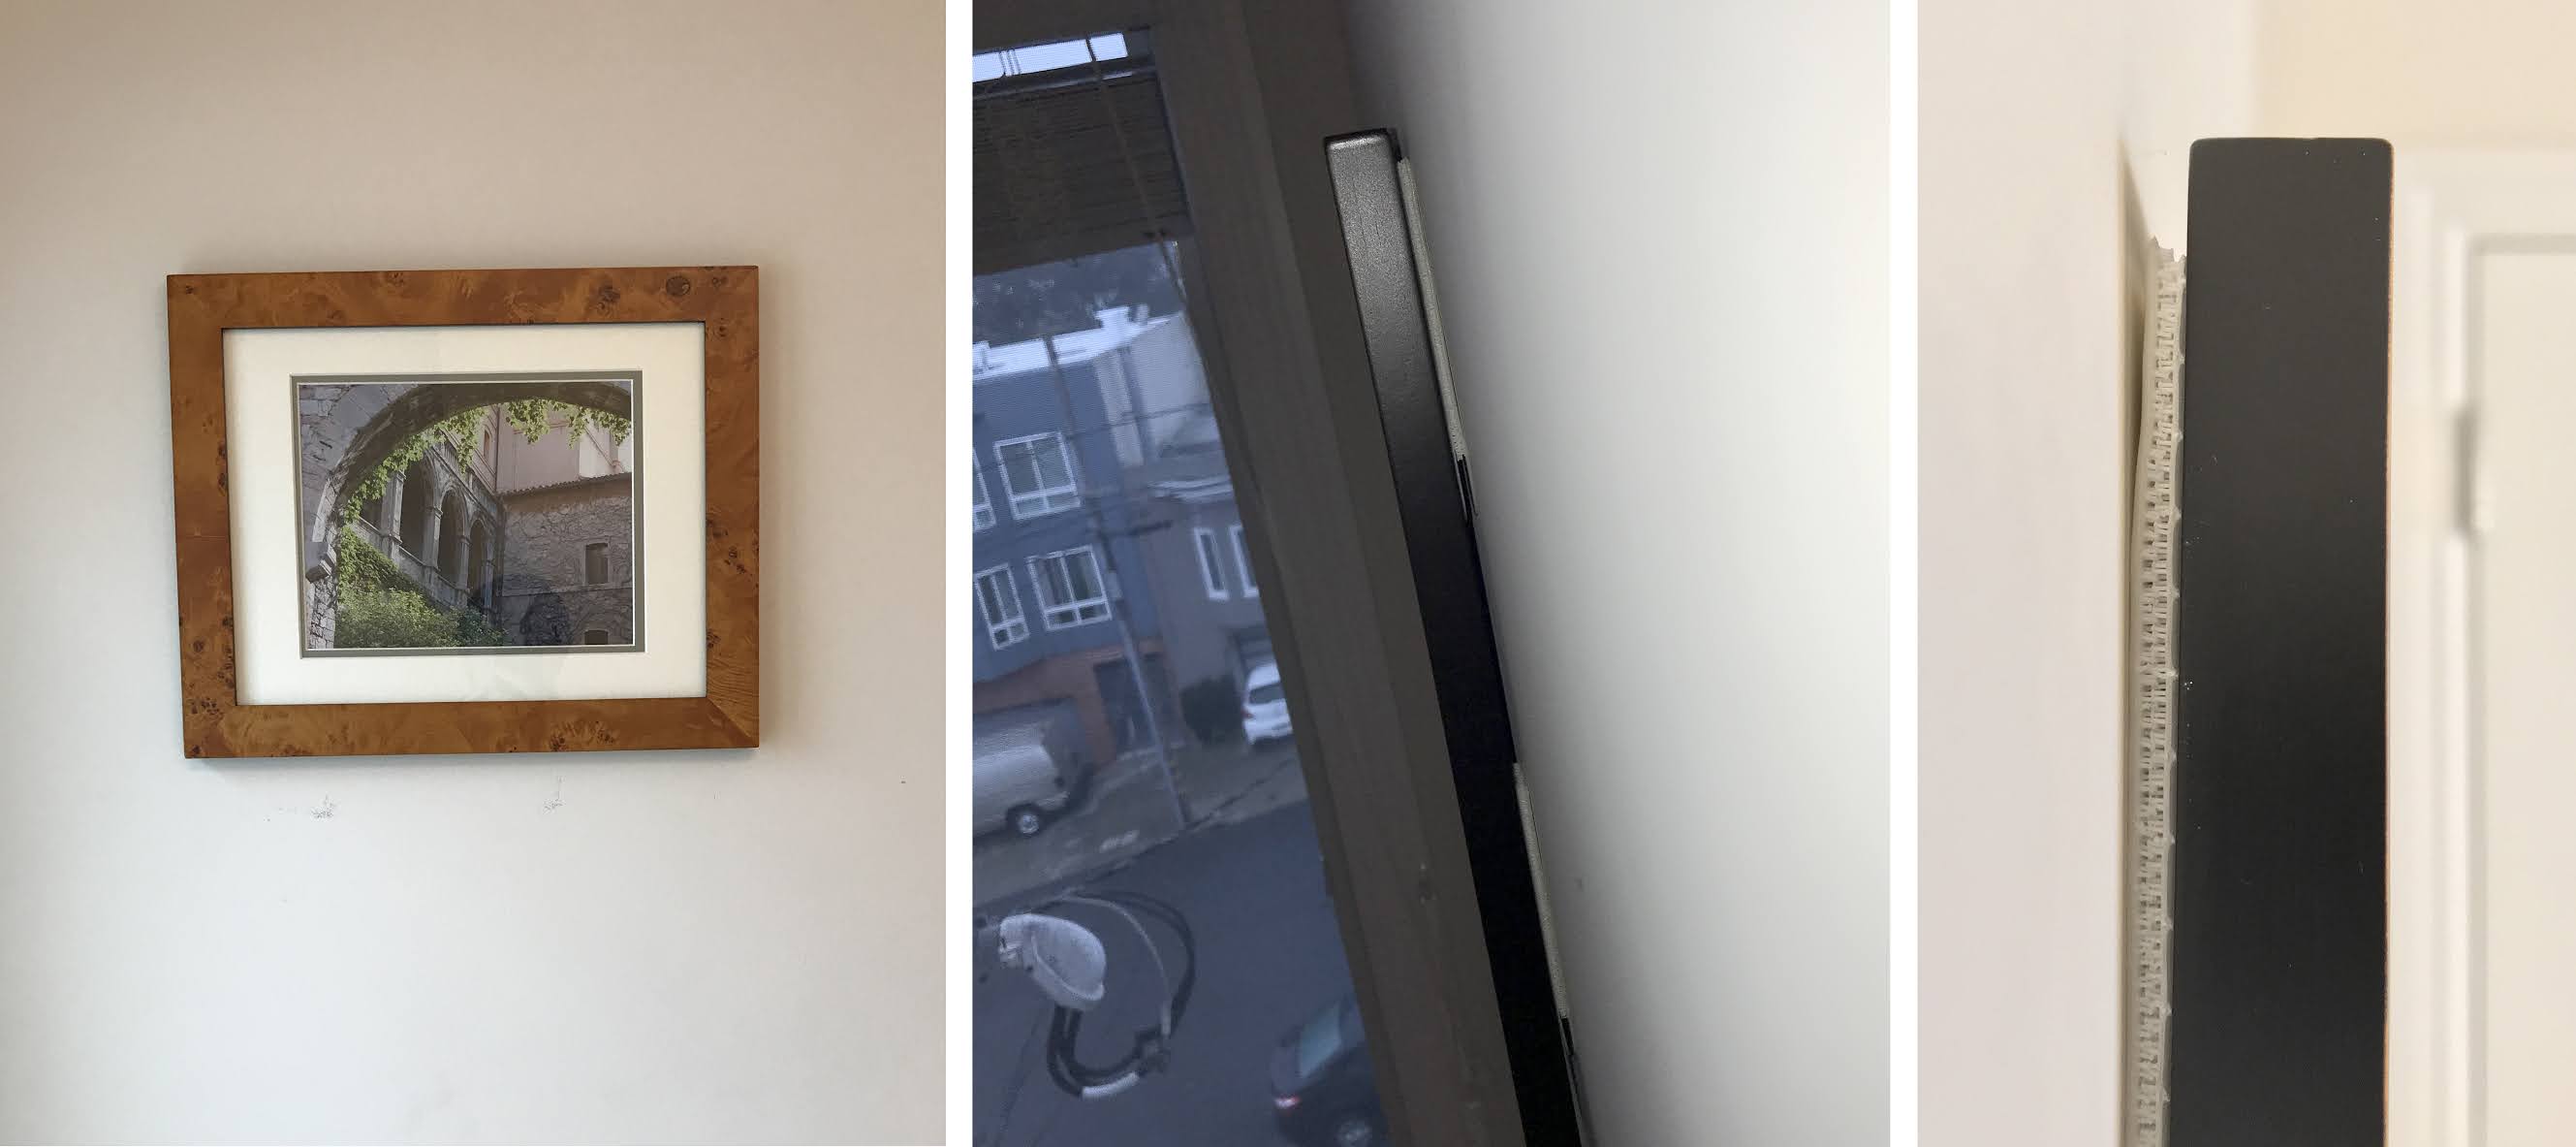
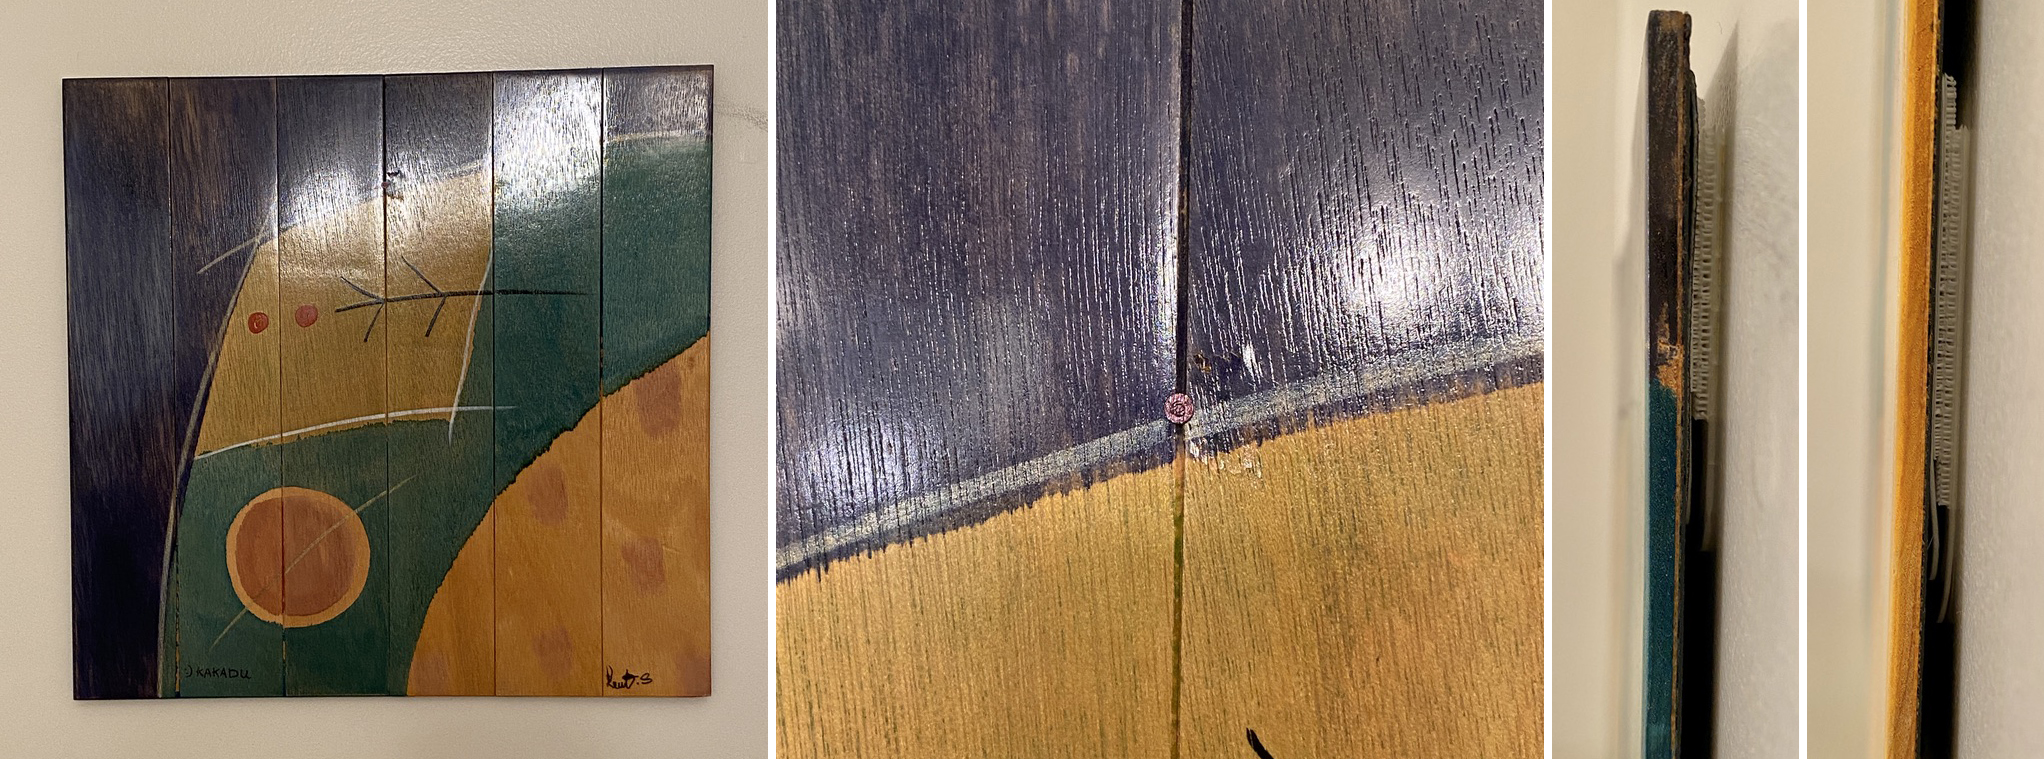
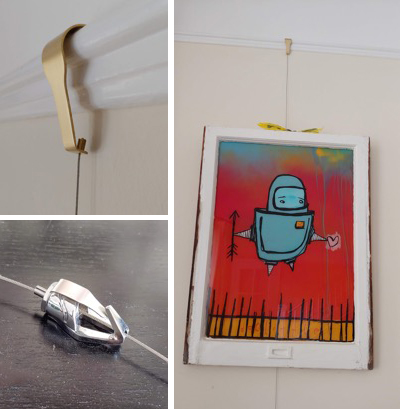
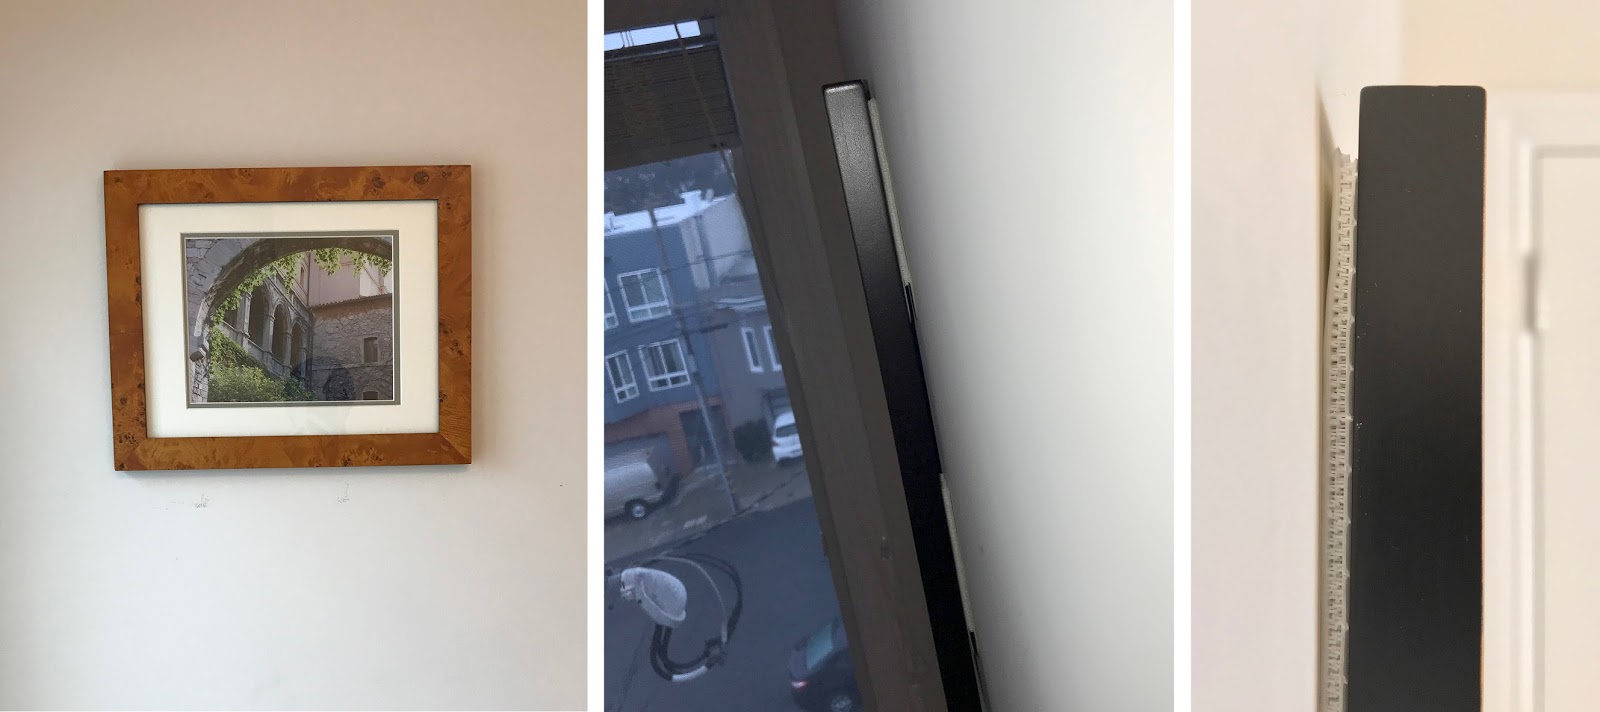
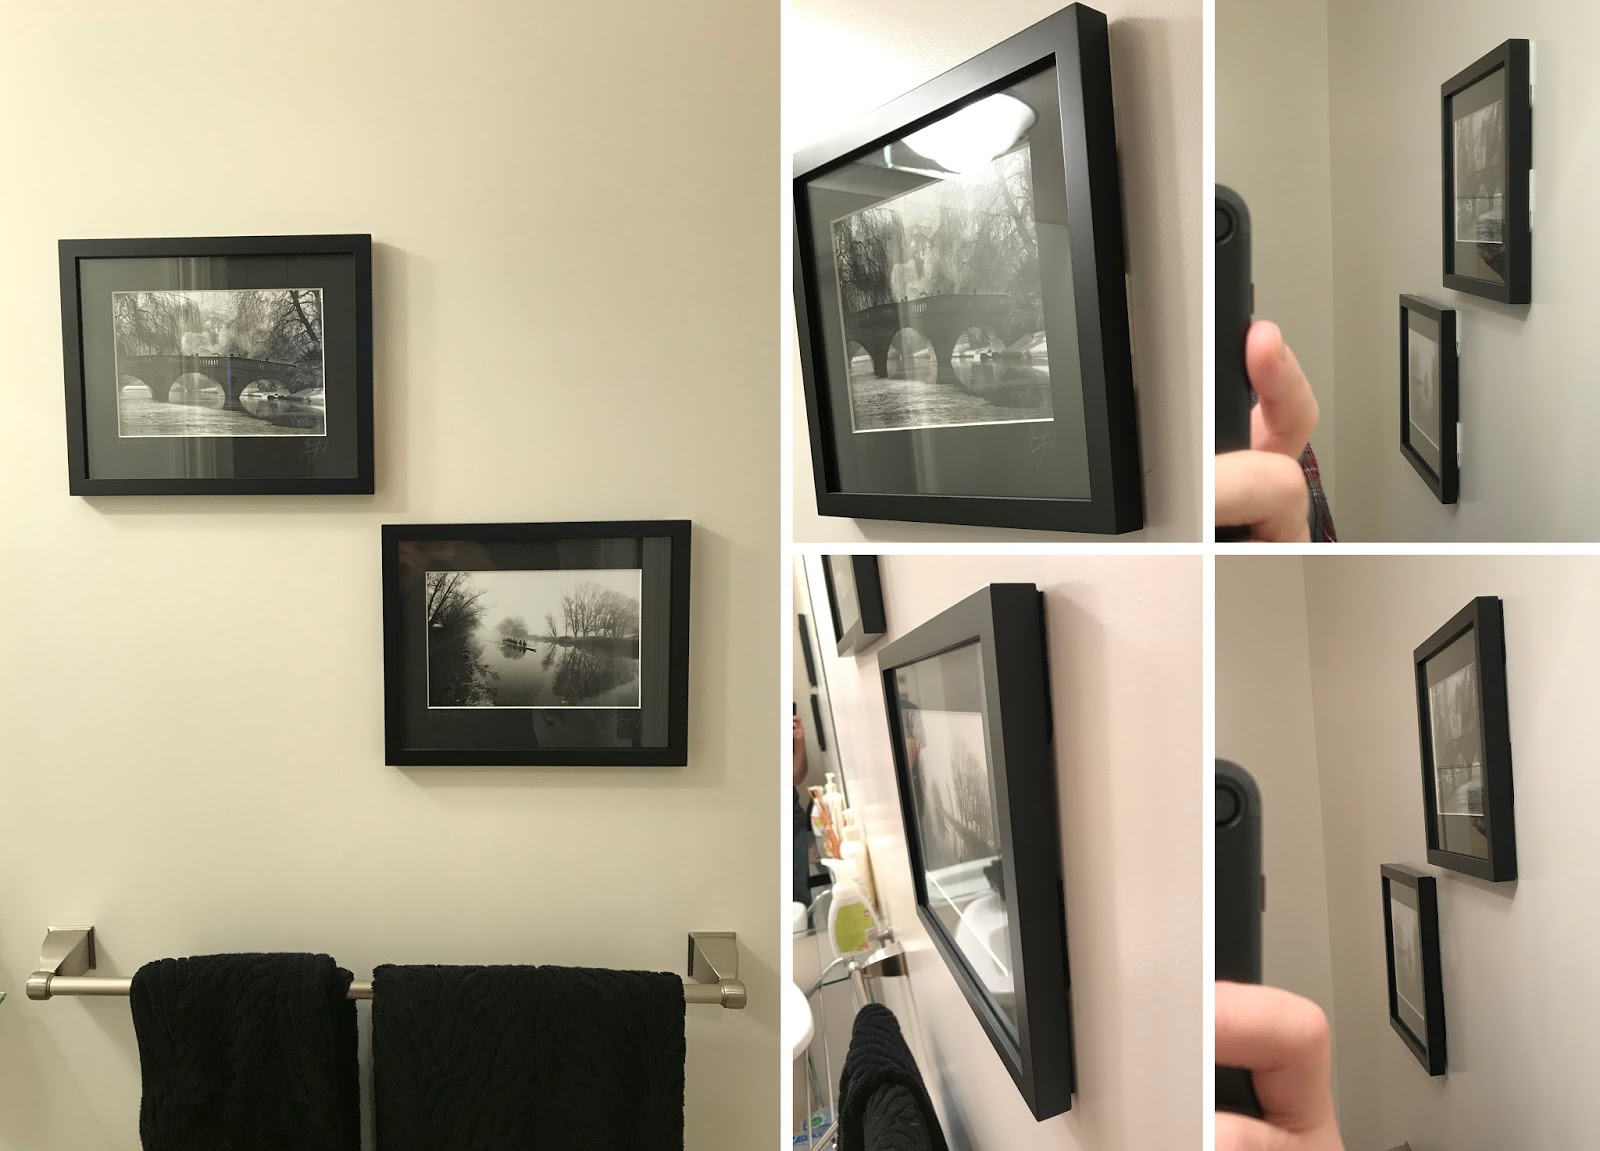
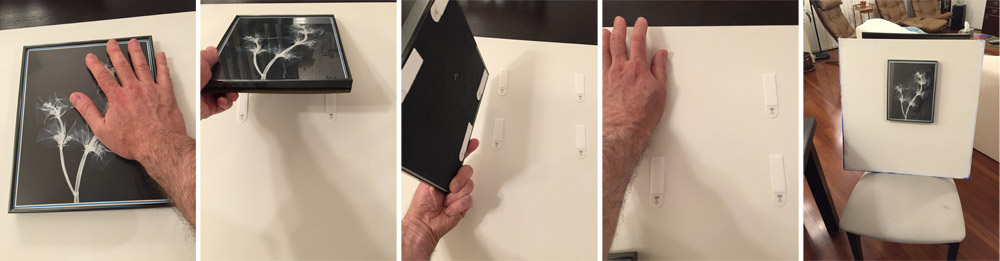
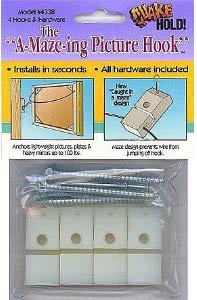
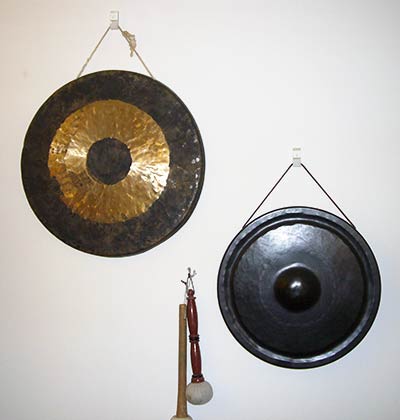
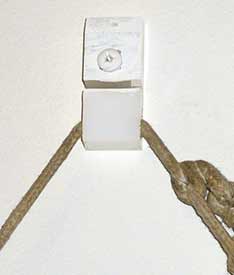
July 29:  I’ve started taking pictures off of the walls; mostly those that have been on the walls for 8 years and are on picture wires hanging from maze picture hooks , with small dabs of quake putty under their lower corners to make keep them straight, and to push the bottom out a bit so that the relatively thick maze hook (a little plastic brick) doesn’t cause the top to be too tilted forward.  When removing quake putty, little bits can remain behind, but these can be picked up by dabbing at them with the remaining quake putty.  This typically works well but I can see that when the putty has been in place for years, it’s a bit harder to get the remaining bits off of the wall.  I succeeded and found that if I dabbed with the rest of the putty and then pulled away rapidly and to the side, it was more efficient at removing the remaining bits.  Still, there is indeed a slightly shinier area on the flat paint where the putty was.   I have already written previously that cutting small pieces of a modern self-sticking polymer pad like “ Gripeez ” (I have no financial interest in this product) and placing them under the bottom corners instead of putty works well; it does not leave the shiny spot on the flat paint that putty leaves.

[update (3/12/18): regarding the use of Gripeez to stabilize the bottom corners of pictures hanging on hooks, as mentioned above, some unexpected home repairs involving water damage have made me need to temporarily remove some of the framed pictures that I hung with maze hooks a few months ago, and I have found to my annoyance that the little squares of Gripeez that I had cut out and placed under the corners left the paint slightly shadowed, as if it was a little wet.  I was annoyed to see this because the whole point of using these things instead of quake putty was to avoid shiny marks on flat paint, so seeing these shaded areas isn't much better.  In my old home, which had a similar paint job, the Gripeez left the paint absolutely unaffected, so I guess different paints react differently.  I did notice that they are extremely sticky though, so very small squares should still be effective and might leave less noticeable marks.]

July 31:  I’ve been giving away furniture that isn’t getting moved, sold, or donated, and patching holes as I go.  I’m also dumping out the rest of that >6-year old water, again not because it’s not good anymore, but because I just don’t want the movers moving a bunch of water.  It’s worth noting that I’ve had 12 of those commercial gallon jugs of water, on shelves so not pressing down on each other, and individually bagged in large Ziploc bags; and none of them appear to have leaked.  There’s no condensation inside any of the outer bags.  I did manage to drop one of them, and the jug ruptured and water poured out…into the outer bag, which held.  My klutziness enabled me to confirm that having that outer bag is a really good idea, especially if these things might get clobbered in a Murphy’s Law earthquake.

Moving for reasons other than seismic events: A diary of undoing quake precautions before moving out of a home
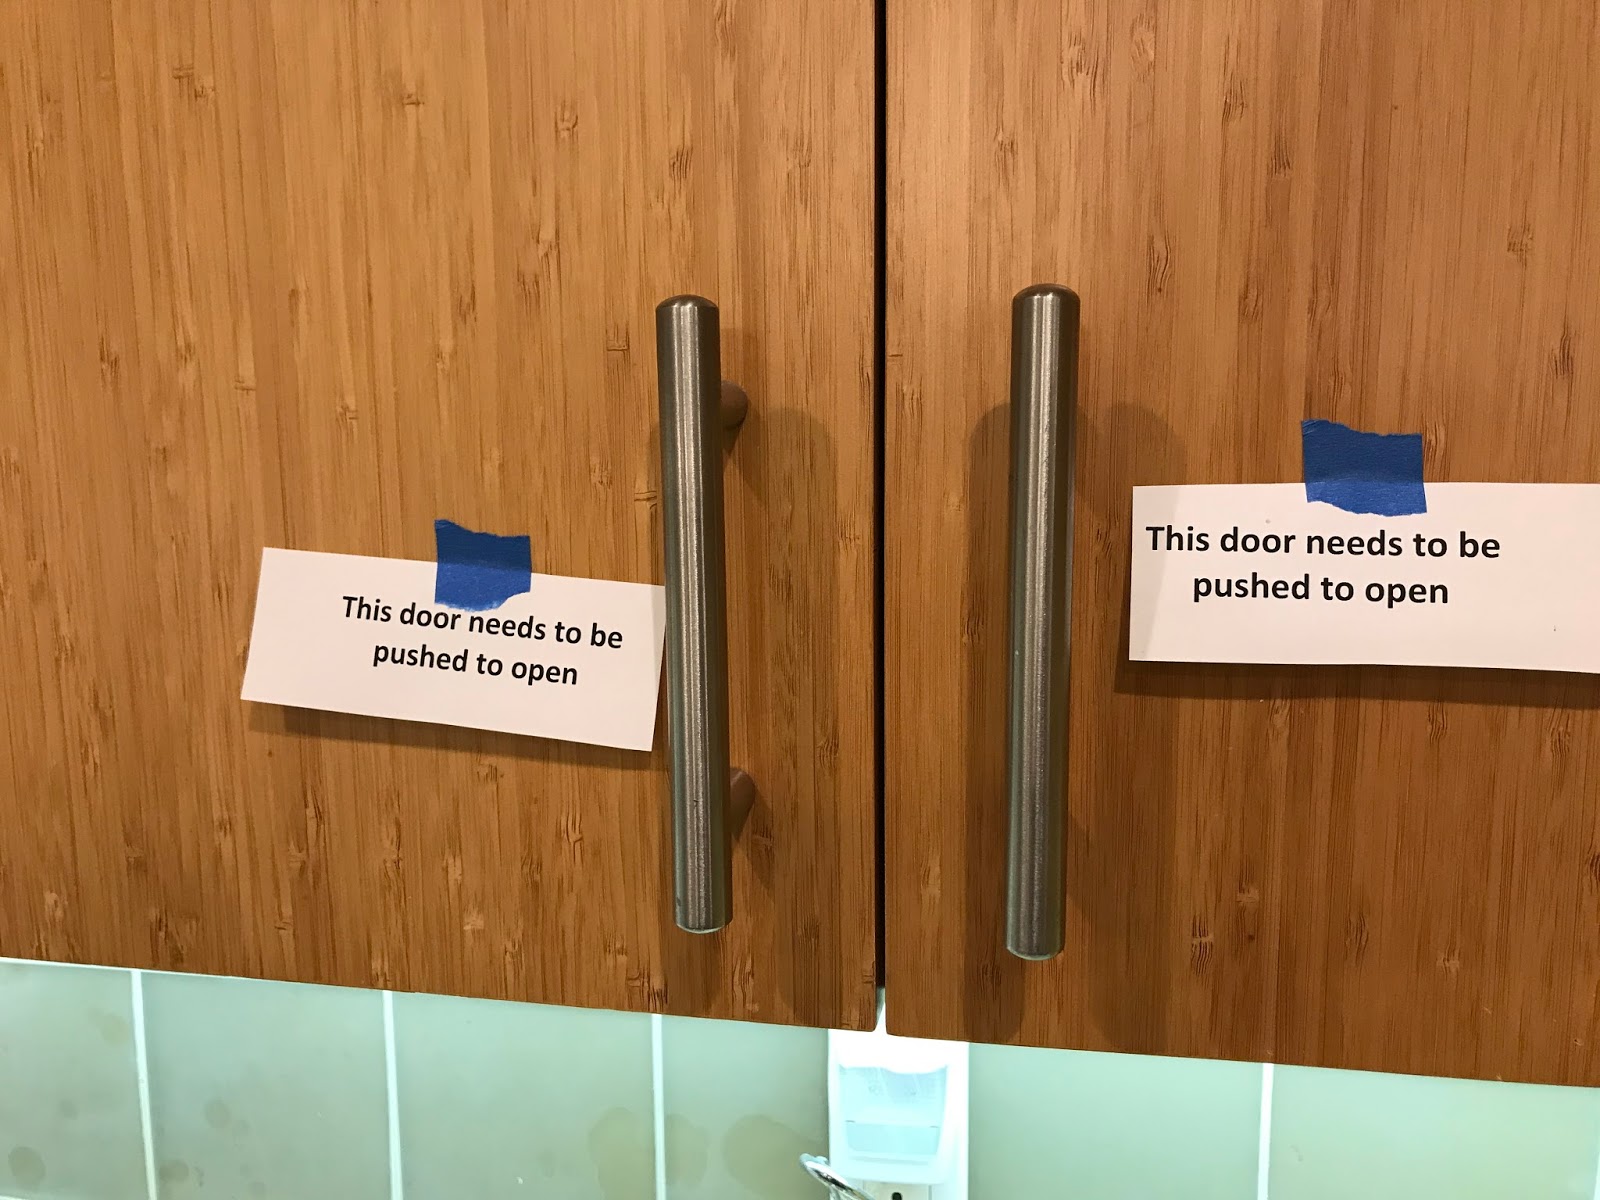
August 2:  The movers are coming to pack up my stuff tomorrow, which means I have to have things unfastened today.  I’m putting labels on the push-latch doors to warn the movers , since I convinced the buyers to leave them in place, at least initially, so I did not have to remove them all.  My knife blocks are on double sided Velcro squares, adhered directly to the granite countertop.  The adhesive squares come up from the counter without leaving a mark, although it is taking a while to slowly pull them off.  Pliers help quite a bit, with a rocking side-to-side motion.  Unfortunately, the bottom adhesive squares can’t be reused, so even though the top adhesive squares are still attached to the bottoms of the knife blocks and the Velcro hook middle piece is intact, I’ll have to get new ones or at least find a replacement for the bottom piece that is as strong as the one that comes with this product.  [I ended up just ordering new sets for the use in the new kitchen.]

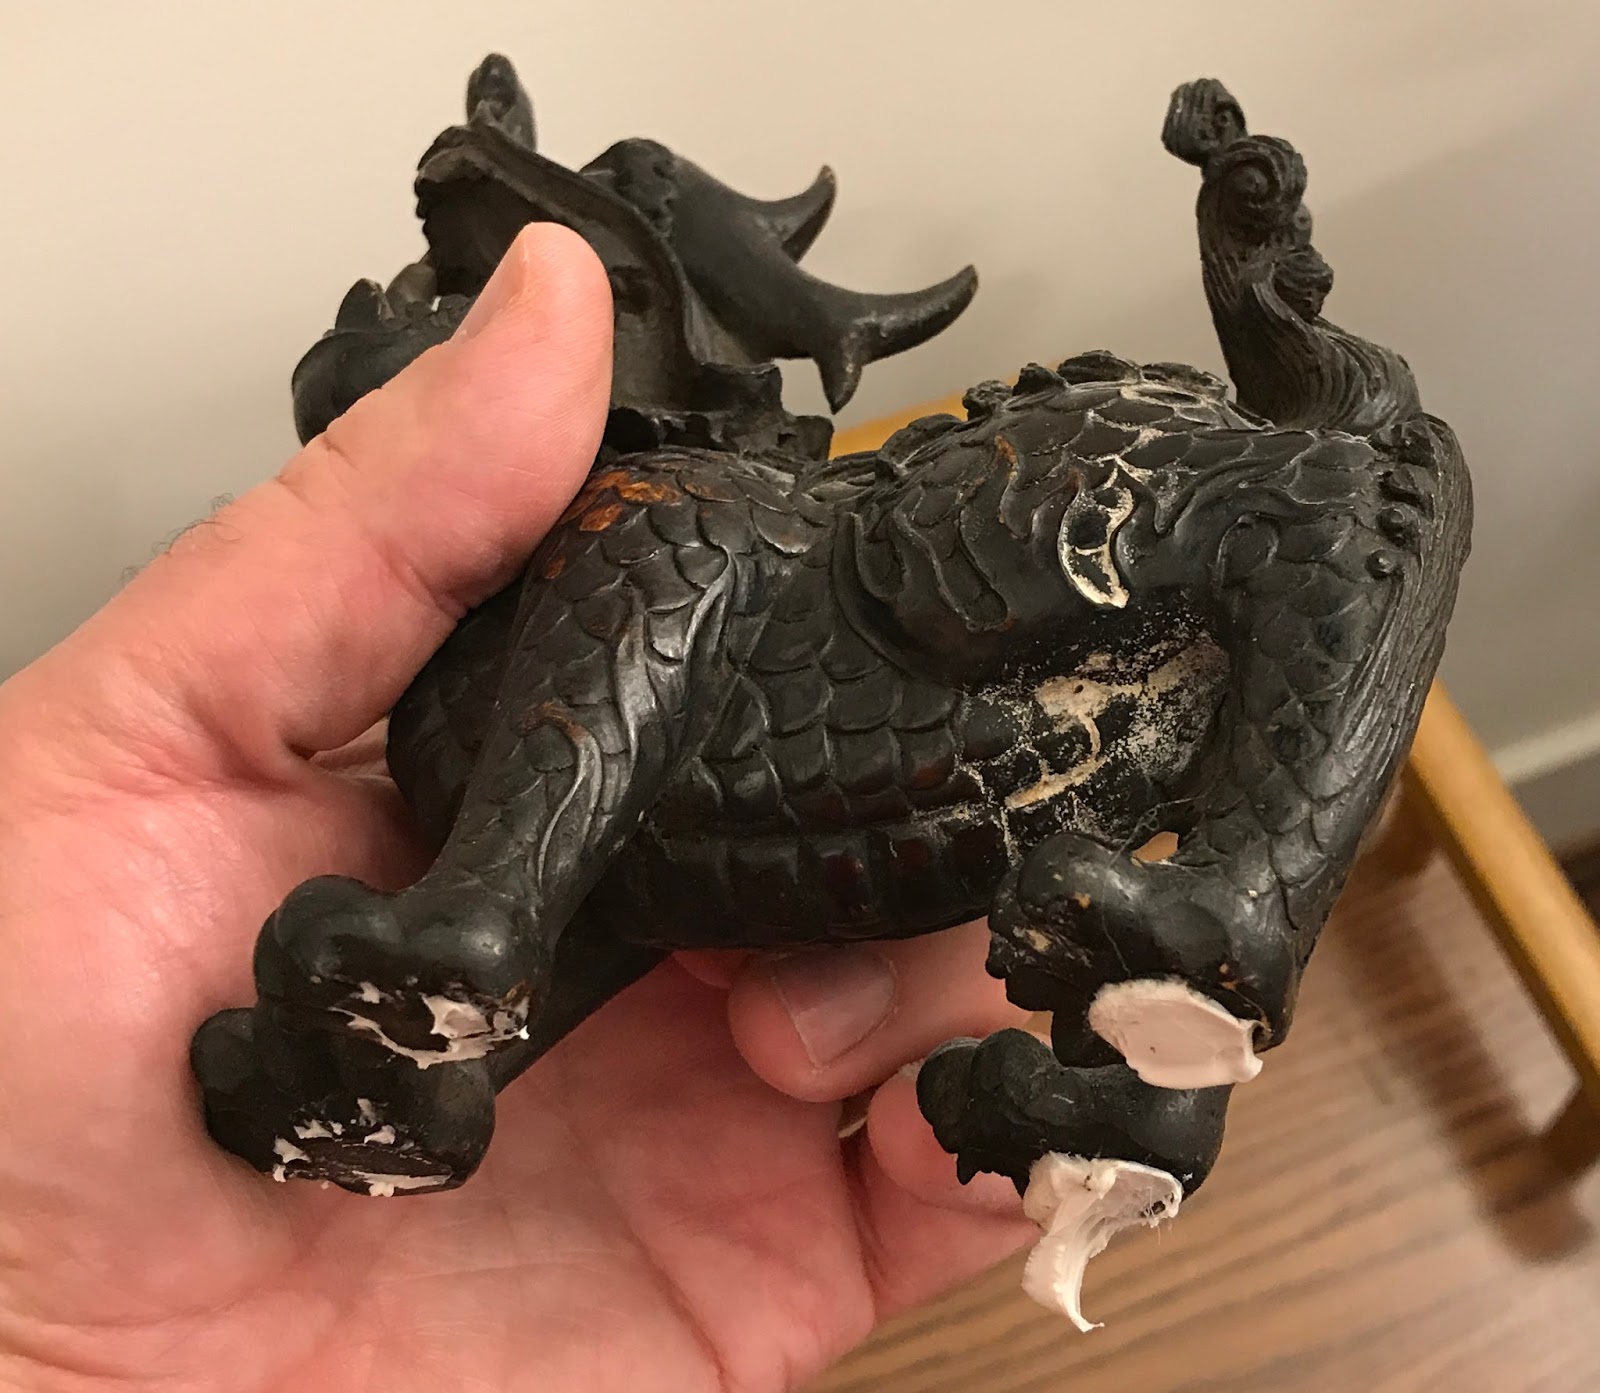
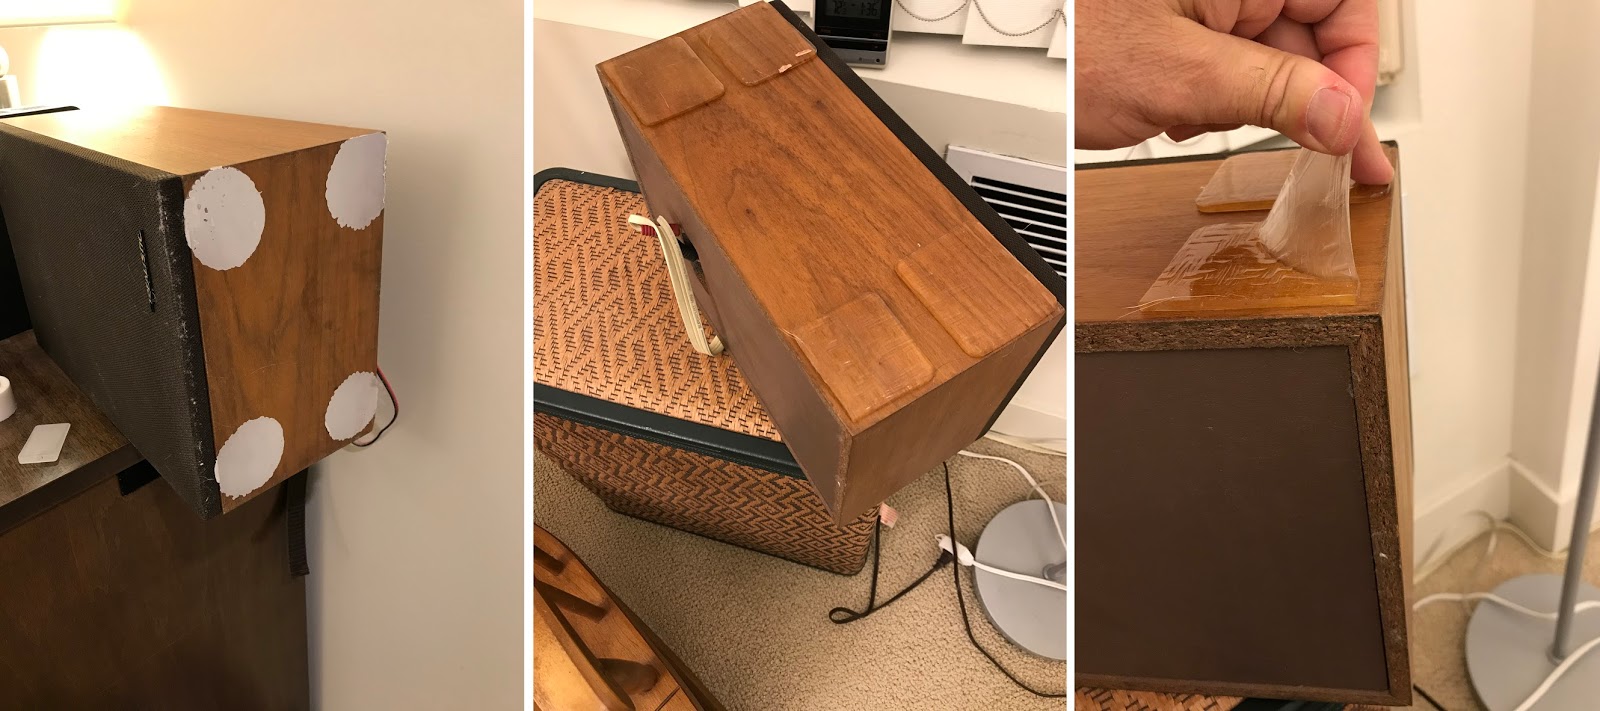
I just took one of my bedroom stereo speakers off of the dresser, repeating the angst-filled experience I’ve had in several previous moves because I stuck it down with quake putty, and over the years, the putty has spread and flattened to make a freakishly strong attachment; but I ultimately manage to pry it off each time without leaving a mark.  Wow, I forgot I tried an experiment with the other speaker 2 years ago when I put it on a wicker hamper and figure that quake putty would not be removed well since it would work its way in between the wicker “twigs” so instead I stuck it down with four “Gripeez” (see above).  It worked excellently.  The speaker did not come off too easily (so the attachment was good) but I was able to kind of peel the speaker off of the wicker surface without too much trouble, and the Gripeez came off of the speaker nicely with a bit of pulling and stretching.
Moving for reasons other than seismic events: A diary of undoing quake precautions before moving out of a home
Speaker that was stuck to a hard surface with putty (left) and another speaker that was stuck successfully to the wicker hamper with Gripeez (center, right)

Moving for reasons other than seismic events: A diary of undoing quake precautions before moving out of a home
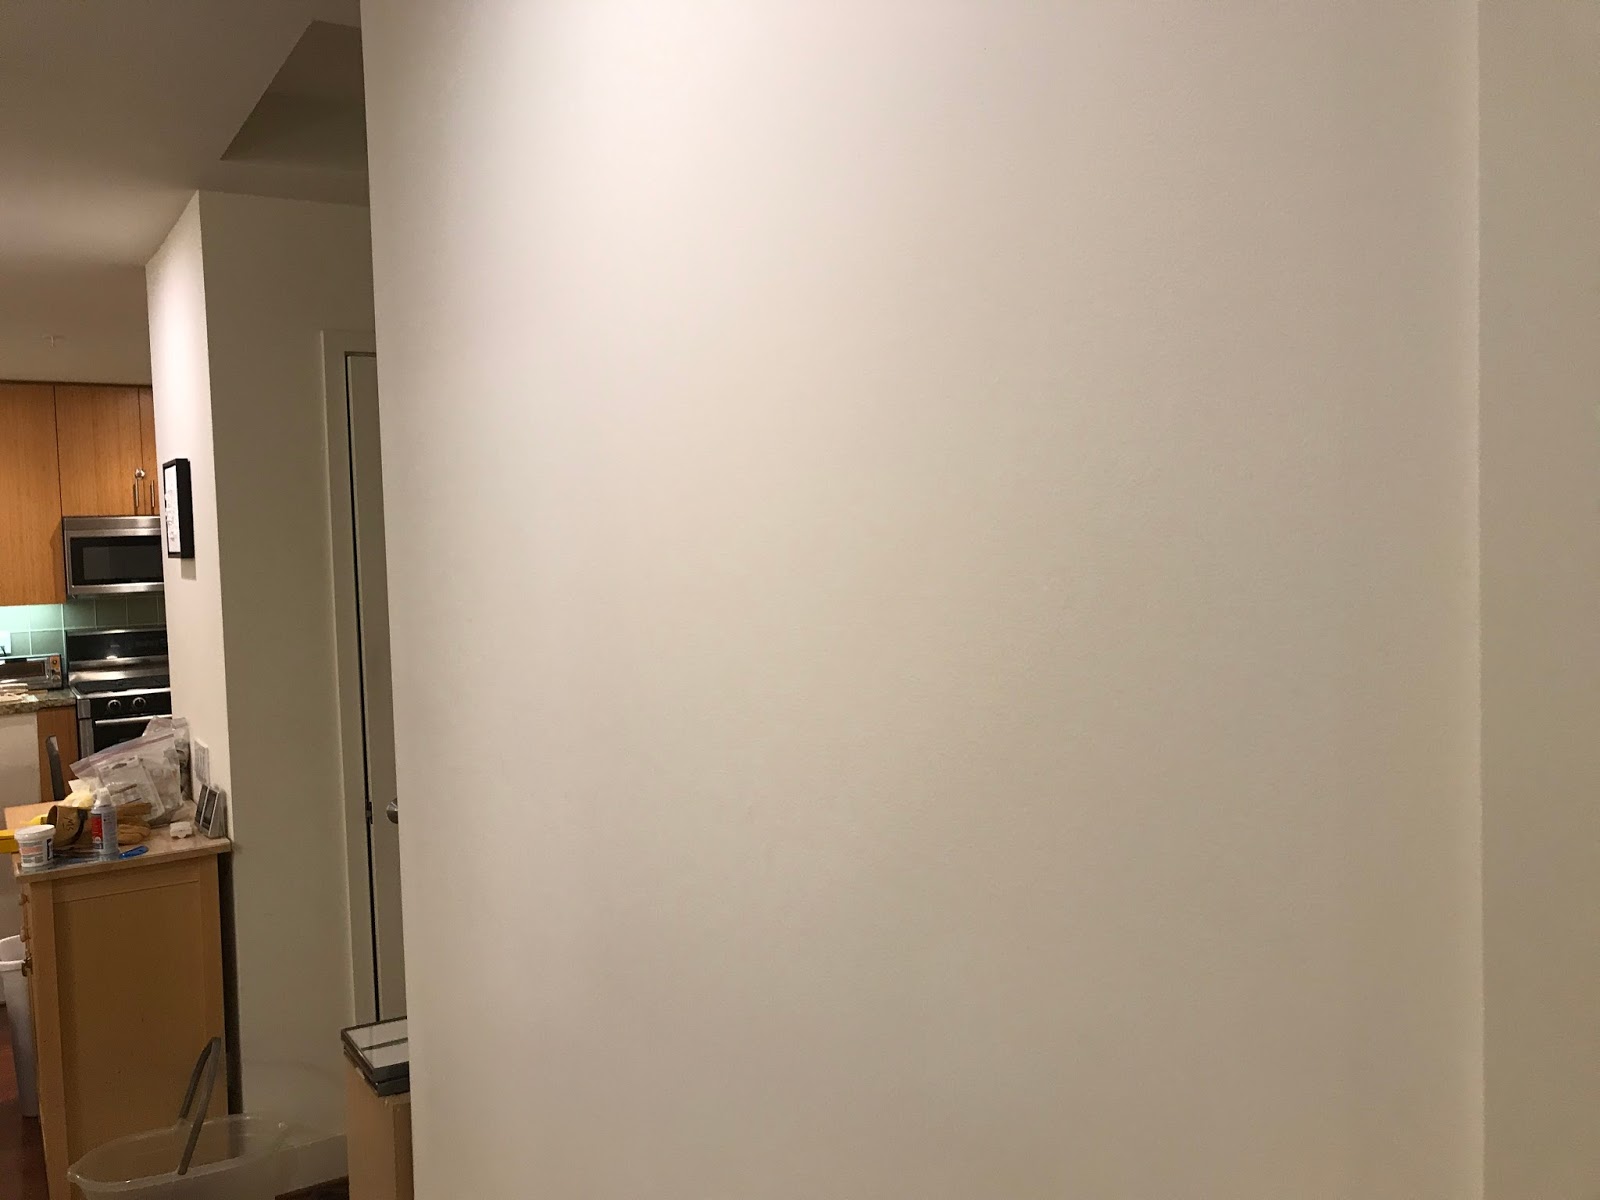
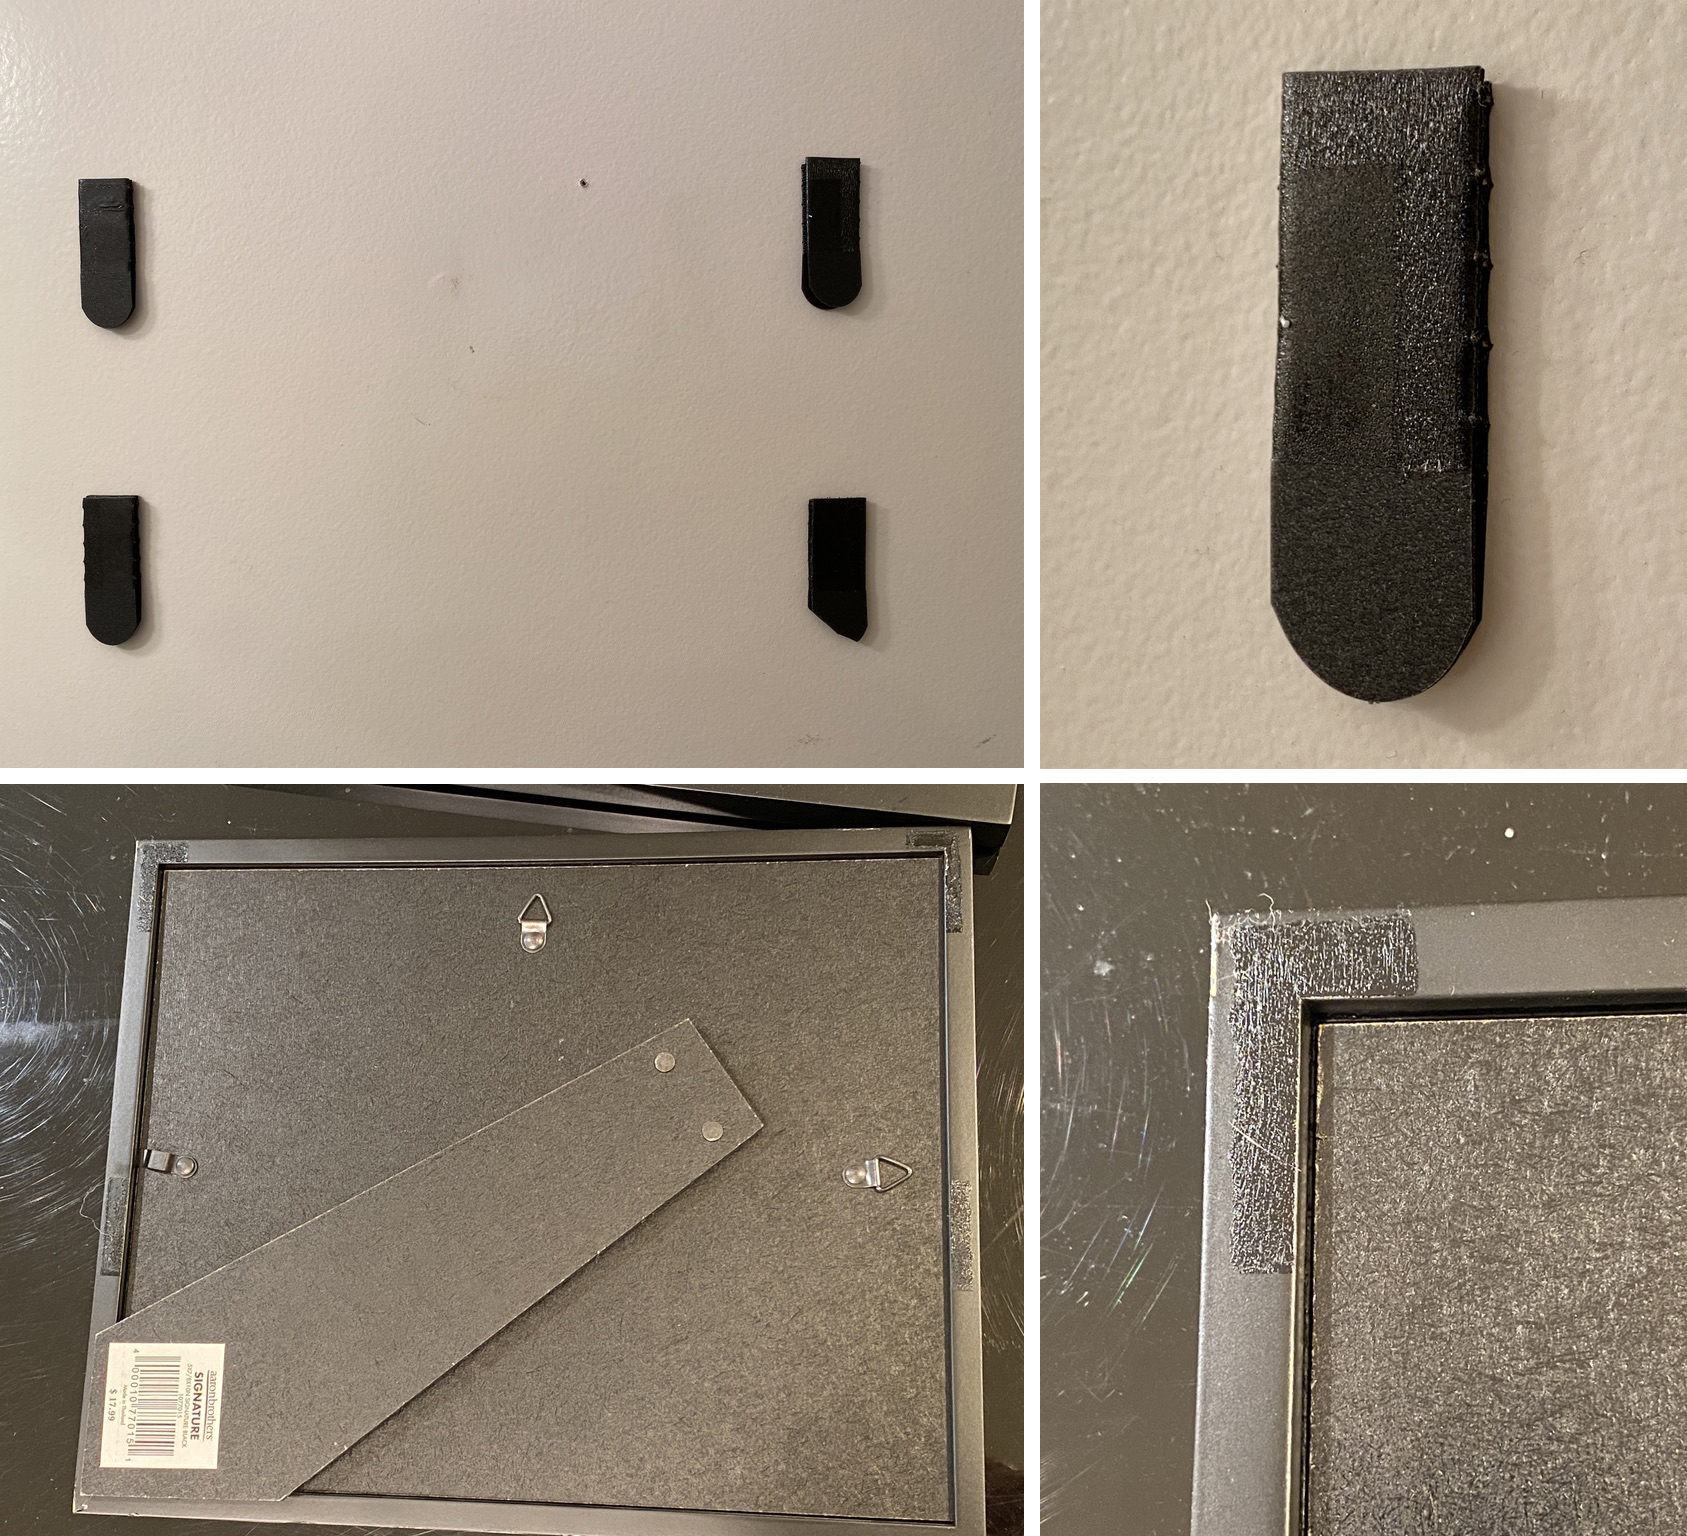
Wall after Command Picture Hanging Strips were removed, showing no marks
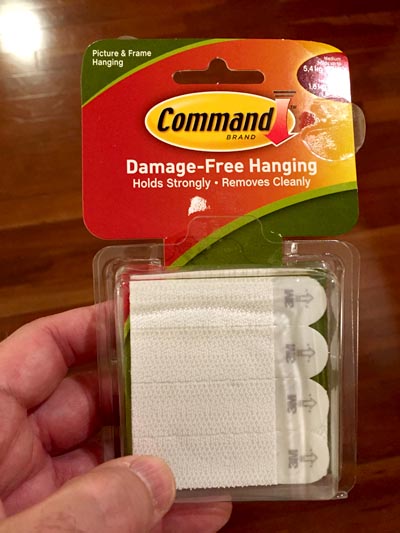
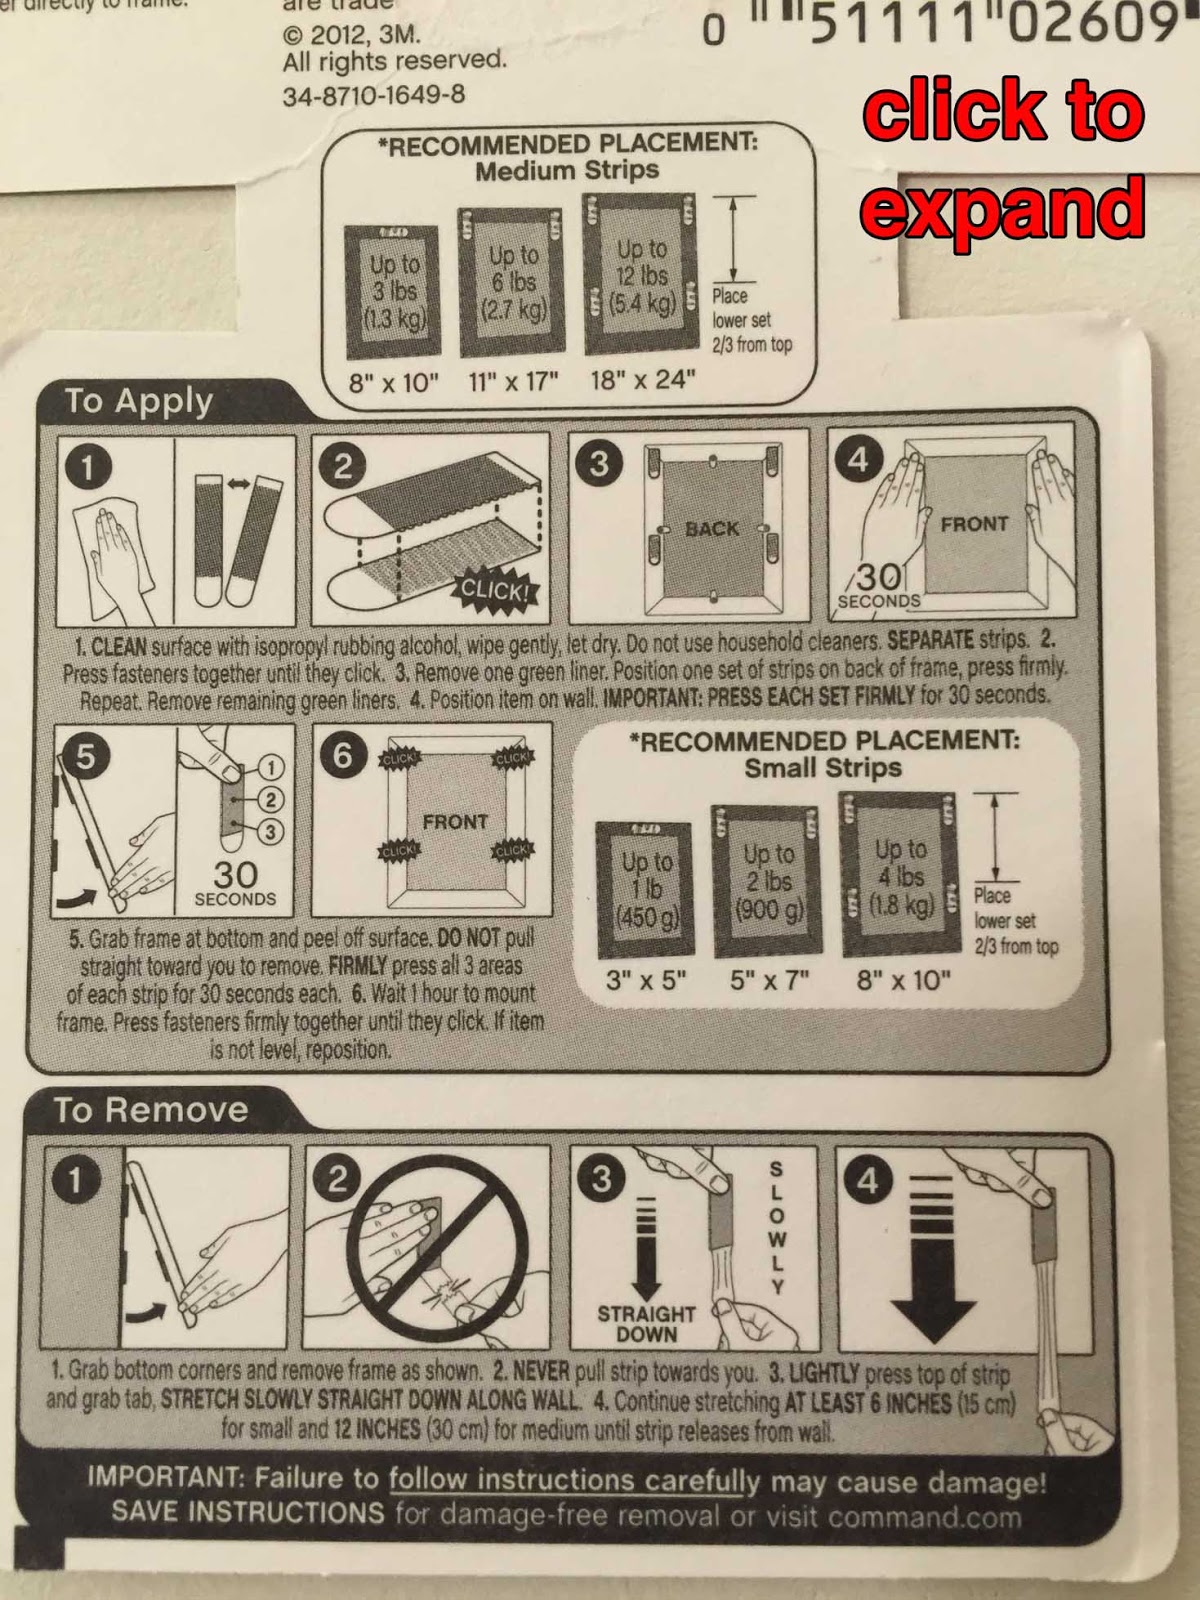
I’m removing the pictures that I had stuck to the walls last year with Command Picture Hanging Strips , and I’m very impressed.  The pictures were just as firmly adhered as when I put them up, but easily separated at the Velcro-like interlocking layers when I used a peeling motion; then I removed the Command Strips by pulling the tabs to make them lose adherence, and the two pictures came off leaving no holes and no marks whatsoever.  There is no sign that anything had ever been stuck to those walls.  Very nice.

August 3-10!  I then fell into the inevitable swirl of constant activity that didn’t allow me to write as I went along, but I will mention the important points.  First, I made sure to unlatch, unstick, and unbrace everything rather than having the movers do it.  Not including taking pictures off of walls, that was a total of 85 objects detached, both large and small.  I was filling a lot of holes in the wall, and of course, the last couple of days in the old place were spent with no seismic precautions; good thing a large quake did not occur during that time!  And in the new place, it’s taking a long time to set up and unpack; bracing is not practical yet.  So that guy who keeps nagging everyone to take precautions (that would be me) is currently in a place where bookcases can fall over, objects can fly through the air, cabinet doors can open, etc.  But as I’ve said in other articles about not running out of buildings and so on, this is an odds game.  If you can reduce the chances of an earthquake causing problems by 99%, that’s pretty good even though the 1% chance is still there.  Likewise, if I am in a seismically secure home all the time except for a few days once a decade, then my chances of being slammed by a quake have been enormously reduced!

Epilogue October 21!!  I’ve been so swamped that I have not had a chance to polish this article until now.  A perfectly poorly timed 2-week illness and several unforeseen events didn’t help.  It’s taken a while to put the new place together and much of the bracing and sticking can’t really be done until things have found their final resting places, so my home has been a model of not practicing what I preach… although by now, all large furniture is well braced, some but not all objects are stuck down, and notably I have not had a chance to install cabinet latches yet but will be doing that soon.  And of course, within days of moving in, we had a tiny earthquake on the San Andreas fault just a few miles offshore of where I just moved that most people didn’t feel but I did, and the Mexico quakes were in the news a lot; let’s just say that being me, I’m getting more worried about being massively embarrassed by an earthquake than being injured by one!

Back to article index

Link to this article Back to top

The earthquake precaution step nobody told you about: tell visitors about your preparations or else you could have problems!

(Note for e-mail subscribers; rather than read this in the e-mail message, please click on the title and go to the actual blog article so that the embedded videos will work; they may be large blank spaces in your e-mail message.  Depending on your browser, you might see one or two versions of the videos.)

Congratulations!  You have braced your bookcase to the wall, installed earthquake-proof cabinet latches , installed emergency power failure lights , stuck down various objects , and done a host of other sensible and wise things to make your home as quake-resistant as possible.  You are done, right?  Actually, there’s one more very important step, and I am probably one of the few people to remember to advise you of this:

You have to tell your visitors, cleaning services, “handypeople,” etc., about some of these measures, or else they or your home could suffer.

Of course, I like to tell visitors about some of my earthquake precautions as part of my earthquake safety evangelism, if the topic arises, but there are more practical reasons to do this: if they aren’t expecting things to be stuck and fastened, they might try to move them... with some potentially destructive consequences that I know can happen, because they have happened to me!  So please learn from my rueful experiences.  Here are some real-life stories:


Bracing of bookcases to the wall:

I practice what I preach and have all of my tall furniture like bookcases braced to the wall with furniture straps.  A year or two ago, I had a company install a new ceiling fan in my den, where there was no pre-existing electrical box in the ceiling.  This involved different teams cutting drywall, running electrical wires, patching and painting the wall, and installing the fan.  A tall bookcase was near the region where they would be working, attached to wall studs of course.  I was concerned that this might get in their way and I asked them about it, but they told me they could easily work around it.  I mentioned that it was fastened to the wall, just in case they needed to know that, and they told me it was no problem.

They finished the job and it looked great, and I was moving some things around on the floor after the last workers left when I noticed a little indentation a few millimeters wide in the rug next to the bottom of the bookcase.  I realized that the bookcase must have been moved a little since the original location was still pressed down in the rug.  I looked up at the straps, and sure enough, one of the two straps attaching it to the wall had been disturbed and the metal washer holding the bolt through the strap into the wall stud anchor was bent out of shape.  Clearly, somebody did not get the message and had tried their hardest to move the bookcase, impressively bending a thick metal washer in the process but also confirming that this bookcase was not going to leave the wall despite the best efforts of a major earthquake or an amazingly strong human.  No harm done; I moved the book case back in place and replaced the washer.  Still, this was still pretty frustrating, because I HAD told them about the bracing and it STILL failed to prevent this problem.  Just goes to show you that this is a real concern!


Push latch cabinets with the original pull handles in place:

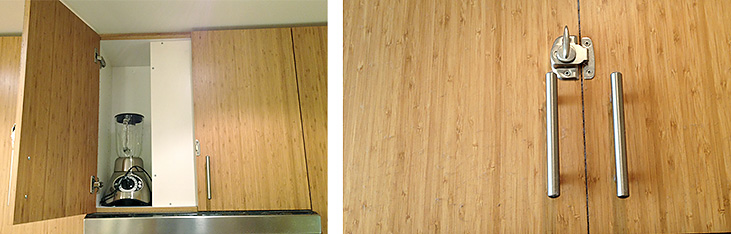
I first started using push latches to prevent my kitchen cabinet doors from opening in the apartment where I lived in Palo Alto in the 1990s.  The cabinets were old and full of little nail holes, and the wood stain was dark and not in great shape.  I installed the latches, and then decided it was pointless to keep the original cabinet door knobs there because I didn’t need to pull on anything, so I unscrewed the knobs (keeping them and their threaded bolts in storage so that I could replace them when I ultimately moved).  I non-permanently filled those knob holes with dark wood filler (waxy, like a crayon) that roughly matched the color of the wood stain.  I did the same thing in my next apartment in San Francisco.  It did not look bad--no worse than it already looked--and since there was nothing to pull, visitors would instinctively push on the cabinet door to disengage it, as in the video that below (you should be able to see at least one of the two versions or click here ).


However, when moving into my subsequent apartment and then into my current home, I found that the cabinets were light enough in both cases that even color-matched wood filler looked terrible in those holes; so for aesthetic purposes, I left the original cabinet door handles in place.  It was no problem if one was already familiar with the set-up, because it was still very easy to push the door and then as it sprung open, to finish opening the door from the handle.  It involved no extra thought or effort whatsoever; see video below or click  here .


But guess what, when a visitor tries to open a door that contains a door handle, the visitor tries to pull it open.  I’ve had a few occasions where a visitor would complain that they couldn’t open the door, prompting me to quickly explain.  However, one visitor (I forget who) was helping me to take things out of a cabinet or put them back in, and told me that the door had been very hard to open but she had managed to pull it open anyway.  That was distressing, because I figured that either the latch had failed, or the visitor had broken the door!  Fortunately, it turns out that if you really pull hard on these latches (kids, don’t try this at home), they give; but it involves a pulling force with leverage much harder than a simple shaking motion that would result from even a massive quake.

Lesson learned, if you have push latches and leave the handles on the doors, you’d better head off any visitors before they create the very kinds of damage you were theoretically trying to avoid.

Push latches, Part II:

The earthquake precaution step nobody told you about: tell visitors about your preparations or else you could have problems! A very simple extra consideration is that if you have push latches, even if the visitors know to push rather than pull, you may still have to remind them to push the door to re-engage the latch when they close it.  Also, sometimes the springy action of the latches results in it opening again as you push it in, not very often, but people should know to ensure that they leave the door in the latched position rather than slightly ajar.


Make sure they don’t turn the emergency lights off:

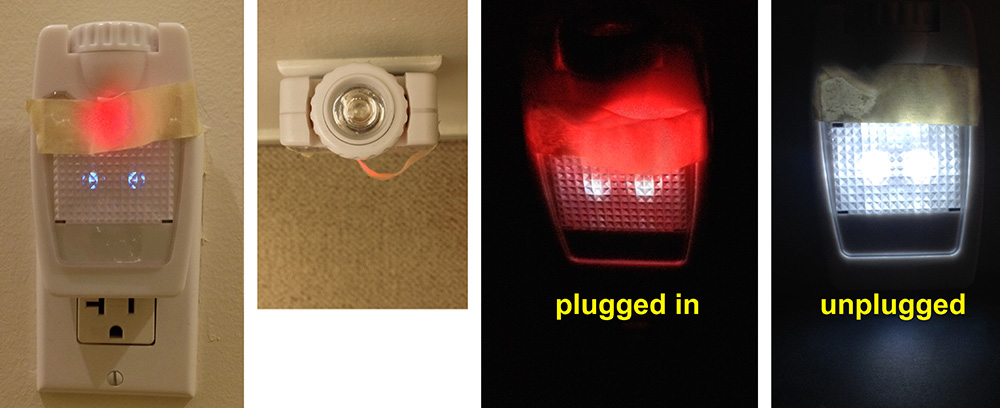
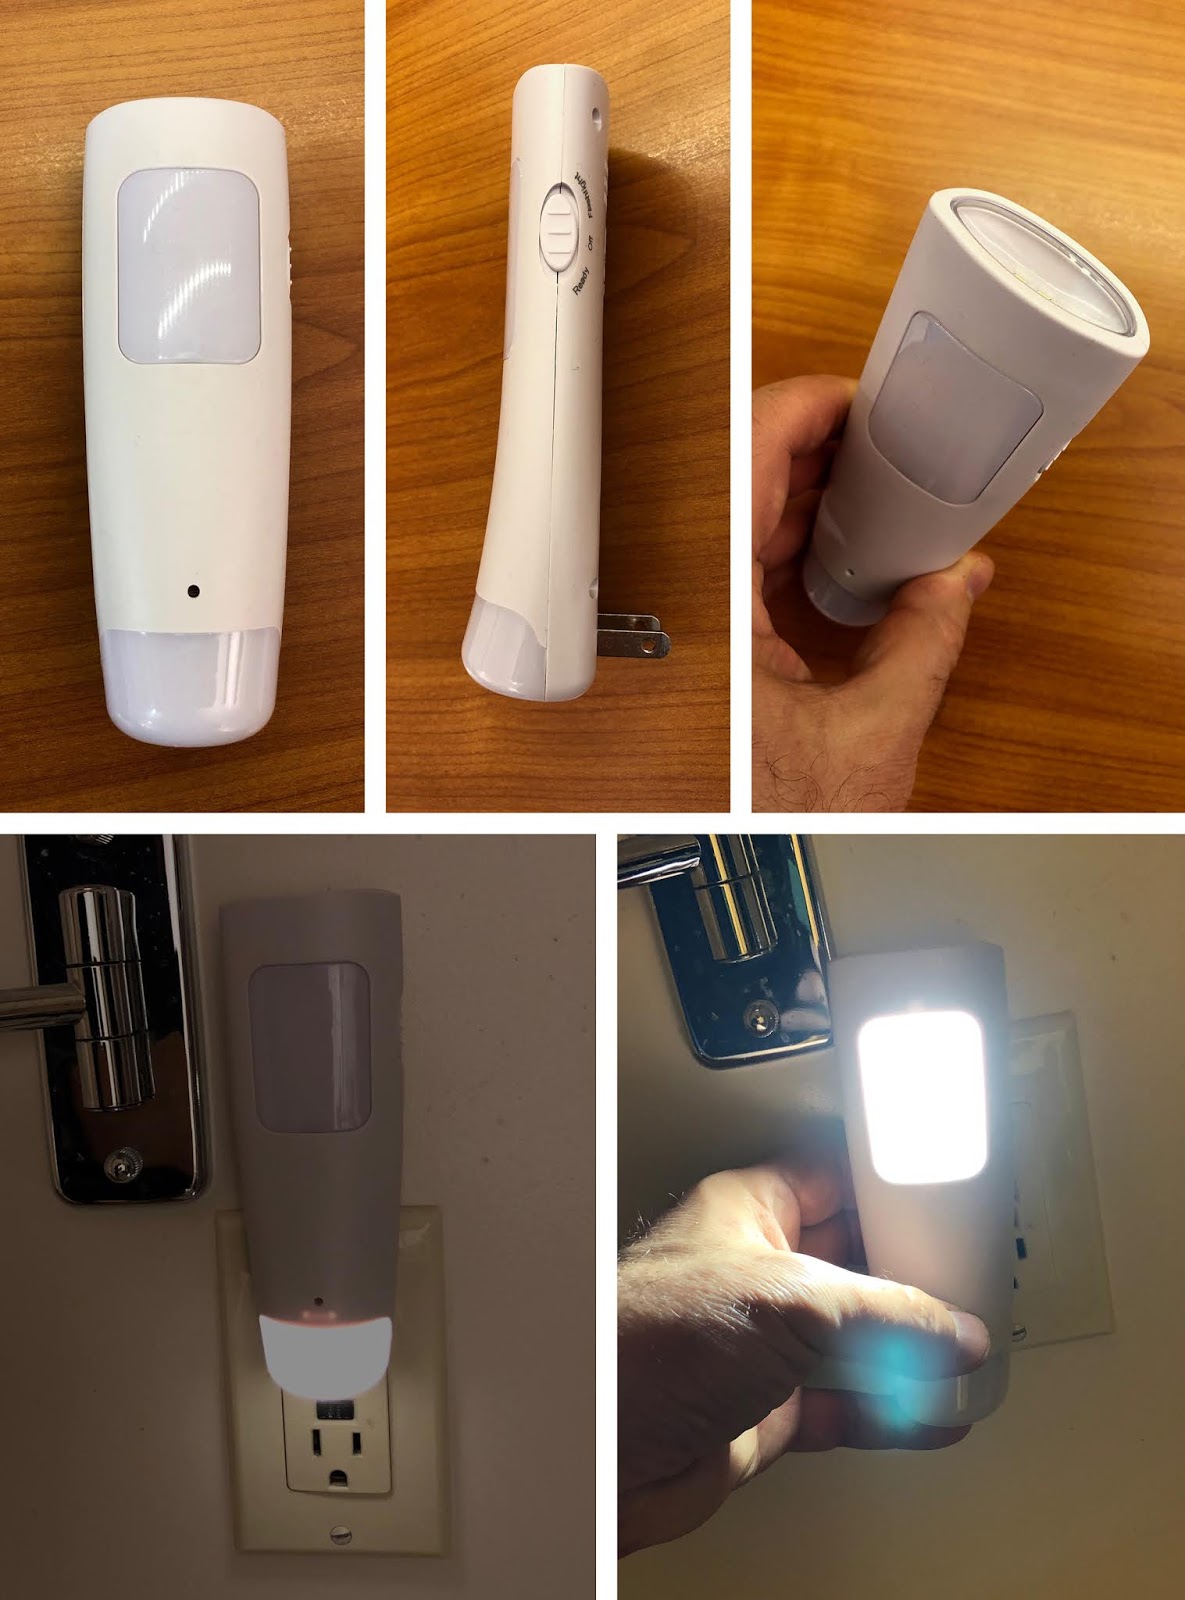
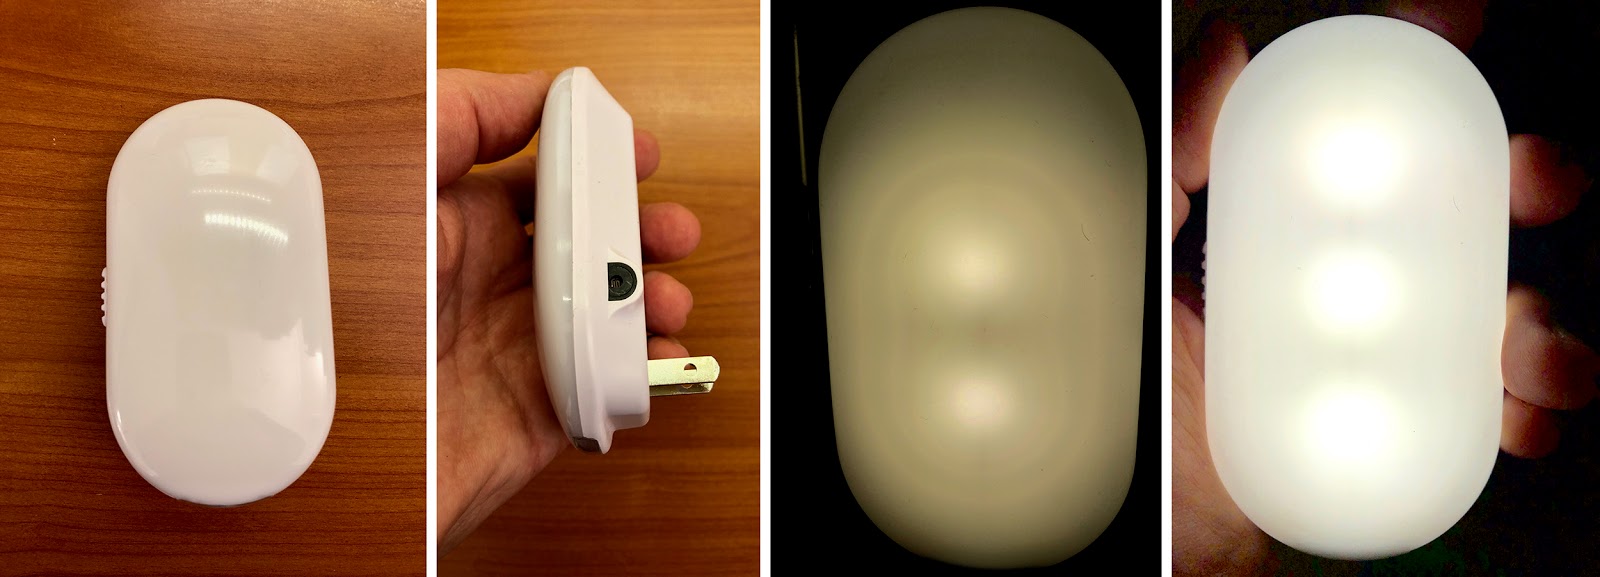
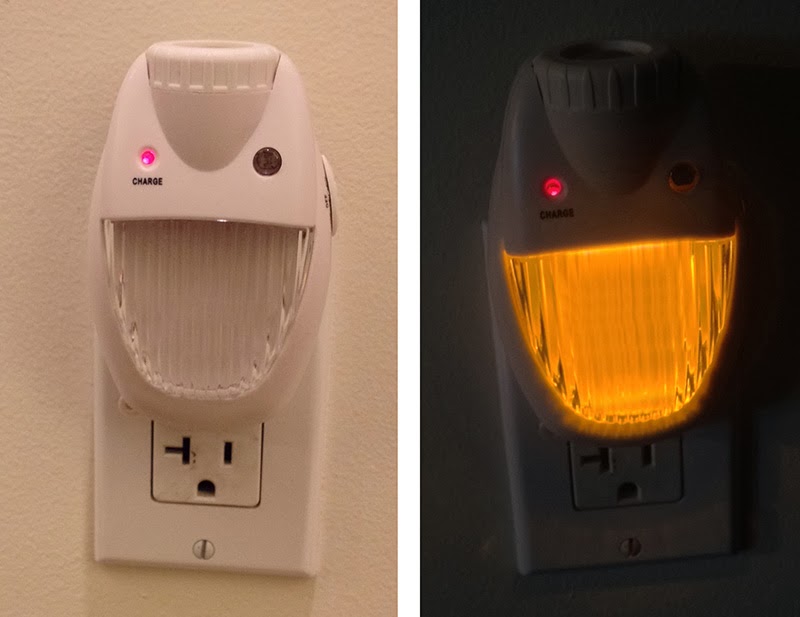
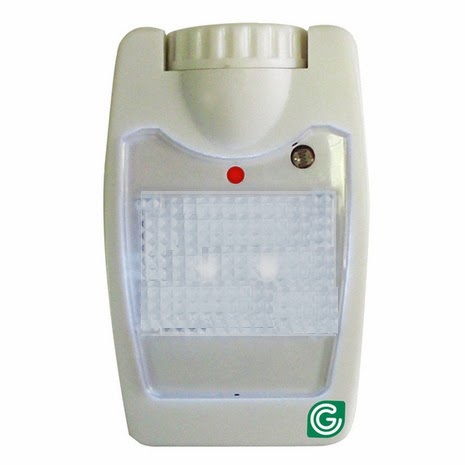
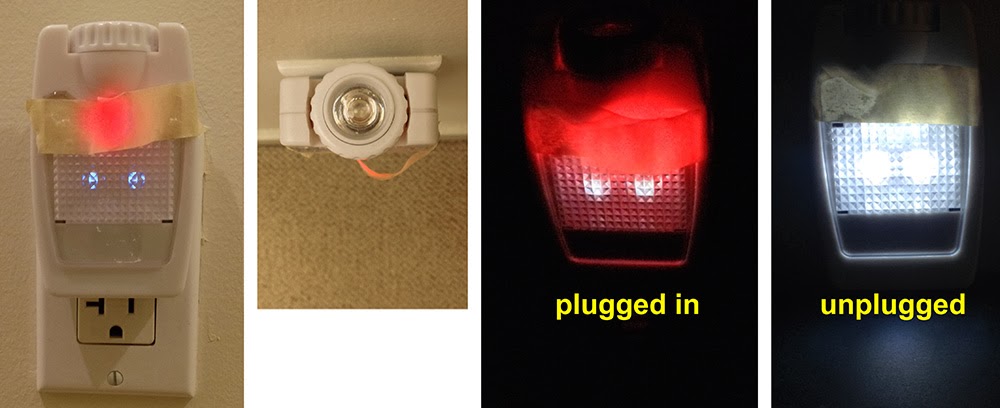
I’ve mentioned this in another article about power failure back-up lights already, but it bears repeating here.  Many back-up lights have a night-light, or an indicator that they are on and charging.  Sometimes, even this light is bright to look at in a dark room.  Many years ago, someone was sleeping in a sleeping bag or air mattress or something, on the floor of my living room. Unbeknownst to me, the night light was preventing them from sleeping, so they flipped the switch to the off position.  Months later, I finally noticed that the indicator light was not on, and realized that it had been turned off, and figured it out.  But that means that during those months, the light would not have turned on if the power cut out during an emergency.

Objects stuck down with quake putty:

Well this one takes very little imagination to predict... if an object is stuck to a surface, and someone attempts to pick up the object to get a better look, or to clean around it, they at best will just not be able to move it.  Worse scenarios are that they do move it and either damage or completely break it in the process, or with larger objects, perhaps the visitor gets a hernia while trying.  (You know, this might be the secret behind King Arthur and the Sword in the Stone ...)  Or perhaps they pick up a large vase stuck to a pedestal or stereo speaker on the floor, and that supporting object gets picked up with the vase only to come crashing down on the visitor’s toe.  The possibilities are endless!

So telling your visitors about your quake bracing precautions can be a wise idea.  You can presumably stave off some damage to property or person (which was kind of the whole idea of making these preparations anyway, wasn’t it?), and perhaps even plant a seed in their head that might blossom into their own precautions later on.

Back to article index

Link to this article Back to top

Grants are available for quake retrofits (California)
This is actually an intermediate "between articles" post, just passing the word along to homeowners in California that you may be able to qualify for grants from the California Earthquake Brace & Bolt (EBB) program to help you with seismic retrofits.  Eligibility depends on zip code, age of home, type of retrofit, and a good bit of luck because the current registration is only for a lottery.  Still, it is worth checking it out if you are thinking about retrofitting.  More information is available directly from EBB website , and you can also read the San Francisco Chronicle article describing the program.

(Sorry about the local focus of this announcement, given readership all over the world, but for those in other seismically active regions, it may be worthwhile to inquire about whether your local governments have financial aid like this.)

As long as I am in local announcement mode, my schedule of talks in San Francisco is currently taking shape.  If anyone has been hoping to attend, check out the online calendar , and you may want to check back a few days into February because a couple of talks still haven't been scheduled yet as this is being written.

Back to article index

Link to this article Back to top

Some updates to standard earthquake preparedness and response advice
A friend of mine sent me a link to an interesting LA Times article about some modifications to the classic “Drop, Cover, Hold On” earthquake response.  I recommend checking it out.  It makes some common sense suggestions such as updating the common advice to get under a table and hold on, to incorporate covering your head with your hand as you get to the table, which makes sense considering that you sometimes have to travel a bit to get to a safe spot and could be beaned in the head on your way.

This got me to thinking about the various ways in which our understanding of not only quake-resistant construction, but also quake precautions and quake response, has changed over the years.  We’ve certainly come a long way since the days that preparing for an earthquake involved live human sacrifices, but even in the last few decades, the official advice has evolved a bit.

For example, as I mention in my talks, when I was a kid in LA, we were taught to brace ourselves in a doorway during an earthquake; but this is a vestige of days long ago when many Southern California homes were adobe buildings with wooden door frames.  The adobe would collapse during large quakes and the door frames would still be standing, but modern buildings are much stronger and the door frames don’t really offer structural support advantages any more.  What’s more, in door frames that contain doors, you could get hit by the door, your fingers could get crushed, etc.

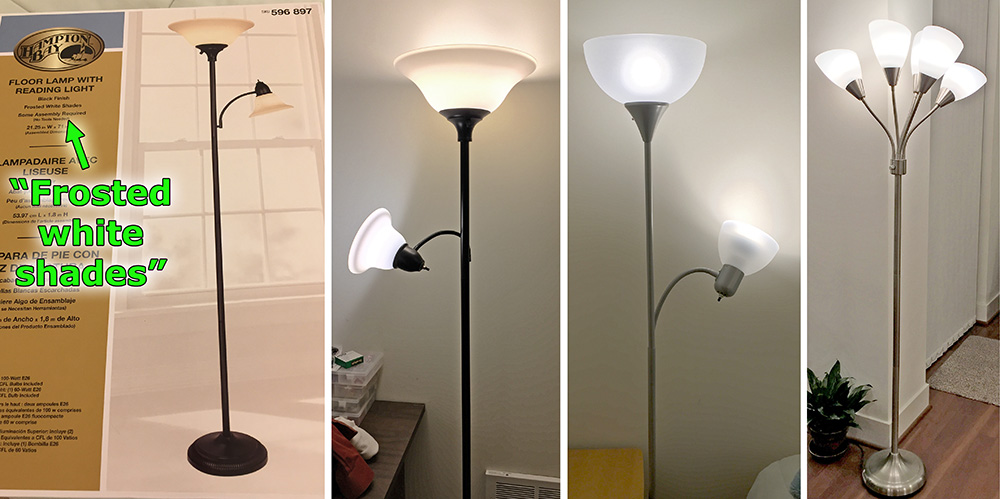
Here’s one that I have started mentioning in my talks relatively recently.  (Sorry to those who recently came to my talks; I really will cover some new material here.)  When you are in bed, if your bedroom has been set up correctly, it can be safer to stay in bed during a quake than getting out of bed to get to your predetermined safe spot.  It seems that people have been getting injured during earthquakes as they tried to get from their bed to their dining room table because they had to go through less predictable and potentially hazardous surroundings, such as random objects on the floor, perhaps whatever wasn’t stuck down flying through the air, your pet porcupine running around panicked in the hallway, etc.  If nothing can fall on you because you haven’t hung anything over your bed, your nearby bookcase is braced to the wall , you don’t have a loose heavy potted plant on top of that bookcase , and you don’t have top-heavy glass-bowl floor lamps ready to tip over and whack you in the face, then they say you may be safer on your big bumper car of a bed with your head protected by the pillow than running around on the floor.

What about if you want to check on your small children in the other room?  (I have heard that when my parents came to get me and my sister out of bed during the 1971 Sylmar quake, coming out of their bedroom, they were going uphill.)  I believe some official advice has been to make sure your kids are secure in their beds and to check on them after the quake.  My friend Larry Guillot —bless his heart, he tells it like it is—wrote in one of his occasional e-mail newsletters coincidentally also called “Quake Tips” that “Parents: you won't stay in bed, so be careful (crawl if necessary) when you go to your children's rooms - and keep them in bed until the shaking is over” and of course make sure that the route from your room to your kids’ rooms is secure.  Still, it can actually be very difficult to get out of bed during violent shaking, even if you want to, so be forewarned!

One big change has been in the recommended length of time for which you have stored supplies.  Remember 72hours.org?  3 days was the recommendation years ago, but based on accumulated experience in various disasters like Hurricane Katrina, 7 days became the recommended period of self-sufficiency, and now some sources are recommending 2 weeks.  Nothing like a few real-world disasters to blow away any rosy expectations of how long it can take to re-establish basic services!

Having a landline corded phone for use in an extended power outage has been good quake preparedness advice for many years, but as landline services get phased out, that advice might be completely out of date in not the too far future.  Similarly, the advice to have an out-of-town contact whom people in your area can call if they can’t dial across town but can dial out of town is likely to become archaic as text messaging, social media, and who-knows-what-is-next (telepathy app??) take over the world.

And don't even get me started about the ill-conceived attempt to “change” the recommended advice from getting under something indoors to getting next to something (the so-called “Triangle of Life” urban legend ).  The problems with this myth are already discussed in one of my first articles .

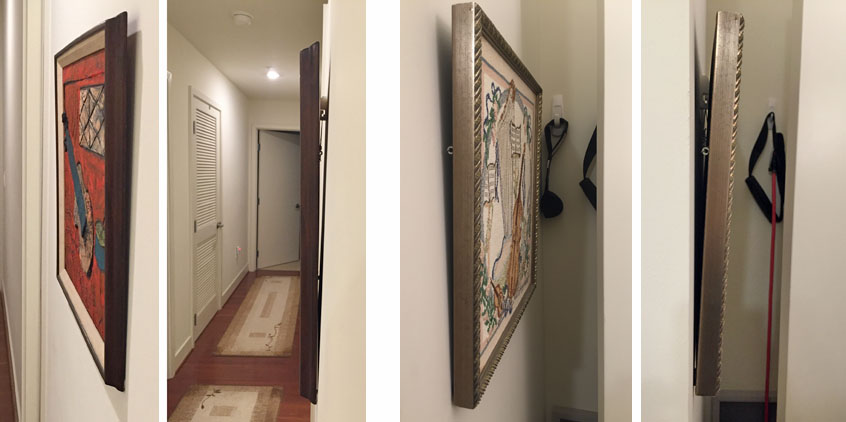
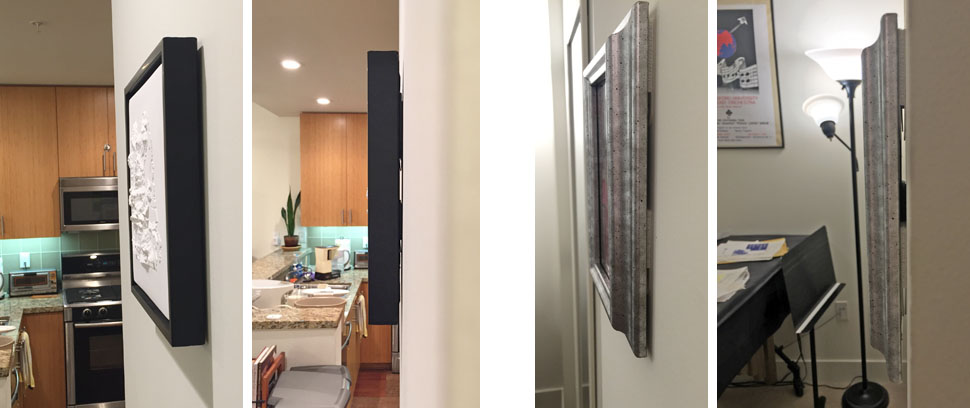
As for me, I have always encouraged the use of maze picture hooks to hang pictures on the wall, but as you can see in my previous blog post , I feel I can change that advice to include the use of Command picture hanging strips as an excellent alternative.

Now here’s a thought: what would I like to see changed in the official quake preparedness/response advice?  I think if you read my article a few months ago about situational awareness , you will not be surprised: I’d like to make sure people know that all of these things that we advise you to do when an earthquake hits are good advice in default situations, and that people MUST be aware of any unique safety hazards and take care of them before they do anything else.  The best example, as discussed into the ground in my article about unattended flames , is that if you have a candle burning, especially one that can fall over onto the rug or sofa, your number one, above-all-else priority before getting under something or finding the kids is to blow that thing out!  (...and watch for smoldering wicks.)  Otherwise, you may have a house fire, perhaps even with leaking gas, and that table you are under ain’t gonna do you much good.

Here’s one I’ll bet you didn’t think of.  Ever accidently scorch dried hot chile peppers in a frying pan?  You get tear gas; it can be extreme.  If I were cooking kung pao chicken and a quake hit, I would first turn off the flame, and hopefully have the good sense to dump the wok’s contents into the sink before diving under the table because otherwise I might be overcome by the fumes.  Think I’m kidding?  I accidentally burned arbol chili peppers in the kitchen of the home I lived in while a grad student, and not only was I wishing I could submerge my head and lungs in ice water, but the neighbor’s cat, who always hung out in our backyard by the window when I would cook, fled!

In the unlikely event that you had a tub of bleach next to a tub of ammonia, better stop them from sloshing into each other.  I know I’m stretching a bit here, but I just wanted to give you an idea of the kinds of unusual circumstances that might pre-empt the usual advice about what to do during a quake!

I would imagine that evolving technology will continue to change our basic advice on what to do before and after a quake.  For example, let’s all hope that it isn’t too long before the main question of “what should we do when a quake suddenly hits?” changes into the new question of “what should we do when our ubiquitous earthquake early warning systems tell us a quake will hit our location in 30 seconds?”  In the meantime, this is a worthwhile topic to monitor, which you can do pretty nicely...by following this blog!

Back to article index

Link to this article Back to top

Know any students moving to the West Coast? Send them this!
Fall is almost here, and college/grad/med/etc. students are moving to new places.  Some of those places are less stationary than others.  However, it's easy for new arrivals to feel as though earthquake risks are for other people and not for people who might be in a place for just a few years.  With that in mind, I wrote the following article last fall for  The Synapse , the student newspaper at the University of California, San Francisco, where I'm a professor.  I am reprinting it here in Quaketips because it really applies to anyone who is about to move to a quake zone and will get around to figuring out the deal with earthquakes "after finals are over," or "never because I'll graduate and leave."  Actually, it's good to know before you get there, so that you can set up your home to at least a minimal standard of quake readiness.
It might get a little surreal toward the end of the article because I mention this blog!  It's like standing between two mirrors and seeing an endless loop of reflections...
____________
(Originally published at The Synapse , Sept. 25, 2014)

UCSF IS MOVING
Advice to new and old students alike about earthquake preparedness
True or false: “I don’t have to worry about preparing my home for earthquakes because I’m a student, and I’m only going to be here for a few years.”
Translation: “Earthquakes don’t occur while I’m a student.”
Ok, future scientists/clinicians, let’s evaluate that hypothesis and its corollary, “Earthquakes don’t occur when anyone is a student.”  Therefore, because earthquakes occur with regularity in the Bay Area, “Nobody is ever a student.”
I probably don’t have to hit you over the head any heavier than that, but I will point out that during the destructive 1989 Loma Prieta earthquake, I was a grad student at Stanford!Once the quake occurred, I was no different from anyone else in that I had to assess damage at home and in my lab.
Fortunately, there was no damage in my home, even though my housemates and I had not taken earthquake preparedness measures, and the only damage in my lab was that something fell on the keyboard of the lab’s Mac (yeah, in the late 80’s, we had “the lab computer”) and ruined the E key, making it impossible to type “Eureka!” and therefore impeding scientific progress and discovery.  However, we lucked out; thousands of people were injured with 62 fatalities, and many more had moderate to considerable damage inside their homes.
Welcome to San Francisco...but I mean that sincerely, not facetiously, because most of the problems experienced by people in California earthquakes in the past 100 years have been preventable by taking certain precautions, many of which are not that hard to do.  People just don’t get around to them, and so when even moderate events like last month’s [original article was Fall 2014] Napa quake occur, you end up with lots of people in the vicinity with substantial damage in their homes that simply would not have occurred if they had taken the recommended precautions for life in the Bay Area.  Although city governments are trying to make structures safer, when “the Big One” comes, even a home that isn’t structurally damaged will contain a lot of damaged possessions unless you have taken your own preventative measures.
Here is some quick “starter” advice for those who aren’t familiar with earthquake safety and for those who have only heard the myths.  These are easy and don’t require a bunch of precautions:
1) Don’t hang heavy framed pictures over the head of your bed (and don’t have anything unfastened that could fall over onto the head of your bed).
2) If you are inside during a large quake, know the following: 
3) Other precautions you should take to substantially cut down your risk of being injured the next time two parts of the Bay Area try to move in different directions include: 
  • Brace tall furniture to the wall 
  • Have enough food, water, and other necessary supplies to enable you to be self-sufficient for at least 7 days.
Of course, there are more ways in which you can prepare. Since 2008, I’ve given talks about home earthquake preparedness at UCSF and to the public at SF Public Library branches.  The next regular cycle of UCSF talks will take place during the first half of 2015. Videos from previous events are also available on my website. Keep your eye on the talk schedule and the streaming video resources using links available at my lab website

You can read even more at my Quaketips blog .  I post articles about how to do things, why some things should not be done, does bottled water really expire, etc.  Here’s an excerpt from one of the first articles:

“Those in other parts of the country might say that at least they have advance warning about the hurricanes, etc… We DO have advance warning about earthquakes; we just have it much farther in advance than for other disasters...so, there's going to be an earthquake, do something about it.  There, you've been warned!”

Link to this article Back to top

The Honey Quake story: Back up your recipes!
At 4:31 am on January 17, 1994, the earth shook under the Los Angeles metropolitan area, centered underneath the LA community of Reseda (although the nearby district where I grew up, Northridge, was immortalized in the earthquake’s name).  Countless buildings were damaged, lives were lost, vast amounts of personal possessions were destroyed or disappeared.  Among them was a piece of paper in a binder in a Northridge apartment.

Some years later, I wanted to try making my deceased grandmother’s beloved honey cake, which she would bring to just about every family gathering in the 1970s and which was always a big hit.  I didn’t have the recipe, however, and it turned out that along with just about everything my mother owned, that family recipe had been lost in the Northridge earthquake.  I contacted other relatives to find out who had it, only to learn to my distress that nobody else did.  It was gone for good!

I’ve tried many honey cake recipes since then, and while some are pretty good, I have never found one that came close to the dark, rich honey cake of my youth.

That experience was a wake-up call for me, that not only are we at risk of losing expensive artwork, jewelry, or musical instruments, or irreplaceable personal items like photos, we risk losing beloved recipes and other miscellaneous bits of text in a disaster.  After that, I made photocopies (it was the 1990s) of each of my favorite recipes that were on index cards or that were in cookbooks that I felt may not be easily replaceable, as well as any appraisals and other important documents that I had in my files, and kept the copies in a folder at work.

Later (in the 2000s), I scanned all of those documents and included them in the regular back-ups of my laptop computer’s hard disk.  I back up my computer both at home and work, since I bring it back and forth, so these recipes along with my photos, music, contacts/calendars, and other digital documents were backed up in two places.

The Honey Quake story: Back up your recipes! A couple of years ago, I pushed it up even one more notch and started keeping an alias of that recipe folder in Dropbox.  Now, in addition to being on my computer’s hard disk and backed up to external hard drives in two places, it’s also on the Dropbox servers and on my smartphone.  As an added benefit, if I’m in the grocery store and suddenly decide that I want to make one of these recipes, I have the ingredient list right on my phone; so I’ve added many of my other recipes that might be easy to replace but are still handy to have with me.

What else should you back up?  How about insurance info, birth certificates, or poems or stories that you’ve written?  Here’s a caveat though.  It’s tempting these days, and perhaps wise, to back up some of this to “the cloud,” and this has the advantage that even if your home and work both perish in a Godzilla attack, the data is safe on some server somewhere in the world.  However, as company after company announces that they’ve been hacked and personal information has been accessed, I am nervous about backing up private information to the cloud, and this is something that you’ll have to determine for yourself.

I just made a honey cake from a newspaper recipe a couple of evenings ago and it was pretty good, although not as good as my grandmother’s.  In fact, as I write this article, I’ve got another one in the oven, from a recipe in the Joy of Cooking, and we’ll see how it is but I’m already bracing for disappointment.  I may never taste that awesome honey cake again, but at least I know that all of my other precious recipes are safe for the future, and I hope you will take home a lesson from this experience as well: not backing up whatever is important to you is a recipe for disaster.

Back to article index

Link to this article Back to top

Earthquake safety at work is good medicine
While I doubt that people wake up every day with excited anticipation that there might be a new Quaketips post, long-time readers may have noticed that I haven't posted since August.  I had to deal with various crises over a few months and had to take a break.  Fortunately, this month's post has essentially written itself, because a while ago, I agreed to write an article about earthquake safety in the workplace from a medical perspective for San Francisco Medicine, the journal of the San Francisco Medical Society, and that issue just came out and is freely available for reading on the web.  The article is not all that different from what I might have written for the blog, so I'm cheating a bit and instead of writing something new, I'm directing people to that article, available for online reading here .  Hopefully you won't mind that it is written assuming that you are a doctor...unless, of course, you are a doctor.

Back to article index

Link to this article Back to top

"Why the heck do you live in that place with earthquakes??"
While some might question the wisdom of living near earthquake faults, it's notable that California is pretty far down on the list of historical disasters in this country.  Hurricanes and flooding in cities like New Orleans, Galveston, Miami, etc. have been much more disruptive, tornadoes and killer winter storms certainly wreak their havoc on a regular basis, domestic and external terrorism in places like New York and Oklahoma City have been very disruptive, and even the 1906 San Francisco earthquake did more damage by starting a fire than it did by shaking.  We haven't had an earthquake of that size (about 7.8 magnitude) in over 100 years, although we certainly could have one again.  The notable earthquakes in the state over the past century have typically killed about 50 people each, which is tragic, but is a small number compared to the number of casualties of many other typical causes; and this number will hopefully shrink as building construction and personal preparation continue to evolve.  And by the way, did you know that the area around Arkansas and Missouri, and the South Carolina region, are both very seismically active, and that there have occasionally been sizable earthquakes every few hundred years in Boston, New York, and Connecticut?

It's also worth pointing out, in the wake of the massive 2011 Japan earthquake (9.0) and the almost-as-large Chile earthquake (8.8) the year before that geologists are saying that the faults in the San Francisco and Los Angeles areas are probably not capable of experiencing such massive events.  These faults, caused by tectonic plates that slide against each other, probably can only trigger up to about an 8 (the Richter scale and similar systems are log scales; you go up by 1, and the quake is 10 times larger).  In contrast, the fault systems in places like Japan, Chile, Indonesia, the Himalayas, Alaska, and the extreme north of California by Oregon that have given rise to the truly massive quakes in history (8.8-9.5 magnitude) are subduction zones, where one plate dives under another plate and creates a much bigger event.  So San Francisco probably will never experience something so massive, which is a bit of a consolation, but we should still take precautions against the problems that can occur from quakes like San Francisco 1906 or the 1989 Loma Prieta quakes.

Those in other parts of the country might say that at least they have advance warning about the hurricanes, etc.  That has not prevented large-scale disruption, damage, and loss of life caused by some of these hurricanes.  Plus, it's like I say in my talks, we DO have advance warning about earthquakes; we just have it much farther in advance than for the other disasters...so, there's going to be an earthquake, do something about it!  There, you've been warned.

For information about the precautions you can take, many of which are quite simple, check out my earthquake preparedness website .  And no, I have no financial stake in any of this...

Back to article index

Link to this article Back to top

Emergency Lighting & Batteries

4 articles

Backup lights, flashlights, batteries, and methods for keeping emergency lighting accessible.

Back to back-up lights: An update on currently available power failure back-up lights
Because I’ve been so busy, I haven’t posted an article since a whole 4 months ago, when I wrote about evaluating various canned goods after their expiration dates .  However, I figured that some readers might wonder if my long absence meant that my sampling of expired food had caused me to expire myself, so I’d better post this article that I have been meaning to write for a long time: an update on the latest generation of power failure back-up lights.

I’m referring to lights that are always plugged into your electrical outlet and are off as long as there is current, but if the powers cuts out (or you unplug it), the light turns on and then has several hours of charged internal battery life.

I originally wrote about this topic in 2014 , and settled on a particular Greenlite model that was not perfect but that I felt was best specifically for power failures DURING an earthquake.  The nightlight was too bright but I reported that you can dim it by using a simple loop of masking tape to reflect the indicator LED onto the light sensor and trick the light into thinking it’s not in a dark room.  I also pointed out in that article that lights that have piercingly bright unshaded LEDs might be great during a typical blackout, but if everything is shaking and you are trying not to freak out, the last thing you want is to be blinded by the very thing that was supposed to let you keep seeing.  So what might be the best power failure back-up light under most circumstances is not necessarily the best for earthquakes.

Back to back-up lights:  An update on currently available power failure back-up lights
Greenlite LED 3in1 Nitelite, the top pick from my 2014 article about power failure back-up lights.
The Greenlite model that I settled on, however, is becoming harder to find, and Greenlite has informed me that they have discontinued it.  This is a problem because the internal batteries and light sensors of such lights have a finite lifespan when plugged in; at some point, they become less discriminating and start getting really bright even when plugged into the wall, which is distracting in most rooms and unacceptable in or near bedrooms.  I was able to get some new ones through eBay, but they are disappearing from most other sources.  Therefore, I decided it was time to check on the current generation of power failure lights and to let you know what I think.

First, I suggest that you read the original article , because even if it is out of date, the concepts are still useful and relevant.  Also, the current article is not an exhaustive list of available options, but these three are the ones that looked most likely to be good on Amazon and are thus the ones that I purchased to try.  I have looked at several brick and mortar stores including Home Depot and Ace, and have not seen any other better alternatives to these.

All of these have one very nice advance over the previous generation.  Even though the earlier ones already had the electrical plug close enough to one end to not block the other outlet in the pair, they only allowed room in that other outlet for a cord plug, so anything bulky like a power adaptor or USB wall plug adaptor still would not fit.  In contrast, the current offerings have the plug blades right at the very end, so the entire other outlet and surrounding space is left open.  They also all have front-facing power-failure lights and separate flashlight LEDs at the top end.

Back to back-up lights:  An update on currently available power failure back-up lights
Westek Night Light LED Power Failure

The backup light is extremely bright but its LEDs are shaded by translucent plastic; bordering on blinding but not as bad as unshielded LEDs.  Still, it might be too glaring to eyes in a previously pitch black room when everything is shaking.  In a large living room, it might be ok.  A small red LED lets you know that it is active and plugged in.  I don’t recommend it for a bedroom because you can’t turn off the light-sensitive night light feature and that thing is bright enough to be a power failure backup light on its own!  I suppose you could put some tape over it.

Energizer Power Failure 4-in-1 Night Light

Much to like but it’s complicated.  The front facing emergency light is nice and gentle, not blinding at all.  It has two brightness settings that you can set with the on-off push button on the side, which actually cycles through off, dim front, brighter front, and end flashlight.  The problem is that the dim setting is a bit too dim for my liking, a glow rather than illumination, and if you have it set to be off in the dark, then cutting the power (or unplugging it) puts it in dim mode.  You have to press the side button after that for it to switch to brighter mode; and if you have it on brighter mode and unplug it and plug it back, then it resets and the next loss of power puts it back in dim mode again.  Very frustrating.

Back to back-up lights:  An update on currently available power failure back-up lights
Energizer Power Failure 4-in-1 Night Light
You can also press the button while it is plugged into live power and it goes into dim mode even while powered, as a night light.  In this case, cutting power or unplugging it puts it in the brighter mode.  But then you would need to have that night light on all the time, and again, the night light is too bright for a bedroom.  A larger room in which nobody sleeps would probably be ok.  If there was a way to have it be off when powered and bright when unpowered, then it would be the winner for me, but I just felt the process was too complicated and I would not want to have to go to the light to push the button before it was satisfactorily bright.  The lack of an indicator LED means that when the room lights are on, or when the room lights are off but you aren’t using the nightlight, you can’t be sure the thing is actually working or plugged in securely.

The night light is supposed to be light sensitive, but while turning out my room lights made it turn on, turning the room lights back on did not make the night light turn off.  The light sensor seems to be a bit buggy.

Regardless, the thing is just too complicated; they should not have tried to jam so many features into a single button.  Here are the actual instructions, good luck getting through them:

Back to back-up lights:  An update on currently available power failure back-up lights
Instructions for the Energizer model

Clearly an example of over-engineering.  I don’t want to have to think that much!

Westek Night light LED Lumi Power Failure Light

Back to back-up lights:  An update on currently available power failure back-up lights
Westek Night Light LED Lumi power Failure Light
This Westek is a nice compact pod, smaller than the others and simple and pleasing to the eye when the lights are on.  This one is a little different in that the flashlight is at the plug end rather than the far end, which doesn’t really make a practical difference.  When plugged into the wall, it’s entirely off when the room lights are on, and the two low lumen LED night light setting goes on when the room lights are off.  As a power failure backup light, it’s pretty good; nice and bright with three high lumen LEDs behind translucent plastic.  Don’t put it in a bedroom though because the nightlight is WAY too bright to allow you to sleep; you’ll see it with your eyes closed!

My recommendations:

The Energizer loses; too complicated and too many issues.  The Westek Night light LED Lumi Power Failure Light is fine for rooms in which you don’t sleep, although you can’t cover that night light to make it dimmer because it’s the same light panel as the emergency light.  For bedrooms, the best I can come up with is to use the Westek Night Light LED Power Failure (honestly, can’t Westek do a better job with the product names?  Anyone see Monty Python’s The Life of Brian ?  You’ll know what I mean.) with the nightlight panel covered with opaque or translucent tape.

It’s disappointing that none of these seem to have the simple combination of an optional or dim nightlight, a bright but not blinding emergency light, and a simple multi-position switch mechanism.  What have I decided to do personally?  Well, I did get that stash of new Greenlite lights through eBay and I intend to use them until they die, with the masking tape reflecting the central LED to dim the nightlight as I described in my earlier article.  When they are no longer working, then I plan to switch probably to the (deeply inhale) Westek Night Light LED Power Failure with taped nightlight in the bedroom, and either that or the (deeply inhale) Westek Night Light LED Lumi Power Failure Light in other rooms.  Perhaps by that time, there will be still newer and better options on the market, but here’s what I see are the currently available options.

I suppose a good earthquake-triggered emergency light could be created by putting a bunch of fireflies in a darkened jar so that if a quake knocks the jar over, the fireflies escape and fly around the room illuminating it.  Try naming THAT one, Westek!

Back to article index

Link to this article Back to top

A simple way to keep your flashlight within reach if your bedroom is shaking
My posts tend to range from instructive technical articles and product reviews to advice and philosophy, but today’s article is basically a “hey-look-what-I-did!” article.  I’ve thought every now and then about the flashlight that I keep near my bed, and wondered if it was a problem that an earthquake could make it fall and roll under the bed, or somewhere else, where it would be difficult to find when needed the most.  I have a power failure back-up light  in every room, so not having access to the flashlight wouldn’t be that big of a problem if we lost power, but here’s the irony: if we DON’T lose power, then the room will still be dark and I’d like to know where my flashlight is.  So a few months ago, I had an idea that was simple enough that it was worth potentially wasting 10 minutes of my time, and it worked so well that I’ll pass along what I did.

A simple way to keep your flashlight within reach if your bedroom is shaking  Basically, I needed to ensure that my flashlight wouldn’t leave the nightstand.  If your nightstand has a drawer, that could be all it takes, but not if the drawer can fly out; and if you occasionally use the flashlight for other purposes while a partner is asleep in the bed, the drawer could be noisy.  What I did was mind-numbingly simple but surprisingly effective.

I had a cheap stretchable fabric belt holster, which came with one of my flashlights, that holds the wider front end of the flashlight snugly but it’s still easy to get it in or out if inserted or removed straight.  I stuck a 3M Command Strip (love those things), the kind that adheres until you pull the tab to stretch it and then it lets go, directly to the flat part of the holster, reinforced it with a few staples, and the stuck down the other face of the Command Strip to my nightstand.  This thing has been around since the 1960s and the surface is pretty marred up, so if I try to remove the strip one of these days and it doesn’t come off perfectly from the wood, that will be ok; but I will be surprised if the 3M strip leaves marks on the wood.  So that the staples won’t scratch up the flashlight (I guess I care more about the flashlight than the nightstand), I took black electrical tape and put a strip on the inside of the flat part to cover the staples, sticking far enough toward the opening that the flashlight can slide along the tape on its way in to the holster.  Voila!

A simple way to keep your flashlight within reach if your bedroom is shaking
Now the flashlight lives in the holster as shown in the photo, for me to easily get it whenever I want to use it.  Taking it out is simple, and I put it back in the holster by using the front of the flashlight to stretch the opening just a little (see photos above).  I just have it in about halfway and it is secure but easily accessible.  It’s been there for almost 4 months and the holster has shown no signs of loosening despite using the flashlight each night to take the dog on his nightly before-bed bathroom break.  Of course, there are other ways to do this, depending on what you have and how your room is arranged (Velcro, etc.); but the point is that in an earthquake, you want to know that the light is still there on the nightstand.  Now let’s just hope the nightstand is still there by the bed!

Back to article index

Link to this article Back to top

Choosing the right kinds of batteries for your emergency supplies in the 21st Century
Even though earthquake preparedness is more than just having an emergency kit, your emergency supplies are clearly a crucial factor in how you fare during the first week or more after a large earthquake or other regional disaster.  That’s why several of the recent articles in this blog have focused on expiration dates, or lack thereof, of your emergency food and water supplies.  However, there are other supplies in your kit that expire, like your batteries, so let’s take a closer look at batteries this month and clear up some of the mystery surrounding the increasingly complicated choice of products.  The kind of batteries that you keep in your kit can actually make a difference.

There are so many different kinds of batteries out there with so many chemical names (alkaline, lithium, lithium ion, carbon zinc, silver zinc, nickel cadmium, etc.) that one almost starts to wonder if we should be checking for monosodium glutamate or partially hydrogenated oils!  However, as a consumer with battery-powered radios and flashlights in an emergency kit, you really only have to worry about two of them: alkaline and lithium.

First, it may go without saying, but don’t rely on rechargeable batteries in your kit!  Not only is the whole idea to have batteries that you can use when there is no power to your outlets, but it’s also important to note that rechargeable batteries don’t hold their charge for long.  The website of Energizer batteries estimates a loss of 1% of deliverable energy per day in storage when not being charged, so a fully charged and stored rechargeable battery could be dead just a few months later.

Alkaline batteries are the ones you’ve probably used for most of your life, from Duracell, Energizer, and a variety of other brands.  The most common consumer forms used in radios and flashlights are 1.5V in AAA, AA, and D sizes, and the 9V transistor radio style.  The shelf life of alkaline batteries has improved in recent years, and some of them, such as Duracell’s Quantum line with "Duralock Power Preserve Technology” and Energizer’s MAX line with “Power Seal Technology,” claim to have a storage life of at least 10 years.  They pay someone to come up with names like these, don’t they?

Choosing the right kinds of batteries for your emergency supplies in the 21st Century

Recently, however, I’ve become very impressed with lithium batteries.  Regardless of shape, lithium batteries used to be primarily 3V and therefore not a good replacement for 1.5V alkalines, but they have shown up in recent years in the familiar 1.5V AA and AAA styles.  Both Duracell and Energizer produce these, as well as the shorter 3V CR123 lithium batteries that power some of the better LED flashlights.  I’m sure there are other good brands out there, but I am focusing on the popular brands that are ubiquitous in stores.  (I have no financial interests in either of these companies, nor in battery technology/sales.)  In fact, I’ve switched all of the batteries in my emergency supplies to Energizer’s “Ultimate Lithium.”  I chose Energizer over Duracell because their lithium batteries are easier to find in the stores that I frequent, and because Consumer Reports gave their top rating to Energizer Ultimate Lithium batteries in 2011 .

Choosing the right kinds of batteries for your emergency supplies in the 21st Century

I like lithium for several reasons.  First, they last longer in storage, which means less chance of opening your kit a few years from now and finding weak batteries if you don’t check your supplies regularly, and fewer rounds of replacement if you do check regularly.  The package says that they hold power up to 20 years.  “Up to”?  What does that mean?  Doesn’t 3 years fit the description of “up to 20 years”?  Still, the helpful folks at Batteries Plus Bulbs confirmed for me that lithium batteries should indeed hold a charge in storage considerably longer than alkaline batteries.

Second, the 1.5V lithium batteries are supposed to power devices considerably longer than 1.5V alkalines, even longer for the 3V CR123 style.  Again, with the “up to” caveat, Energizer says its Ultimate Lithium batteries power devices up to 9 times longer than alkalines, and while the 9x figure is unclear, Consumer Reports agrees that lithium has considerably longer run time than alkaline.  This means that your crucial use of battery-powered devices during extended power outages won’t be derailed nearly as often by batteries running out of juice, and you don’t have to store as many of the lithium batteries.

(9/27/14 addendum: I was at the hardware store and noticed that Energizer has two different flavors of lithium batteries: "Advanced Lithium" and "Ultimate Lithium."  Sigh...  well, the Ultimate Lithium batteries are the ones pictured above, supposedly up to 20 years in storage and 9x longer lasting while in use compared with their comparable alkaline batteries; whereas the Advanced Lithium last only up to 12 years in storage and 6x longer use.  Ok, up to you!)

Lithium batteries are considerably more expensive than comparable alkaline batteries, but the increased run time on a charge more than makes up for the added cost of purchase.  Pair some lithium batteries with an LED flashlight and you have a longevity combination that would have Thomas Edison and Alessandro Volta giving each other high fives.

An added benefit of the lithium batteries is that they are significantly lighter in weight than similar sized alkalines, which is a plus when you have them in portable emergency kits that won’t be as heavy.  Furthermore, lithium batteries are less affected by extremes of hot or cold temperature, making them ideal for outdoor use and for unpredictable conditions under which you may need to use them during an emergency.

Lastly, think also about replacing your 9V alkaline smoke detector batteries with 9V lithium batteries, some of which are marketed specifically for that purpose.  They won't need to be changed as often as the alkaline batteries.

While I am not aware of any downsides of using lithium versus alkaline batteries, the folks at Batteries Plus Bulbs told me that you should still try to avoid storing alkaline or lithium batteries in the devices’ battery compartments during long periods of non-use, due to increase potential for leaking when the circuit is almost complete.  [1/12/19 update: I was just perusing Energizer's website and it says "Energizer® Ultimate Lithium™ Batteries are GUARANTEED NOT TO LEAK. Due to advanced technology, Ultimate lithium™ batteries will not leak under normal consumer usage. If you believe that you have a leaking Energizer® Ultimate Lithium™ battery, contact 1-800-383-7323 for return instructions."]  They should still be recycled if possible, like alkaline batteries, although neither are as bad for the environment as the rechargeables.  If you dump 3V batteries in a bag haphazardly for storage or a recycling container, the salespeople counseled me to tape the terminals because of the risk of a circuit forming in the bag and consequent overheating.  Finally, just like the alkaline batteries, storage in the freezer or refrigerator is NOT recommended, as it’s an urban legend that these conditions increase shelf life, and the resulting condensation can actually reduce shelf life.

I hope I’ve managed to clear up some of the mystery surrounding modern batteries.  No charge...

Back to article index

Link to this article Back to top

Don’t be left in the dark: which kinds of power failure back-up lights work best in an earthquake?
[Note 5/13/19: I have written a follow-up article on this topic , but I recommend that you still read this one first because of the discussion about what features I feel are important in the situation of earthquakes, as opposed to general concerns about power failures.]

What’s worse than being woken up by a large earthquake?  How about being woken
up by a large earthquake in complete darkness because the power went out?  Even
if you were already awake, it’s hard to find your chosen protected spot ( UNDER 
something, not next to it ) and avoid any tripping hazards like toys on the floor or
even banging into stationary furniture if you can’t see anything.  This is where a
well-placed power failure back-up light in each room can make a huge difference to
your well-being as a quake is occurring.  I’m referring not to flashlights that live in
Don’t be left in the dark: which kinds of power failure back-up lights work best in  an earthquake? electrical outlets that are always charged when you need them, but specifically to lights that remain charged and function as dim nightlights as long as the outlet has power, and if the power goes out (or if you unplug the light), a bright emergency light goes on automatically and can last for hours.  The picture shows an older version based on an incandescent bulb; good for illustration but these aren’t available anymore because the LED versions last so much longer on a charge.

I make a point during my talks about having these back-up lights, but if you
actually go to a store or online to find some, you will find a bewildering assortment
of these things; and the sad fact is that I haven’t found any light with which I am
completely satisfied.  However, some are much better for the purpose than others,
and I’m going to report here what I’ve found out over the past few years of looking
for lights that I like.  Some are fine as general power failure back-up lights but are
impractical for earthquakes.  As I always mention, I have no financial ties to any of
these companies and don’t benefit from you choosing any particular brand over
another, but the choice of which to use could make a huge difference in those first
critical seconds of your response during a nighttime earthquake.

I did not consider any back-up light that was bulky, which many of them are.  The
reason is that it makes sense to have one in each room or part of the home in
which being suddenly shaking in pitch dark could be bad; that includes bathrooms.
A bulky light is not going to be practical in many electrical outlets.

While most of these lights provide a constant nightlight when plugged into a
powered outlet and a brighter constant emergency light when there is no power, at
least one product has an emergency light that flashes on and off.  I guess this is
supposed to conserve battery power, but I can’t imagine using this for earthquake
safety.  Picture yourself in a large earthquake, very bewildering and disorienting;
the last thing you need is to add a strobe effect as if you were in a 1970’s disco.
Those of us old enough to remember know how surreal the effect is; if you don’t,
go see American Hustle ...  For earthquake emergency back-up, avoid the flashing
lights.

I ended up with three serious contenders, none perfect, and only one that I will
use.  All three have not only a nightlight and emergency back-up light, but also a
real flashlight from a different bulb.  However, don’t choose on the basis of the
flashlight; it’s most important that this functions as a good emergency light and
then you can find your favorite flashlight wherever it normally lives.  First the two
runners-up:

Etón American Red Cross “Blackout Buddy”:  While this has some admirable
features, I was ultimately disappointed with it.  I liked that it was small and flat,
plugs into one outlet without covering the other, and looks sleek enough to not
detract from your décor, with white constant lights.  There was a review on Amazon
about a potential electrical defect that could cause a fire hazard, and I contacted
the company to inquire.  As a result, they responded to the review on Amazon.
According to them, the electrical safety passes standard UL inspection standards,
and the product does indeed have the UL sticker.  Interestingly, I just checked
Amazon and the dialogue is continuing as recently as 2 weeks before this post.  It’s
also been pointed out that some of these products had a moldy smell.  The
manufacturer tells me that the smell was a real problem with one batch but that
has been fixed.
Don’t be left in the dark: which kinds of power failure back-up lights work best in  an earthquake?

Unfortunately, there are more practical problems with the Blackout Buddy in my
opinion.  The nightlight, despite facing down, casts a very bright cone of light and
would be very distracting in a bedroom.  What’s worse, while it has the brightest
emergency light I’ve seen, which you might think would be a good thing, it
unfortunately faces upward with no diffuser and is blinding to look towards in an
otherwise dark room.  So imagine you are trying to get to a safe place during an
earthquake and being blinded in the process.  No thank you.  I would only use this
in a room in which nobody ever needed to sleep, and in a place where one was only
worried about power outages but not about needing to see during a large
earthquake without being blinded.

(An aside: watch what you put in your living room.  We had a back-up light in our
living room several years ago, which had a nightlight.  We had a guest sleep over,
and months later, I realized that the light had been switched to the complete “off”
position, presumably because it was interfering with the guest’s sleep.  Nothing
wrong with that, although it didn’t get turned back on, so we had actually been
without a back-up light all those months.)

Don’t be left in the dark: which kinds of power failure back-up lights work best in  an earthquake? Leviton “rechargeable power failure light”:  This one has a nightlight that is nice and soft, which is good, and leaves one outlet uncovered.  The problem is that the emergency light IS the nightlight; it’s no brighter.  I think it was not intended to cast emergency lighting into a dark room, but instead just to be a floor marker light to help you find your way down a hall.  That’s not good enough for a true emergency situation.  I also found it distracting that the nightlight is amber colored, very pretty but a bit disconcerting late at night in a dark room.

Don’t be left in the dark: which kinds of power failure back-up lights work best in  an earthquake? The winner hands down, at least for me, is the Greenlite “LED 3 in 1 Nitelite .”  [2025: this model appears to have been discontinued; check out the update about newer lights.] This also leaves one outlet uncovered, and has a white nightlight that goes on during the dark, with a reasonably bright white emergency light that shines outwardly through a multifaceted lens that spreads the light nicely; no blinding effect while still casting a glow into a dark room.

However, this was not without its problems.  First of all, Amazon has reviews from hundreds of people, some of which love it and some hate it.  Those that hate it mostly complain about bad light sensors, in that the nightlight is supposed to be off when it senses light but some of these would be completely bright during the day, even if a flashlight was shining directly on the light sensor.  My original Greenlites didn’t have this problem, then I ordered more and some did.  My most recent one did not.  I suspect they had some bad batches and the bad reviews are from those who got the bad products.  If you get the Greenlite, be sure to test it for a couple of days before discarding the packaging and be prepared to return it if it is bad in exchange for a new one.

The only problem with all of the Greenlites that I’ve ordered over the last several
years is that the nightlights are too bright in a dark room if you want to sleep;
positively glaring.  However, there’s a work-around, which I think is silly to have to
do but it works nicely.  I may be the only one who’s figured this out because I’ve
never seen it mentioned anywhere.  The light sensor is taking the darkness a little
too seriously and it cranks up the light in a dark room, not nearly as brightly as
when the power cuts out, but enough to be too bright.  The solution is that there’s
a little red LED indicator light to the side of the light sensor that lights up whenever
the product is plugged in.  Believe it or not, by putting an object (your finger or
anything) in front of the red light but not covering it, about a centimeter away, red
light from the indicator bounces off of the object and onto the light sensor, and the
nightlight gets dimmer!  Try it, if the finger gets too close to the red light, the
nightlight doesn’t get dimmer, but as you move farther away from the red light, the
nightlight does get dimmer!

Therefore, I have put a piece of masking tape so that it loops away from the plastic
and then back to it, leaving the sensor completely uncovered and with the red light
just where the tape leaves the plastic so some of it reflects to the sensor.  It’s
easier than it sounds, just look at the photos.  Once in a while, if it is too bright for
me, I adjust the tape.  It doesn’t look fantastic, but if you are really concerned
about it, you can probably find a different kind of tape that will look better.
Don’t be left in the dark: which kinds of power failure back-up lights work best in  an earthquake?

Feel free to comment on this post if you have any other lights that are worth trying.
I will bend my regular policy of not advertising products if your comment includes
the reasons why a specific product will fulfill the qualities I’ve described above.  I
should emphasize that some of these other lights might be perfectly good power
failure back-up lights in general; the goal here is to have one that doesn’t cause
problems during the confusion of an earthquake (like disorienting or blinding you).
And now hopefully you are no longer in the dark about not getting left in the dark.

[1/25/17 addendum: there is more useful information in the comments that follow]

Back to article index

Link to this article Back to top

Emergency Food & Water

11 articles

Stored food, drinking water, shelf life, filtration, and emergency-ration testing.

So much for the “can of beans” legend: A second round of testing what is good or not after the use-by date

So much for the “can of beans” legend: A second round of testing what is good or not after the use-by date
In November of 2019, I checked the canned food in my emergency kit and a few other odds and ends, and reported here what was still good despite being past the use-by date, and what was not; and I replaced most of those things ( MREs , emergency food bars , and water last much longer, as I’ve written about many times).  Four years later in the fall of 2023, I figured it was a good time to check on the current batch of supplies purchased in 2019, many of which had use-by dates 3 years out, so this would be another year past that.  I didn’t actually get around to it until February 2024, started writing the article, and then [insert life happening here]...  Well, here I am finishing it in November 2024.  But the information was current as of a little over 4 years from purchase.

Last time, I learned that certain canned foods don’t last well (“steam crisp” corn canned without liquid, canned Blue Diamond almonds, canned peaches in syrup, canned apricots, canned garbanzo beans) and opted to not purchase most of those for the next round.  Others lasted well, so I got more canned beets, and more canned corn in liquid, and tried a few new things.

What was still good 4 years later?

The “O Organics whole kernel corn no salt added,” like the Del Monte corn canned in water before, again was in GREAT shape, firm and delicious, despite having a use-by date of 12/21. I have been using it occasionally for cooking ( southern style cast iron skillet corn , awesome!)

Signature Select sliced beets with use-by date of 11/21 were also quite good, and I snacked on them until they were used up.  They are good for a while in a snap-top container in the fridge for several days; eat one and pretend it’s a purple cookie!

What was just kind of ok?

Valley Fresh Chicken breast in water with rib meat, use-by date of 6/22, was ok but the texture was not optimal and would fall apart a little too easily.  It tasted fine though, and I used it up in salads or with added BBQ sauce (because everything tastes good with BBQ sauce).

What was not good?

Big surprise: Signature Select butter beans with date of 8/21 were mushy and I tossed them.  And here I’d always pictured that one last can of beans in the cupboard from some old story; I guess that should not be the last food left in one’s cupboard after all! 

I had been surprised last time that Blue Diamond almonds had gone bad, and was hoping it was a fluke, but the subsequent cans with a 9/21 use-by date were bad again.  The foil top under the plastic lid was puffed out (never a good sign), and they had a slightly off smell.  Ok, done with having almonds in my kit.

What was absolutely disgusting?

Signature Select cut leaf spinach (12/21), dull, slimy, yuck, had to be on the look-out for alligators in it (on the other hand, I don't know what it was like when new).

What non-food items had become useless?

Like last time, the adaptors with my device chargers were out of date; this time the problem was lack of USB-C connector.

My first aid kit had antibiotic ointment from 2015, Aleve had an expiration date of 2/21  We can safely say those need to be replaced.

For my growing number of daily prescription meds, everything there was not all that far past their expiration dates (which are totally imaginary anyway), but my current regimen was not reflected; it was a good reminder to add some of newer medications.

Speaking of meds, I had Flonase allergy nasal spray and antihistamine eye drops that I’m supposed to take every morning.  Unlike the pills, those liquid medicine solutions probably should not be kept much longer than their designated expiration dates, so I had to update them as well.

So much for the “can of beans” legend: A second round of testing what is good or not after the use-by date
Glad I finally got this article up before the next time anything expires!  My one regret is that I neglected to photograph the almonds with the ballooned-out foil.  I hopped on the internet to search for an image of an expired can of almonds and couldn’t find anything useful, so I decided to ask ChatGPT: “Is there a photo of Blue Diamond almonds that have expired, with a puffed out foil top?” Rather than find a real photo, it generated one on the fly and I have to share it because it was hilarious (with my own disclaimer superimposed on it).  Tip: if ANY of your emergency supplies ever look like THIS, start over again!


Back to article index


Link to this article Back to top

MRE shelf life follow-up follow-up: Ever wonder what a 21-year-old MRE tastes like?

“Previously, on Quaketips”

2013:   MRE shelf-life follow-up: Ever wonder what a 14-year-old MRE tastes like?

“Several days ago, I ate an MRE with an 'expiration date' of 2005, and lived to tell about it.”

“...May of 2011, I wrote an article about MREs in which I reported that while MREs have long had charts from suppliers showing shelf lives as long as 10 years depending on ambient room storage temperature, the official estimated shelf lives had recently been made considerably shorter.  However, I also reported that this was based not on “going bad” but instead on subjective taster opinions about when the meals were no longer at their best flavor and texture, and that there was every reason to think that they would be edible and not harmful for years to come.”

“I purchased a new batch (this will be 2013-2020), planning to keep the remaining 2005-2012 MREs as backup, and found again that a new meal that I tried was better than the expired 2005-2012 MRE, but the expired one was not bad.  So naturally, I had to find out what had happened to the ones with 2005 expiration that I had been keeping as a back-up.”

“...the 2005 ‘expired’ meal, which was packaged in 1999, was about as good in 2013 as it probably would have been in 2005.”

“However, I think I’ll stash one or two of them away to test in 2020, out of morbid curiosity, and I’ll report back...I guess that means I’m committing to this blog for at least 7 more years!”


And now, the conclusion:

2020 was the target year that I set forth in my earlier article, 7 years before that.  Not that there’s anything magic about 7 years; it was the approximate stated life of the MREs stored at the temperature of the closet in which they had been stored for 7 years before that.  My current closet is colder, so that would presumably increase the time window for this somewhat arbitrary guideline, so it’s ok to do it in 2021.

OK, actually, the reason I waited until 2021 to try my 21-year-old MRE was because it simply seemed like a bad idea to try eating theoretically expired food in the year 2020…

MRE shelf life follow-up follow-up: Ever wonder what a 21-year-old MRE tastes like?
So on January 1st, 2021, I dug out this very old MRE that has been sitting in my emergency supplies all these years.  With anticipation, I opened the outer package.  No goblins or hairy things emerged.  More importantly, there was no bad aroma, and no ballooning packages.  Interestingly though, there was a slight smell of mint when I opened the outer package, which turns out to have been from the pair of green (I presume that was the original color) spearmint chewing gum squares that were wrapped in cellophane inside the package of napkins and spoon, inside another thick sealed plastic bag.  I don’t recall that happening in the identical menu MRE that I tried in 2013.

So that means that some molecules can very slowly pass through multiple layers of plastic if given a couple of decades.  Keep that in mind (foreshadowing!)

I remembered that the jam does not age well, so I opened the jam for the heck of it and sure enough, very dark and gloppy.

The chocolate covered oatmeal cookie was PERFECT.  I mean it was really delicious, no hint of anything wrong, it was EXACTLY like its siblings of various younger ages.  I ate the whole thing as a New Year’s Day dessert.  Good stuff.

The crackers were in reasonable shape but there was just the slightest aroma of old cooking oil or old nuts (oxidized oils).  I took a bite and it was fine but it had the slightest old taste to go with the old smell, so I opted to not continue.

The real discovery was the beef stew entrée itself.  I already knew from last time to expect it to not look appetizing until it was heated up, and this indeed was again the case.  However, unlike 2013, this had a mild old oil smell like the crackers.  I would not say rancid; it was not terrible but since the mildly unpleasant aroma was there, I decided to not eat any.  I don’t think it would have made me sick but something was clearly off that wasn’t off 7 years before.

This mild odor suggests to me that the process that ultimately makes old MREs undesirable is slow lipid oxidation of the natural fats and/or added oils.  Since nothing was growing in the MREs after 14 years (for that matter, after even just a few months), I don’t feel that one would get food poisoning.  However, it sounds like enough oxygen was able to get into the beef stew and the cracker packages, despite their individual vacuum-packaging and the outer bag, that the oils were oxidizing over 21 years to the point that the food was affected.  So my recommendation from this experience would be that while 2 lifetimes are probably fine, don't push it to 3 lifetimes.

However, here’s an important point to consider.  These late 20th Century MREs have partially hydrogenated oils in the ingredients lists of most of their components, and one of the reasons that partially hydrogenated oils used to be popular in the food industry was that they were very stable and could bestow a long shelf life on baked goods and Oreos and Pop-Tarts, etc.  They were phased out of the food supply (at least in the US) many years ago though, because of our modern understanding of their harmful cardiovascular effects.  I did notice some partially hydrogenated oils included in the "sub-ingredients" of something called grill seasoning in some of the more modern MREs, but it's presumably at lower levels than before.  I wonder if as a result, this lipid oxidation will occur faster in modern MREs and their shelf-lives will thus be shorter than the MREs made in the late 1990s.  

As a result, what any of us learn about currently old MREs may not be applicable to modern MREs when they reach a comparable old age. 

Now a limitation, as we would say when describing a scientific experiment, is that this was “an n of 1;” that is, it was just one MRE and perhaps it’s the exception rather than the rule.  However, in 2013, I tried several of the 1999 MREs including one with identical ingredients to this one, and all of them were fine; and in this MRE, more than one component had the old oil smell.  That makes me pretty confident that what I’ve observed is real (at least for Mil-Spec brand MREs).

So my conclusion from this very long experiment with pre-Y2K rations is to keep "expired" MREs around as a back-up set for one extra shelf-life.  And with that, I think I'll stop looking for old food to eat--although--wait, didn't the ancient Egyptians leave food in the crypts with their deceased Pharaohs?  Hmm...

Link to this article Back to top

More fun with expiration dates: some things really DO expire!
If you have been following this blog, you know that I’m fascinated with expiration dates.  I’ve reported that MREs last far longer than their presumptive expiration dates , that water envelopes and SOS food bars also last past their printed expiration dates, that unopened commercial gallon jugs of water basically don’t have an expiration date according to the FDA , and that stored lithium batteries last for many, many years .  Perhaps I should explore whether dates have an expiration date.  However, you really should still check your emergency supplies every year or two to see if anything needs to be replaced due to expiration or obsolescence.

Also, if you have been following this blog, you know that I moved over a year ago and have been so busy with other things that various precautions that I usually take for granted took me an embarrassingly long time to implement.  One of the final things that I just got around to doing this month has been to dig my emergency supplies out of the “still to do” pile and check them.  And I’m glad I did, because my canned food all had use-by dates in mid-2016.  While it’s well documented that a tragically large amount of perfectly good food is thrown away due to arbitrarily chosen “use by” dates , in the case of canned food, some of these dates are real and should not be ignored.

So my negligence gave me the opportunity to run a little experiment for you all!  I opened up samples of each canned good that was 1.5 years past the use-by date to see what was still good, and I’m giving you the results here.  I replaced all of my canned supplies whether good or not, but I tossed the ones that were bad and I’m incorporating the ones that are still good into my current meals.

(In case it is not obvious, this was written at the very beginning of January 2019, and posted a few weeks later)

First, here are the canned goods that were still fine:

Corn (Del Monte) in water, expiration date Aug 2016:  Tastes good, smells good, good crunchy texture.  I’ve been snacking on it.

Whole white potatoes (Safeway), exp. June 2016:  Not exciting but still fine.

Whole beets (Safeway), exp. June 2016:  Perfectly fine.  I’ve been snacking on them; I actually had a beet instead of a cookie the other day!

Now here are the one that I tossed but would still be ok to eat if food were limited:

Corn (Green Giant) “Steam Crisp” (packed without liquid), exp. Oct 2016:  Ok, but not crisp and not sweet.  Not unpleasant, but bland and boring.

Now here are the ones that I tossed because they were unpleasant:

Almonds (Blue Diamond), unsalted, cans with peel-back foil and plastic lids, exp. Aug 2016:  They smelled a little off and were ballooning at the sealed foil.

Garbanzo beans / chick peas (Bush’s Best), June 2016:  Smelled unpleasant.

Sliced peaches in extra light syrup (Del Monte), exp. July 2016:  Good flavor, but soft and mushy.

Apricot halves in 100% juice (Safeway), exp. March 2016:  Not sweet at all and somewhat bitter, completely mushy and falling apart; very unpleasant!  (In fact, I waited a week to write this so that I could confirm that I did not keel over after tasting one.)

How about dog food?

More fun with expiration dates: some things really DO expire! I have supplies for Milo in our emergency kit as well: small cans of his Natural Balance wet food and also sealed bags of his w/d prescription kibble in the portable kit.  The kibble was the subject of my earlier article about using oxygen absorbers to essentially vacuum-pack supplies in sealed mylar bags.  However, I have not known how long the kibble would last, and these bags were filled in July 2016 with kibble that itself had a printed use-by date of October 2017.  As you can see in the photo, the bags were still shrink-wrapped from the oxygen absorbers.  And when I opened one, the kibble did not have a bad smell at all.  However, it also did not have much of any smell at all; it seemed to have become very bland at least to the nose.  I ended up tossing it rather than using it so Milo could still have tasty food.

Some of the wet food cans also had use-by dates of a year ago or more (I forgot to write down the dates).  I did not even bother to open them; since wet dog food can smell a little odd to the human nose even when dogs love it, I would not want to guess if an extra odd smell had appeared so I just tossed them to not take any chances.

Vitamin pills: cute idea but let’s not try that again

More fun with expiration dates: some things really DO expire! In addition to having a week or two (I had one week but now I have two) of certain medications that I take like statins, which I tend to let go maybe a year past their use-by date but then swap out with my daily meds to refresh the ones in the kit), I decided several years ago to include a bottle of vitamin pills.  I decided to have a little fun and put in these Centrum “Flavor Burst” mixed fruit adult chews that look like brightly colored gumballs (I have a soft spot for artificially colored food with colors not even remotely resembling anything found in nature).  Well, I noticed that they expired in 2014, and boy did they expire; a bunch of them had spontaneously exploded in the bottle!  Oh well.  I replaced them by adding in a couple of weeks of my normal multivitamin pills with the meds and I noted the expiration date from the source bottle.

What else can go wrong?

Then there were the other things in the kit that needed to be replaced for various reasons that were sometimes surprising.  My Eton American Red Cross emergency radio in its beautiful red shell was… sticky!  Very sticky!  Even though it had been sitting in its box in a compartment of my emergency kit and was not to humid or hot or anything.  Gross.  I have ordered a new one.  (Yeah, I know, “insanity is doing the same thing…” but perhaps this was a fluke; they are a reputable company.  Plus, the product has been redesigned last year.)

More fun with expiration dates: some things really DO expire! Then the one that really made me laugh is that I have a cool Energizer cell phone charger that works off of standard AA batteries, and I also have a solar chargeable charger pack that can charge cell phones.  I opened both of them for apparently the first time in ages, and the accompanying photo will show you the problem!  (For future historians who are reading this blog in the 23rd Century to see how we Silicon Age civilizations prepared for earthquakes, these wide iPod plugs have not been in cell phones for several years now.)  I included an appropriate adapter cable for the AA battery charger and swapped in a new cable for the solar power battery.

So there you have it: not everything lasts forever.  Even waiting an extra year from when you had planned to check your supplies is not a good idea.  And even non-consumables can go bad as technology evolution leaves them in the dust.  Now I must remember to back up this article… let’s see, where is that floppy disk drive again…?

Back to article index

Link to this article Back to top

How to vacuum pack dry supplies without a vacuum (the magic of oxygen absorbers)
How to vacuum pack dry supplies without a vacuum (the magic of oxygen absorbers) Today I’m sharing a tip about preserving dry emergency supplies, from a chance observation that I was surprised to make a couple of years ago.  Most of my emergency supply food is in the form of MREs , emergency food bars , and canned food.  However, I also wanted to store away a few small bags of my dog’s kibble (dry food), so I parceled out portions into a couple of heat-sealable Mylar bags to be sealed and stored in my emergency kit.  To ensure that they were adequately preserved, before sealing each one, I tossed in a fresh oxygen absorber packet, the kind that you commonly see in sealed bags of jerky and other preserved foods to remove oxygen from the sealed contents and avoid oxidation.  These sealable Mylar bags and oxygen absorbers are easy to find online.

I also took the same approach to preserve some dry dental hygiene treats (yes, still for the dog) that I could only get in a large bag; I wanted to preserve smaller bags of them and open them successively over a couple of years.  This was not for the emergency supplies; it was simply a way to stretch the contents of the large bag over a longer time than I felt they would last after opening once air got in.

No, I haven’t gotten to the surprising part yet.

In both cases, I pressed as much air out of the bags as I could before heat-sealing them, but since the contents were dry hard pellets, it was impossible to get rid of ALL of the air since the air left between the hard objects could not be pressed out.  That means that the bags right after sealing were firmly enveloping the hard contents but the outside surfaces of the bags were smooth and flat.

However, when I looked at the bags the next day, in both cases, I was surprised to see them appear to have been shrink-wrapped and vacuum-sealed, even though neither was the case.  That is, there were invaginations in the bag surface between each pellet, it looked like crinkled foil, and it was completely stiff with no movement at all of the contents inside!  As close to a perfect vacuum as one could get with no actual vacuum device!

How to vacuum pack dry supplies without a vacuum (the magic of oxygen absorbers)
I would not have guessed this in advance, but the oxygen absorbers apparently were able to remove enough gas from the sealed bags that they effectively vacuum-packed themselves.   This is shown in the photo of the dental treat bags, in which the bag on the left was sealed the day before, and the bag on the right was just sealed a few minutes before the photo was taken.  And yes, that bag on the right looked like the bag on the left the next day.

The next pair of photos shows one of the kibble bags that I just removed from my emergency kit to photograph, viewed from the front and side.  It’s as tight as it can be, like a brick, completely vacuum packed still nine months later.
How to vacuum pack dry supplies without a vacuum (the magic of oxygen absorbers)

Perhaps a chemist will weigh in here; I was a bit surprised since air contains only ~20% oxygen (78% is nitrogen), so if the oxygen absorber only absorbs oxygen, I would not have expected it to effectively remove all of the gas from the bag.  However, I’ve done this several times and it always happens.

So you can actually vacuum-seal and preserve dry supplies even if you don’t have a vacuum sealer, just as long as you can heat-seal bags and have oxygen absorbers.

By the way, a few years ago, I had an e-mail correspondence with a representative from Pack Fresh, one of the companies that manufactures oxygen absorbers and sells them on Amazon.  I learned some interesting tips about preserving supplies in heat-sealable ziplock bags; that is, the bags that have a ziplock top but then extra material beyond the ziplock part that you can heat-seal (the bag is completely sealed until you rip the top part off and then you can re-close it with the ziplock).  That ziplock part is just plastic, not Mylar, and I was surprised to learn that oxygen goes through even the closed ziplock because the plastic is somewhat permeable to oxygen.

That means that if you take an ordinary plastic “Ziploc” bag and close it, oxygen can still get in.  If you have a Mylar bag with a ziplock top that is closed, oxygen still gets in, more slowly.   You need to heat-seal the opening of the Mylar bag to truly keep the oxygen out.  This means that if you put supplies into even a Mylar ziplock bag with an oxygen absorber and just close the bag with the ziplock part, oxygen will ultimately get in and overwhelm the oxygen absorber, and you will not have successfully stored away the contents.  For that reason, you should heat seal the top of the bag for long-term storage, and then when you ultimately open it, you can use the ziplock closure for subsequent closing for short-term storage.
[Note added 3/5/2021:  It's true!  I bought a bag of chicory granules online, to add to coffee, and could only get a 1 lb bag, which is like a lifetime supply since I only add it occasionally when I feel like it.  It also takes up too much space on the shelf by my coffee supplies.  So I decided to put a manageable amount into a smaller container, and store away the rest for the future by putting an oxygen absorber in there, and tried just squeezing air out and closing the bag with its ziploc top.  Not only did it not shrink down, it even inflated a little.  I then sealed it with the heat sealer, and it became vacuum-packed.]

How to vacuum pack dry supplies without a vacuum (the magic of oxygen absorbers) He also told me that while an actual heat-sealer (like that used for Seal-a-Meal bags, the photo shows mine) is great, many people just use a clothing iron or a hair iron and that works as well.

Of course, if you really want to go all-out and your bag contents are dry, you can also toss in a desiccant packet before sealing the bag.  Interestingly, a comment was left on my recent article about keeping emergency cash in emergency kits , from someone who had put some paper money in their kit and opened it years later to find that it had gotten moldy!  I checked my paper envelope of emergency cash and it is fine, but I guess if you suspect that moisture might be a problem, you could also seal emergency cash in a Mylar envelope with a desiccant packet inside.

So there you have it; how to shrink-wrap bags with oxygen absorber packs.  However, this doesn't work for everything; please don't attempt to reduce your waist size by eating oxygen absorbers!

Link to this article Back to top

Further adventures with expiration dates for food and water: Emergency water envelopes and S.O.S. Food Packets
Long-time readers of this blog (there are some, aren’t there...?) will know that I’ve developed a minor obsession with seeing how long I can use emergency food and water past their expiration dates.  That’s not as wacky as it sounds, since most “expiration dates” on food are normally "use-by dates," and are actually “best-by dates," arrived at by a variety of approaches that have nothing to do with them becoming harmful to health.  Tossing and replacing good food and water is wasteful of money and effort.  Still, some supplies really do go bad, so it’s worthwhile to figure out where to draw the line.

Further adventures with expiration dates for food and water: Emergency water envelopes and S.O.S. Food Packets
I’ve already told readers about the FDA’s statement that you can ignore the expiration date on sealed, commercially bottled gallon water jugs , and I’ve determined and reported that MREs (Meals Ready to Eat, a popular kind of military and emergency relief ration) are as good as a can of Hormel chili even after a decade and a half , 7 years after their theoretical best-by date.  However, in addition to gallon water jugs and MREs, I have additional emergency supplies in the form of US Coast Guard-approved emergency water envelopes (125 ml; 4.3 FL. oz.) and “Survival food packets” (also listed as "Emergency Food Rations") from S.O.S. Food Labs, Inc. that are single-serving meals in the form of good tasting fat, sugar, and protein.  Both of these are good for storage in portable go-bags, in the car, and at work due to their light weight and compact size.  I purchased both kinds of rations some time around 2006-2007, I think, and they each had manufactured dates of 2005 and expiration dates of 2010.  I put them in my portable emergency kit at home, in my office at work and in my UCSF lab, and in my car, and forgot about them for a while.

The fact that two completely different kinds of emergency supplies from the same company both have the exact same stated shelf life should already suggest to us that these dates are somewhat arbitrary, and I have interpreted them loosely.  Since the car is sometimes out in the hot sun, I have been good about periodically replacing the food and water in the car (more on this below), but the supplies at home and work just sat there, and in early 2016, I realized that I should probably check them.  It seems that my earlier successes with eating expired supplies have apparently made me a bit overly confident!

Water envelopes

Further adventures with expiration dates for food and water: Emergency water envelopes and S.O.S. Food Packets Let’s start with the water envelopes.  These are silver colored packets that, according to S.O.S. Food Labs, are plastic-lined aluminum packets (tri-laminate foil film structure; see figure on the right).  The S.O.S. rep also told me that the plastic lining is BPA-free, which puts this water in a similar situation to water that has been commercially bottled, unopened, in the BPA-free gallon jugs as in my earlier article about being able to ignore that expiration date .

Further adventures with expiration dates for food and water: Emergency water envelopes and S.O.S. Food Packets These envelopes are truly indestructible.  I haven’t pushed it to the max, but you can put a good bit of pressure on the envelopes and they don’t burst or leak.  S.O.S. tells me that they have an average burst in foot lbs of 862.  As a testament to the twisted sense of humor of those who created them (or perhaps a testament to those people having fingernails and teeth like razor blades ), there is a little notch at one corner of the envelope that says “tear here.”  But you can’t tear there.  You can’t tear anywhere.  If you cut a real notch with scissors or a knife, you still can’t tear there.  Only by slicing or cutting the envelope completely open can you get at the water inside, so if you get stranded somewhere with these water envelopes and no knife or scissors or vampire, I’m afraid you’ll probably perish.

But the water won’t perish.  I opened it using the extreme method above, and found the water to be just fine.  Perfectly clear, no odor, and only the slightest stale flavor that is expected in water that has sat for a long time and can be removed by aerating the water; just expose it to air and shake it.  There was only the slightest hint of that taste, even 6 years after the "expiration date."  Therefore, since the water rations cost a lot and are heavy to ship, I opted to keep those water envelopes for emergencies for the foreseeable future.  Even if there was the slightest bit of some unknown chemical leaching in the water in small amounts, I feel ok about using such water for a few days or weeks in an emergency, even if I wouldn’t necessarily want to live on the stuff on a daily basis.

S.O.S. Food packets

On the other hand, I had mixed results with the food bars.  These are high-fat intentionally and have a lot of sugar; there are many ways in which they could go bad by having something grow in them or having the fat go rancid.  MRE rations are good for much longer than their best-by dates suggest (see my articles about the expiration date actually being based on subjective opinions by taste testers  and my subsequent article describing  my enjoyable experience eating a 14-year-old MRE ), but these S.O.S. food rations are not MREs and might not be as stable.

Many of my packages are dated 2010-2015, but I had four 2005-2010 packages in the lab, each containing 9 bars.  I noticed that three of the four packages were still tightly vacuum packed, but the fourth one had ballooned out a bit.  The one that ballooned out a bit had an "old cooking oil" smell that you also find in old nuts, and had probably oxidized, so I discarded it.  New bars taste kind of like peanut butter and sesame and are very sweet (if you click on the first photo to enlarge it, you can see the actual ingredients).  However, I opened one of the expired but still-vacuum-packed packages and sampled a bar, and found that while it smelled fine and it still tasted ok, it had the slightest old flavor as an after-taste.  I'm sure they are still good in an emergency but I decided to order replacements for the 2005-2010 food bars just in case.  Still, these are 11 years old and 6 years past their printed use-by date, so I’m guessing it’s reasonable to keep them around for about 10 years before replacing them.

I was pleasantly surprised, however, when I replaced the 2010-2015 bars that were in my car and opened the old one.  These were fine under controlled temperature conditions, but I had assumed that with frequent baking in the hot sun, the bars stored in the car would go bad very quickly.  Not at all; the package was still tightly vacuum-packed, and the bars inside were just as good as the 2010-2015 bars that had been stored indoors.  There was one little section of the bar that was more solid than the rest and hard to bite through, but it all tasted so good that I admit I finished off the rest of it as a late night snack!  Then I thought about the presence of vegetable shortening in the ingredients, which for something manufactured in 2010, certainly means partially-hydrogenated oils, and decided not to snack on the remaining eight bars in that opened package for casual use.  I can live with a bit of trans fats for a few days after a regional emergency.

IMPORTANT:

As long as the packaging is intact and there is no extra air, a food product in which nothing has grown in 5 years should not spawn life during the subsequent 5 years .  It's always possible that some spore could be in there that takes over 5 years to activate, but I think that is unlikely.  I also presume that if chemicals haven’t leached out of the packaging over 5 years and the product is not stored in the heat or light, it’s doubtful that chemicals will leach out into the food in the subsequent 5 years to an unhealthy extent for temporary emergency use.  I’m presuming that if it doesn’t taste or smell bad, then the worst risk of eating it is that the culinary experience won’t be ideal .  However, I don’t have the authority to officially pronounce food to be safe, although I’m pretty confident of the logic and you can draw your own conclusions.  Similarly, it is my OWN opinion that the envelope water will be fine for much longer than the use-by date.  My information about ignoring the use-by date on unopened bottled water comes straight from the FDA, so I can confidently repeat it to my readers.  In contrast, the use of “expired” water ration envelopes is my own conclusion from the evidence and you can draw your own conclusions from what I’ve reported here.  In both cases, I take no responsibility if you sample vintage rations and grow a second nose.

Back to article index

Link to this article Back to top

Can you use a portable camping water filter to safely drink tap water after an earthquake in case your emergency water is gone? (Spoiler alert: the answer is no.)
It’s about a week after a major earthquake, and your commercial emergency water bottles, regardless of the date stamped on the side , are all used up.  There is no running water from your faucets, or there is water but your utilities company hasn’t yet managed to confirm that it is safe to drink, and the government is overwhelmed trying to bring in water supplies to a large affected area.  Your water heater and UPPER toilet tank are emptied out.  And even if you are in San Francisco, the potable water hydrants are defunct and haven’t been recertified yet.  What now?

Well, there are the long-known last resorts of using water purification tablets, boiling, diluted bleach, etc.  But there’s a new kid on the block, growing in popularity over the last several years: the personal water filter.

I may be a bit behind the curve on this one, but I’ve only recently become aware of several types of portable, lightweight, hollow fiber membrane water filters that you can use to drink water directly from potentially unsafe ponds and streams.  These filters, the best-known of which are the LifeStraw from Vestergaard and the Sawyer MINI from Sawyer, let you suck water through them directly from the questionable source and drink it.  Last month, a reader inquired as to why they weren’t on my list of emergency supplies, and I decided to investigate.

I was pretty impressed by these devices, at least regarding use in the undisturbed wilderness.  I know that putting one end of a cylinder into a pond with Cryptosporidium and Giardia (which are as bad as they sound), or MONSTER PARASITES THAT EAT YOUR BRAIN (they are probably out there somewhere), and sucking water through the cylinder and DRINKING IT might sound concerning.  However, these hollow fiber filters are quite good at keeping out the bad stuff while letting the water in, and still allowing water to flow quickly enough that you can drink it in real time.  Time Magazine gave LifeStraw their award for Best Invention of 2005.  The LifeStraw and Sawyer filters use FDA-compliant materials and yield water that the companies report to meet US EPA drinking water standards and World Health Organization “highly protective” category standard of safe water.  Hang on, though, we’ll look more closely at these health claims in a minute.

Can you use a portable camping water filter to safely drink tap water after an earthquake in case your emergency water is gone?  (Spoiler alert: the answer is no.)
Hollow fiber filter (from Sawyer website)
First, let’s look at how they work (humor me, I'm a scientist).  Inside the cylinders are bundles of tiny hollow fibers with tinier holes in their walls.  The fibers are bent so that both ends are densely packed toward the drinking end of the cylinder, and the middles are facing the water source so that water has to get from outside the fiber to inside the fiber before it can come out the drinking end (or perhaps the other direction, descriptions vary).  The size of the tiny pores determines what gets filtered out.  Because the fibers are so small and there are so many of them, there’s a huge surface area for filtration, and the water flows through the filter fast enough to have a satisfying drink.

They do have a finite lifespan of use, however, with LifeStraw filtering up to 264 gallons (that’s 1000 liters, so it really is a round number) and Sawyer Mini filtering up to 100,000 gallons.  They also store indefinitely.  For a while, LifeStraws were given a storage life of 5 years but this was later revised to indefinite.

Can you use a portable camping water filter to safely drink tap water after an earthquake in case your emergency water is gone?  (Spoiler alert: the answer is no.)
LifeStraw
Can you use a portable camping water filter to safely drink tap water after an earthquake in case your emergency water is gone?  (Spoiler alert: the answer is no.)
Sawyer MINI
They also come in different forms that have varying advantages depending on what you want to do.  The basic LifeStraw is about 9 inches long and you can see pictures on the web of people lying down to get their faces within 9 inches of the surface of a pond; perhaps not ideal on a muddy shore or one infested with scorpions, but probably not a problem if you have scooped up a bottle of water from a suspicious pond and are drinking that through the filter.  The Sawyer MINI is even shorter, 5 inches including its tips, so it fits better into backpacks, and it has a real straw that attaches to the end that effectively extends it to 12 inches.  They both have the ability to be attached to standard water bottles and you can get them with their own bottles and bags.  Here’s where Sawyer has a nice feature; while they both have bottles that incorporate the basic filter cartridges, these take up space, and the Sawyer has a bag that screws onto the bottom of the cartridge but can be rolled up when empty, taking up practically no space.

Most importantly, what about health?

LifeStraw filters through 0.2 micron pores.  (A micron, or micrometer, is one one-thousandth of a millimeter; the typical bacteria living inside your gut is about 2 microns long and about 0.5 micron wide.)  LifeStraw claims that this yields good drinking water, EPA compliant, etc.  Sawyer filters to 0.1 microns or 0.02 microns depending on the version.  Sawyer states that the 0.1 micron filter takes out 99.99999% of bacteria and 99.9999% of protozoans (like Cryptosporidium and Giardia), but does not remove viruses due to their smaller size.  Sawyer thus considers this filter safe for travel around the North American wilderness but not for third world countries, in which viruses like hepatitis A in the water supply is a big concern.  (Human-infecting viruses do not persist in the wild; their presence in the water is typically from contamination with human waste/sewage.)  They claim that the 0.02 micron filter takes out 99.9997% of viruses and that this exceeds EPA recommendations, although they point out that the 0.02 micron filter takes a longer time to pass water, and suggest that you use the 0.02 micron filter if you will go to a third world country.  Unfortunately, the 0.02 micron Sawyer filter system does not appear to be available in the small portable size, and is much more expensive.

(But wait, LifeStraw makes a big deal about its filters with their 0.2 micron filtration being used in developing countries; they have been partnering with various charities to give free filters to people in various African countries, Haiti after the recent typhoon, etc.; so this contradiction is confusing.)

It’s worth noting that these pore size figures are not the average pore size, with some pores being smaller and some larger; they are absolute pore sizes, so no pore should be larger than the number given.  One more important point is that these are physical filters; they don’t include resins or activated charcoal so they don’t take out chemicals or bad tastes like commercial kitchen water filters do (for example, Brita).  So if you use these to drink from germ-laden disgusting water, you’ll ingest germ-free disgusting water.  And remember, no filter can let you drink saltwater.

Ok, so what about health AFTER AN EARTHQUAKE?

Still, what concerns us most in this article is: what about health in a modern city after an earthquake?  After all, it’s one thing to wander around in the Rocky Mountains drinking from beautiful streams, but what will our water supply look like after an earthquake has potentially compromised our water pipes?  Well, I checked with emergency planners and water quality engineers at the San Francisco Public Utilities Commission, and I have disappointing (not to mention rather disturbing) news from Water Quality Division Engineering Manager Manouchehr Boozarpour.  Normally, our potable water pipes carry potable water, and our sewage pipes contain sewage, and never the twain shall meet... unless both kinds of pipes crack during an earthquake, in which case cross contamination is likely.  Yep, THAT’s what they mean when they say you need to purify tap water after an earthquake, and because the sewage potentially introduces viruses, which are not removed by the 0.2 and 0.1 micron portable filters, the water from your post-quake tap is likely to be more dangerous than the water in the mountain pond.

So, unfortunately, a LifeStraw or Sawyer individual filter tube does NOT offer sufficient protection to drink potentially contaminated tap water after an earthquake in a city.  The options that I can see to decontaminate suspicious tap water are to either pack one of these small filter tubes in your portable emergency kit but to also have water purification tablets packed to treat the water before you suck it through the filter, or to purchase one of the larger systems that would be intended for home use in the aftermath of a major quake but would be more difficult to take with you if you had to leave.   These kits consist either of Sawyer’s 0.02 micron filter that theoretically removes the viruses, but is slow and requires a large pumping mechanism; or a system that includes both a filter and a chemical water treatment step designed to inactive viruses like the Sweetwater purification system .  Note that chemical purification alone does not guarantee killing of Cryptosporidium and Giardia.  Boiling is great, but you can’t assume you’ll have the necessary heating source to do it, and flame is never a good idea around potential gas leaks.

Can you use a portable camping water filter to safely drink tap water after an earthquake in case your emergency water is gone?  (Spoiler alert: the answer is no.)
Purification systems that remove or inactivate viruses
But guess what, even making your water non-infectious doesn’t mean it is safe.  If the ground in your local area, or wherever the pipes are buried, has high levels of industrial pollutant chemicals, then these can also get into the water supply after an earthquake.  I would not count on Brita water filters to solve that potential problem, and boiling that water won't make a difference.  Many regions do not have this problem, but some do.  For this reason, I think the best advice I can give here is to be prepared and able to remove/inactivate microorganisms including viruses, BUT to drink only your stored emergency water until you have heard from your own local authorities about what problems are affecting your own local water supply.  It follows, then, that none of these purification systems get you off the hook from having to store emergency water.

The Centers for Disease Control has a very useful and detailed document about emergency water purification that is worth reading.  (Just don’t be surprised to see their comment that you should observe printed expiration dates on commercially bottled water, which contradicts the FDA’s advice about which I wrote last year that you can ignore those dates .  Remember that the FDA is the agency charged with regulating safety of bottled water, so I am comfortable giving priority to their advice on the matter.)  One of the links on that page takes you to another useful guide about relative effectiveness of different chemical purification methods .

Bottom line: I still advise keeping sufficient emergency water supplies handy so that you don’t have to purify tap water in the first place.  Still, we can’t know that a more extended water shortage won’t develop (remember, the Red Cross is recommending TWO weeks of emergency supplies now), so having the ability to remove microorganisms including viruses may still come in handy if the local authorities tell you that you can drink the water if it's been boiled.

I had never realized how much we take our water faucet for granted!

Back to article index

Link to this article Back to top

Most people don’t know about San Francisco’s emergency drinking water hydrants, but it’s probably just as well...
Apologies to most of my readers, but this article is specific to San Francisco.  For decades, I believe, this city has had a separate network of hydrants for drinkable water, in addition to the fire hydrants.  There are about 65 of these hydrants, identifiable by their blue drop logo, spread throughout the city, with the idea that if water supplies were disrupted and people didn’t have enough emergency water stored, they could go to these emergency potable water hydrants and fill up.
Most people don’t know about San Francisco’s emergency drinking water hydrants, but it’s probably just as well... That’s a nice idea, but getting information about these theoretical hydrants in the last few years has been like trying to locate unicorns.  We keep hearing about this program, but official information has been next to non-existent.  There was one source for a while, drop2drink.org, that provided a map of the hydrants, but a few years ago, that site mysteriously turned into a Thai wedding site!  (And some emergency info resources still link to that!)  To make matters worse, when I looked around the vicinity of where our closest hydrant was supposed to be, I didn’t see anything obvious.
I thought we had a breakthrough just a few weeks ago when I learned through SFist.com about a new interactive map that had shown up on Foursquare that was really pretty comprehensive.  It even had photos of some of the hydrants like the one at the top of this article, so I really thought we were getting somewhere.
So, imagine my surprise today when I revisited SFist and found a new article in which they had interviewed San Francisco Public Utilities Commission (PUC) emergency planning director Mary Ellen Carroll, who called the program out of date and said that the water in the hydrants should NOT be used after an emergency unless the PUC certifies it as ok, with no guarantee that it would turn out to be ok.  In fact, the article quoted Public Outreach director Amy Sinclair as saying that there's "no way should ANYONE be opening these hydrants except the Fire or Water Departments.”  Ms. Carroll went on to say that “We've been working over the last three years to develop a different plan and to walk away from the blue-dot hydrants for the moment.”  The whole article can be seen here .
Well, I guess if you are being wise and saving emergency water in your home (official recommendation of 1 gallon per person per day for 7 days), you hopefully won’t be missing those hydrants (and if you don’t live or work in San Francisco, you would not have cared about them anyway).  Remember that as I reported last year , the FDA says that unopened commercially-bottled water jugs can be stored indefinitely, and that the “use by” date printed on the jugs is really a best-by date rather than an expiration date.  As for the legendary SF emergency drinking water hydrant program, it sounds like the legend is about all that’s left.

Link to this article Back to top

The ethical dilemma of being prepared when other people aren't
This is somewhat of another sequel to the previous post about old MREs .  Don’t worry, this isn’t turning into an MRE blog, but there’s an important aspect of emergency preparedness that people tend to ignore, and I want to raise it here: How do you prepare for the desired number of days without ignoring the plight of those around you who didn’t prepare?  As we head into the season when people are most likely to think about the folks who are less fortunate, it seems like a fitting topic.  I don’t have perfect answers, but I would like to offer some food for thought.

Here’s a scenario:

Being wise and sensible, and a frequent reader of this blog, you have stashed away enough food, water, and other supplies to be self-sufficient for at least 7 days after a disaster even if your regular supply of food was at a low point when the disaster struck.  The food has not gone bad , the water is fine , your kit is in a reasonable location , etc.  Then, a major earthquake occurs!  Stores and banks are closed, and everyone is on their own for a while.  Good thing you and your family are set for 7 days.  But wait: the neighboring family never got around to preparing, or didn’t think it was that important, and after 2 days, they are out of food!  Or perhaps several neighbor families.  They are hungry; they have hungry kids.  They see that you have enough for 7 days, and they ask you for some of your food.  “You don’t need 7 days of food; surely the stores will open or the government will bring in supplies before then, and my son is hungry now!”  And these aren’t total stranger neighbors; these are your friends.

What are you going to do?

After all, the whole point of your careful preparations over the years, for just this event, was to have supplies to last you and your family for 7 days, not to have 7 days worth of supplies that you hand out to other people on the 2nd day and then you don’t have any more for yourselves on the 4th day.  Basically, if you desire to be prepared for 7 days, you should have the right to do so.

Well, I’m not a professional ethicist or a spiritual leader, and even the fact that I consider myself to be an ethical guy doesn’t give me the standing to dictate the correct moral solution.  However, I have thought about the issue a great deal for many years, so at least that puts me in the position to make one non-controversial point: if you have supplies for your family for 7 days, and other families (especially with children) near you have none, then you are going to have a problem.  My goal in this blog is to point out potential post-quake problems and to suggest pre-quake solutions.  In this case, my pre-quake solution is: don’t ignore this issue.  Your solution, depending on your philosophy, could be “I’ll make sure that I have enough and won’t be able to give anything to anyone who didn’t prepare.”  It could be “I will not turn down a neighbor in need; guess I may not really have 7 days of supplies after all.”  I suspect many people would be uncomfortable with the first, and the second seems rather self-defeating.  Surely there’s a way to have 7 days of supplies without refusing to help hungry neighbors or other people in need.

Surely there’s a middle ground.

One way out of this would be to have purchased enough food for your family AND for a few extra people.  It would certainly be very thoughtful.  On the other hand, if you are storing MREs, they are actually rather expensive, so storing away a substantial amount of extras increases the financial burden.

Those who read my previous article know where this is headed.

I am reluctant to officially give advice here, but I’ll tell you what I have done.  Because I have demonstrated repeatedly to my satisfaction that MREs are still fine even after twice their “best by” shelf life ( calculated the old way, not the new shorter way ), I am storing not only the current batch but the previous batch as well.  That is, I have a “current” box of MREs that are within their recommended lifespan, and I have a “previous” box of MREs that have surpassed that shelf life.  The batch even before that (14 years old) was still good, and I not only ate the few that I tested for the previous article, but I have gradually used up all of the other 14 year-old provisions over the past couple of months so that I don’t end up throwing entire MRE batches into the garbage and waste all that money.

This way, I have all of the current provisions that I had planned on having, and I also have the previous cycle stored away that I could use to hand out to those who needed a boost.  If I did that, I would certainly explain to the recipient all about the shelf life and my 14 year old MRE experiment, and would probably be there when the first one was opened to ensure that it was as good as expected, perhaps even taking a bite to prove that I wasn’t passing off bad food!  The fact that my current 14-year-old MREs are fine suggests, but doesn’t prove, that the next 14-year-old MREs will be fine.  In fact, my experience was only with one manufacturer, Mil-Spec, and there are other brands out there so perhaps my experience won’t extend to those.  I suspect, however, that these are all packaged in essentially the same way.  Still, I’d feel better inspecting one to ensure it hasn’t ballooned out and doesn’t smell bad before passing it off to others, and I could also ensure that I could warn them about dishes known to become unappetizing over time ( such as the applesauce and jam ).

So there’s my humble suggestion on how this problem might be avoided without any extra outlay of money if your MREs have already gone through a “best by” cycle and you have a previous batch.  It takes up extra space but the space isn’t wasted; in fact, if you don’t have to give these to other people, then you can even consider it an extra layer of protection if the aftermath of a disaster lasts longer than 7 days.  If you have only purchased MREs for the first time, then clearly this isn’t applicable to you; perhaps you could store away a few extra cans for the purpose (but remember that the shelf lives are just 2-3 years).

Sorry, this also doesn’t apply to emergency water, since having uncovered a few months ago that the commercial bottled water from the store doesn’t really expire , you won’t have an “old batch” to give people, but at least there are other sources of drinkable water and ways to purify questionable water, so this isn’t as big of a problem.

Now, if any readers have gotten to this point and are thinking “what a jerk, passing off expired food to other people,” I emphasize again that I’ve been eating these myself, and haven't found it to be a bad experience.  I think this is a creative solution to two problems: how to help the less prepared people around you while still successfully having your full 7 days of supplies, and how to avoid wasting food that is still good.  Even if you are well-prepared, the first few days after a disaster may not be enjoyable, but hopefully your stomach and conscience will both be feeling ok.

Back to article index

Link to this article Back to top

MRE shelf-life follow-up: Ever wonder what a 14-year-old MRE tastes like?
Several days ago, I ate an MRE with an "expiration date" of 2005, and lived to tell about it.  Actually, it was pretty decent, Chili and Macaroni “Menu #4” from Mil-Spec packaged in 1999, not any worse in flavor or texture than what one would expect from a typical canned version from the grocery store.  Considering its age, it was practically gourmet!
MRE shelf-life follow-up: Ever wonder what a 14-year-old MRE tastes like?
For those of you who have not been following this blog since May of 2011, I wrote an article about MREs (meals ready to eat; military/emergency rations that are popular in emergency kits) in which I reported that while MREs have long had charts from suppliers showing shelf lives as long as 10 years depending on ambient room storage temperature, the official estimated shelf lives had recently been made considerably shorter .  However, I also reported that this was based not on “going bad” but instead on subjective taster opinions about when the meals were no longer at their best flavor and texture, and that there was every reason to think that they would be edible and not harmful for years to come.  There are reports that most of the components (notably not peanut butter, cheese spread, or applesauce ) were just fine at the end of the shelf life, and I myself had tried eating one at the end of the 7-year recommended shelf life period corresponding to the ~70-75 degree F temperature of my closet (in 2005) and had found it perfectly fine, if admittedly not finely perfect.  I therefore kept that batch for back-up (more on this in a future post) and purchased a new batch with a recommended shelf life for my closet temperature of 2005-2012.
Well, here we are at the end of that new cycle, a little late actually in 2013, but I figured it was ok based on the experience with the 2005 expiration meal at the end of its recommended life.  I purchased a new batch (this will be 2013-2020), planning to keep the remaining 2005-2012 MREs as backup, and found again that a new meal that I tried was better than the expired 2005-2012 MRE, but the expired one was not bad.  So naturally, I had to find out what had happened to the ones with 2005 expiration that I had been keeping as a back-up; would they have truly been edible if I had had to resort to eating them in the present?  I opened up each packet and sniffed first without encountering any foul smells.  Then I heated up the entrée and gingerly touched my tongue to it, so far so good.  Took a small bite, no problems noted at all.  Ate the meal, mmm mmm good.  And there you have it, the 2005 “expired” meal, which was packaged in 1999, was about as good in 2013 as it probably would have been in 2005.
To be exact, the chili and macaroni was fine, not up to restaurant or homemade standards but certainly worthy of canned lunch food.  The crackers were ok, with just the SLIGHTEST hint of “old cracker” taste but really not bad.  The chocolate covered cookie was delicious.  However, the packet of strawberry jam was darker than I imagine it was initially, and had a slight old smell to it; it probably would not have been bad for the health but I opted to not eat it.  Of course, I scoffed at the instant coffee packet.  (Starbucks, bless their hearts, are like cockroaches in a way; they will still be on every corner after the earthquake or nuclear blast.)
A few days later, I tried another one from that old batch, beef stew.  I squeezed it out of its package into a bowl (I didn’t bother using the heater packet and just microwaved it instead) and got a little worried because it did not look very appetizing.  I microwaved it and stirred it up, and it actually looked a lot better, but I was still skeptical at the tiny size of the pieces of beef and potato.  However, when I ate it, I was pleasantly surprised; despite the small size of the meat pieces, they were nice and meaty with good texture, not tough, not mushy; the potatoes held up; a little on the salty side but not a deal breaker—again, as good as I would expect from a can, and this was 14 years old.  A third meal, with an entree of chicken breast strips with chunky salsa, was also quite good despite the chicken being a little dense; although the applesauce was dark as expected , looking and smelling like a cut apple that had been left out too long; I tossed the applesauce.
This is consistent with an article that came out recently in the San Francisco Chronicle about “expiration” and “best by” dates of food frequently being far earlier than necessary, resulting in the disposal of massive amounts of good food by US consumers.  It’s also in line with what I recently reported in this blog about the FDA stating that expiration dates on bottled water were not really valid and there was not actually a reason to dump out store-bought emergency water jugs every couple of years.
In fact, I’m starting to get a little nervous because here I am telling you about how its ok to drink expired water and eat expired food...let’s just frankly remind everyone that I don’t have a higher truth and can’t make official statements that something is safe; I cannot guarantee your health and would not want to be held legally responsible for telling you do ignore an expiration date.  I can, however, tell you that the FDA has said exactly that for the water, and that the expiration dates for the MREs have best-by estimates that are not based on health, but rather on taste and texture.  You should use your natural senses and good judgment to determine if something in an old MRE is clearly bad (smells odd, green fuzzy things swimming in it, populations of microscopic Whos yelling “we’re HERE,” etc.) as you would with any long-term stored food.
MRE shelf-life follow-up: Ever wonder what a 14-year-old MRE tastes like?
Want to know when your MRE was packaged?  Each MRE component is date coded with a series of numbers.  The numbers include the production year, and the day produced in addition to a lot number extension.  Look for a number stamped on the package that looks like 9077M1 2 1FD2 (in the case of my old MRE that I tried).  The last groups of numbers refer to lot number so you can disregard them, and the packaging date is encoded in the first numbers, 9077M1, just in the first four digits.  The “9” in 9077M1 stands for the last digit of the year, which is presumably 1999 since I purchased it in 2000 (one bought today with a number like that would presumably be from 2009 but you need to have some rough idea of how old it is to be sure).  Next look for the three subsequent numbers.  In mine, 077 represents the 77th day of the year, or March 18th.  So my old MRE that I tried, with a stamped number of 9077M1 2 1FD2, was presumably packaged on the 77th day of 1999, which is March 18, 1999.

[Update, 12/31/18: I have some MREs from a different manufacturer, MRE-STAR, and the number  before the letter has 5 digits rather than 4: "16173B2 07:47"  I purchased this set in 2016, so I'm guessing that rather than the first number denoting the last digit of the packaging year, this company may take a more user-friendly approach and the first two digits are the year, which would be 2016 and would make sense.  Then presumably the 173 would be June 20, 2016; although that isn't really all that important.]
So now I have three different batches of MREs, one current, one recently “expired” as a back-up, and one legacy group of MREs that probably had siblings that fed US troops in Kosovo.  That last group is still ok but I don’t know how much longer it will be that way, so I don’t plan on keeping that whole batch around for another cycle (more on this in a future post).  I will just eat the remaining old MREs occasionally over the next few weeks to not waste the money (although the sodium content of these varies widely, from 10% to 64% of the daily suggested amounts in the ones at which I looked, and some have partially hydrogenated oils; save daily consumption for emergencies).  However, I think I’ll stash one or two of them away to test in 2020, out of morbid curiosity, and I’ll report back...I guess that means I’m committing to this blog for at least 7 more years!

Link to this article Back to top

Does bottled water really expire? The FDA says no!

Does bottled water really expire?  The FDA says no!
Every now and then, during the question period at the end of my talks, I get asked how long bottled water lasts and whether you can keep it past the expiration date; and I experience temporary panic.  You see, I have typically kept my bottled water a year or two past the printed expiration date, because I’ve found it to be such a hassle to lug 14 gallons (in our case; 1 gallon per person per day for 7 days*) to a sink, empty them (it takes a LONG TIME), discard the jugs, and lug 14 more gallons from the store and individually bag them to put them on the shelf in our closet!  I figure that even if it was unhealthy to frequently drink water that had been stored too long in plastic jugs, my emergency water is for an extremely rare event and I won’t mind a few days of it. 
(* QuakePrepare.com recently pointed out that the Red Cross now suggests 14 days of supplies...but we don’t have enough space!)
However, I worry about giving this advice to people, because while I have felt that it is probably not a problem, I don’t know for sure.  I would not want to counsel people to drink water that was potentially contaminated with leached chemicals.  So, I answer that the expiration date on those gallon jugs typically gives you a year or two, and that I tended to over-store mine but this was not official advice and I could not guarantee that the water was healthy.
Well, yesterday I was reading a back issue of Consumer Reports (from October 2012), and they had a letter in their “ask our experts” column asking how long water should be used after purchase and whether the expiration date was meaningful.  To my surprise, they said that the US Food and Drug Administration (FDA) considered bottled water to have an indefinite storage life as long as it was produced in accordance with regulations and was unopened.  Let’s take a closer look at this, because not having to rotate out all this water would avoid a major hassle.

I found an article on the FDA website from February/March 2002 about bottled water that concurred with what Consumer Reports said.  [As of June 2021, that article is no longer there, but I have found it reprinted in Food Safety magazine .]  Among the notable text:

"In the U.S., bottled water and tap water are regulated by two different agencies; the FDA regulates bottled water and the U.S. Environmental Protection Agency (EPA) regulates tap water... FDA regulates bottled water as a food... Bottled water is considered to have an indefinite safety shelf life if it is produced in accordance with CGMP [Current Good Manufacturing Process] and quality standard regulations and is stored in an unopened, properly sealed container. Therefore, FDA does not require an expiration date for bottled water. However, long-term storage of bottled water may result in aesthetic defects, such as off-odor and taste. Bottlers may voluntarily put expiration dates on their labels...”
more
So this sounds promising!  However, it’s from 2002, and while the page was last updated in March, the last few years have witnessed increasing debate about bisphenol A (BPA), the chemical in some plastics that’s been found in baby bottles, food can liners, and some plastic water bottles.  If I drink 10-year-old water from an unopened jug, will I be full of BPA?
more
The website of the International Bottled Water Association says that:
more
“BPA is a chemical building block used primarily to make polycarbonate plastic and epoxy resins... Many bottled water companies use polycarbonate plastic for their 3- and 5-gallon water cooler bottles. It is not, however, used in any retail-sized PET bottled water containers... As noted by Health Canada, an adult would have to drink approximately 1,000 liters (or 264 gallons) of water from polycarbonate water cooler bottles every day to approach the science-based safe intake limit for BPA recently established in Canada.”
more
So it probably isn’t in your water jug, and even if it is, it probably isn’t bad for you according to this website.  Now admittedly, this is the bottled water industry speaking here.  So let’s check back with the FDA, in an article about BPA checked 7/1/13 that was last updated 5/24/13:

“The Food and Drug Administration’s assessment is that the scientific evidence at this time does not suggest that the very low levels of human exposure to BPA through the diet are unsafe.
The agency has performed extensive research on BPA, has reviewed hundreds of other studies, and is continuing to address questions and potential concerns raised by certain studies.
FDA scientists have also recently determined that exposure to BPA through foods for infants is much less than had been previously believed and that the trace amounts of the chemical that enter the body, whether it’s an adult or a child, are rapidly metabolized and eliminated.
Research has shown that people are exposed to BPA because small amounts can migrate into the food and beverages from their containers. Reports from some animal studies have raised potential concerns that BPA exposure may cause multiple health problems, including reproductive disorders, diabetes and cardiovascular disease.
There have also been studies that contend that BPA is a hazard to people too. But FDA—as well as the European Food Safety Agency (EFSA)—has carefully assessed these studies and finds no convincing evidence to support that belief.”
more
The FDA’s assessment will satisfy some people, but not everyone.  Therefore, the next quote from their website is probably the most important:
more
“Plastic containers have recycle codes on the bottom. Some, but not all, plastics that are marked with recycle codes 3 or 7 may be made with BPA.”
more
Aha.  So I went into my closet in which I had installed extra shelves on the back wall to hold 12 gallons of water (we just did not have any room for gallons 13 and 14!) and took a look at one of the jugs, with 2011 expiration dates.  The recycle symbol shows a 2.  So now I have a few more reasons to feel ok about storing my emergency water for a long time, and not minding if it tastes a bit off if I ultimately have to use it.  If you are concerned about BPA, you can at least make sure you get water jugs that don’t have the 3 or 7 recycle symbol.
more
Does bottled water really expire?  The FDA says no! Does bottled water really expire?  The FDA says no! Remember also that if worse comes to worst, you can drink the water in your water heater assuming it is undamaged, and yes, the UPPER tank of your toilet has water that has never touched anything undesirable, as long as it is clear and colorless and doesn’t have added toilet cleaners.  The running water from the tap might be suspect if the water pipes are damaged, so if that is all you have, the Centers for Disease Control and Prevention (CDC) says to pass it through a coffee filter or cloth if it is cloudy, and boil it for 1 minute (3 minutes over 6500 ft elevation) before drinking whether it’s cloudy or clear.  If boiling isn’t an option, water purification tablets or a tiny bit of bleach can sterilize it; to 1 gallon water, add 1/8 teaspoon unscented bleach (8 drops, 0.75 milliliters) if water is clear or twice that amount if water is cloudy; mix and wait for 30 minutes.
more
Hmm, I see that the same CDC website also says “observe the expiration date for store-bought water” and so does the Red Cross.  Argh....well, it sounds like the FDA has been studying the issue pretty thoroughly and they are the ones who are charged with regulating bottled water.
more
Note though that if you take your own water from the tap or another source and store it in your own bottle, all bets are off.  There’s no guarantee that you will have safe water to drink after 6 months; it depends on the condition of the water and the composition of the container or liner that you use.  Also, everything I’ve said is based on US standards and I can’t vouch for its accuracy if applied to other countries.  Nonetheless, if you are buying bottled water in the US or of comparable quality standards, hopefully this information has quenched your thirst for knowledge.

3/10/14 update:   The San Francisco Chronicle ran a story today about a study in which some BPA-free plastic products were still observed to contain chemicals with similar potential effects as BPA.  The study hasn't undergone peer reviewed publication (it is based on toxicology reports from a commercial lab and a lab at UC Davis), and the products tested are gimicky sippy cups that change color, so it's difficult to infer whether this is relevant to those BPA-free clear plastic water jugs.  Moreover, your emergency water will be used for just a few days rather than drinking questionable water daily for years.  However, given the relevance of the recent report to the findings presented in this blog article, I wanted to mention it for the sake of providing a balanced picture.

10/16/14 update:  It's advisable to not store your emergency water bottles in hot areas; a shed in the middle of the back yard in the sun is probably not a great idea.  This may increase the chances of the plastic breaking down in as yet unknown ways.

7/28/17 update:  Out of curiosity, I have opened a bottle of water from my closet that has a 2011 best-by date and tasted it.  It actually tastes fine; better than the tap water in a lot of US cities, and with no hint of plastic or chemical taste.


You may be interested in reading the subsequent article that I posted on 10/16/14 about whether or not portable water filters can substitute for stored emergency water (they can't).

Link to this article Back to top

Your MREs (emergency rations) are good for up to 10 years--or are they?? An update...
Many of us have emergency supplies that allow us to be self-sufficient for several days after a major disaster; not just earthquakes, but floods, hurricanes, tornadoes, terrorist attacks, you name it.  Canned foods have a surprisingly short shelf life: typically 2 years and sometimes 3 years, and of course, what comes out of the can is not necessarily nutritionally balanced.  Therefore, MREs (“meals ready to eat”) have become very popular in emergency kits, and I recommend them in my talks.  These are military rations also used for emergency relief, and have a number of advantages including multiple nutritionally balanced menus, decent taste and texture, a little food-warming packet, and a really long shelf life…or at least they did until 2010.  Surprise!

Wait, what?  How did all these MREs suddenly get a shorter shelf life, and what does this mean for our emergency kits?  I was perusing the Internet for information about MREs that would help me write the article that I initially planned to post this month, and I came across many references on the web to the new guidelines that were just released last year.  It seems that the chart they’ve been using for years about MRE shelf life at various temperatures was based on tests of the original MRE formulations from the 1980s, at which time they contained a lot of freeze-dried foods.  Modern MREs have largely forgone the freeze-dried foods in exchange for sterile-packaged wet dishes, probably under nitrogen or at least vacuum-packed, that still have an excellent shelf life but one that is less than the limits for freeze-dried foods.
Your MREs (emergency rations) are good for up to 10 years--or are they??  An update...

Your MREs (emergency rations) are good for up to 10 years--or are they??  An update... I’ve included here the pair of pictures that are all over the web, taken from the MRE Info website , which is a site with information about MREs including history, menus, storage, and purchase.  Both show the shelf life increasing as storage temperatures decrease, but the rate is now much faster, to the point that they appear to be saying a typical closet floor temperature of 60-70˚F only gives the MREs a shelf life of 3½-4 years.  That’s not very impressive if you ask me, especially considering the cost.
However, I suspect that the effective shelf life is really longer than this.  Several points are worth noting.  Even these websites point out the difference between official recommendations and reality, and refer to personal anecdotal evidence that MREs opened after a decade are still good.  Ordinarily, I would not put much stock in personal anecdotal experience, but in this case, I’ll make an exception because I have my OWN personal anecdotal experience.  The last time I had my MREs reach their “expiration date” based on storage temperature (7 years in my closet at the time), I tried one, and it was fine.  Good enough, in fact, that rather than discard them and waste all that money, I had MREs for dinner for about a week and a half.  I also tried one of the new MREs that I got to replace them, and decided, as I say sometimes in my talks, that the new ones were comparable to excellent hospital cafeteria food, and the expired ones were comparable to, well, let’s just say cafeteria food at some of the hospitals that are less culinarily inspired.
I also learned, by doing more research at that time, that MREs that have “expired” should still be perfectly fine to eat; they just won’t taste as good and some texture might have suffered.  It’s more like a “best by” date than an expiration date.  True enough; the beef goes from a nice texture as if you were eating a good quality frozen lunch to more like a canned chili con carne.  But it won’t taste terrible, and importantly, will not have become toxic, rancid, etc.  The nutritional situation may have deteriorated a bit, but to get you through a few days of self-sufficiency, it shouldn’t be a problem.
That is not to say, however, that everything in there will be good.  If you check out that MRE Info website mentioned above, there are links to some great tests that they did with two of the more unstable ingredients from some of the menus, the applesauce packet and the cheese spread packet.  They stored these things at temperatures ranging from 40˚F to 140˚F (I guess they are thinking about desert storage conditions for the army), and showed photos of what they looked like after different times of storage.  Bottom line, applesauce stored at 140˚ for three months looks like Vegemite (in case you don’t know any Australians, picture used motor oil mixed with glue).  And indeed, I recall deciding to skip the peanut butter or something like that in one of my old MREs when I was going through my old inventory. 
Some suppliers are not using the new chart, even though they might sell more of these if they did.  For example, SafetyCentral  and the Epicenter , as of this writing, are using the old chart.
So, it is worthwhile to be aware of these new guidelines, and also to be aware of how they are being set and the somewhat ambiguous nature of the endpoint.  My suggestion, based only on what I have heard and experienced, is to plan on a long shelf life but make a note to try one about halfway through and see how it is doing.  It shouldn't send you to the hospital, but it you do need to go, be sure to take along a few new MREs in case you don’t like the food!

[Note: a follow-up article was posted on October 7, 2013]

>> Back to article index

Link to this article Back to top

Emergency Kits & Sanitation

4 articles

Home, work, and car kits; cash; storage locations; and post-quake sanitation.

Hmm, your plumbing might be out for a while (or, “Quaketips descends into bathroom humor”)
(WARNING: This article contains graphic mentions of bodily functions and should not be read while eating lunch)

I’ve got some uncomfortable news for you.  One of the first shortages in the US during the COVID-19 crisis was toilet paper, so suddenly TP is the must-have emergency supply.  However, in the aftermath of a major earthquake, if your plumbing is out of commission for a while, having emergency toilet paper may not cut it.  I mean, we have needs, if you get my drift.  Without working toilets, what are we going to do, put poop in a bag like our dogs or use litterboxes like our cats?

Well actually, yeah, that pretty much describes what we are going to do!  This is the perfect use for compact foldable camping toilets, which are basically a seat that empties into a bag that contains chemicals that disinfect and deodorize your waste.  If you think that sounds distressing, compare it to the alternatives: NOT having a foldable camping toilet, or not pooping.

I must admit that it took me over 13 years of giving talks and over 9 years of writing this blog before realizing that I hadn’t provided for such eventualities, and I did a bit of research about it.  There are a few different kinds of camping toilets out there, and I was able to glean quite a bit of information about them from simply reading Amazon reviews.

It seems some of them have a high risk of collapsing or falling over as you are sitting on them.  I can’t even… let’s not even go there.

Another distressing feature that should be avoided: Something that reached out and grabbed me in these reviews was that some of these toilets reach out and grab you, and this is not the kind of earthquake-induced injury that sounds impressive to relate to people years later.

(There’s one review in particular that had me absolutely on the floor laughing hysterically.  At the risk of turning this family-friendly blog into a PG-13 feature, I’ll link to it assuming the link is permanent.)

I ended up ordering the GO anywhere portable toilet by Cleanwaste.  (This is not intended to be a product endorsement and I have had no contact with the company, nor do I have any relevant financial interests.)  I’m not suggesting this as part of the portable kit, but it could come in really handy if stuck at home with a bunch of TP.

Hmm, your plumbing might be out for a while (or, “Quaketips descends into bathroom humor”)

I think the only disadvantage I can see is that after unfolding the legs, it’s really hard to fold them back into position unless you use a screwdriver or some other similar tool to help you push some plastic tabs into their positions.

Now, longtime readers of this blog will know that I typically like to end articles on a light note with some attempted humor.  It seems like a no-brainer that an article about portable toilets would have some great endings, but actually, I couldn’t think of anything that wasn’t just too obvious (like flushing jokes).  And then I was listening to a radio ad about some short term assistance loan program or something, and heard the announcer say, “There are relief programs available.”  I don’t think I can top that…

Back to article index

Link to this article Back to top

New Year’s resolution: put some cash in your emergency kit
How many of you have cash in your emergency kits?  Wait, how many of you have emergency kits?   Hopefully if you are reading this blog, you all do ; if not, please assemble one ... and while you are at it, I strongly suggest that you include some cash.  You know, cash, remember that stuff?  Paper and metal money, not plastic or electronic money, that can be used even when the power is out and credit cards aren’t being accepted.

A cash reserve is an important part of any emergency kit, regardless of whether your own local likely disaster of choice is an earthquake or anything else.  In the aftermath of a regional disaster, it's unclear whether stores will be open, but even if most are closed, some stores might be doing limited business.  If stores are open but the bank systems aren't working and credit cards/ATM cards are not useful, the stores will probably work on a cash-only basis.  That's happened before after some disasters, with inventory being tracked using pen and paper, and also during some extended power outages not related to disasters.  Even if no stores are open, people might be willing to sell each other spare supplies and will probably prefer cash to chickens, goats, and bags of salt or spices.  For all of these reasons, I do suggest having spare cash, and keeping it in your portable kit.  You might want to also keep some spare cash in your car (hopefully not in a spot clearly marked “EMERGENCY CASH”).

You might be wondering, if you have responsibly stocked an emergency kit anyway, what else would you need to purchase?  Perhaps you find you are going through batteries faster than you expected.  Perhaps that 1/4 gas tank that you always keep in reserve turned out not to be enough.  Perhaps you were just about to run out of toothpaste before the quake and now need to buy some.  Maybe you could really use something for an upset stomach and don’t typically keep things like that around.  Or perhaps the toy designed to keep your 2-year-old satisfied as you stay in a Red Cross shelter turns out to not be very useful for the current 6-year-old who mysteriously replaced the 2-year-old some time in the past four years.

One thing I like to emphasize in my talks is that having cash is good, but having it in small denominations is even better.  Assume whoever is selling you something won’t be able to make change.  I’ve been using the same example in my talks for years now: If you need to buy a battery and someone can sell you a battery but they don’t have change, having an envelope of $20 bills means you’ll pay $20 for a battery.  That’s an expensive battery, and also a poor use of what would probably be a sizable chunk of your emergency cash.

How much money to have is debatable.  I started off years ago with $100, and then years elapsed, and I realized that I might need to bump that up.  A transition from being single to married or having kids means more people in the household and more money that might be needed.  It's really hard to judge how much to keep handy.  I am very prepared with supplies, so in that respect, needing to purchase them is a low probability for me, but one never knows.  I saw one blurb about emergency kits that mentioned $1000 in cash.  I don't plan to do that.  However, if space aliens invade the Western United States and I have to bribe a corrupt military official for safe passage to Canada, I might regret it!

(Also check out my earlier post about where to keep emergency kits .)

Back to article index

Link to this article Back to top

Big emergency kit for home, little emergency kits for work and car
We spend a lot of time discussing emergency kits for the home.   Those kits should be geared mostly toward keeping yourself supplied at home if the stores and banks are closed, and at least part should be a portable kit that you casually take to a shelter with you.  You presumably won’t need to grab it and run out of the building during a quake, because you are not supposed to run out of a building during a quake .  So these emergency kits can be large and contain supplies for up to 7 days.
But what about where you work, and your car?  It’s important to think about such things, because if you are stuck somewhere that isn’t home, your home emergency kit isn’t going to be much help to you.  Here are some thoughts about how to go about preparing work and car kits.
First, let’s think about the workplace.  What you need in the kit depends on the circumstances that you might face at work.  To my mind, there are two main scenarios: (1) you are at your workplace and there is no way to get home, and (2) you are physically stuck inside your workplace.  The first scenario is much more likely than the second in general.  However, it varies by situation.  If you work a reasonable walking distance away from your home, then the concept of not being able to get home isn’t relevant, and your work kit could be pretty minimal and just focus on what would happen if, for some reason like a jammed door, you couldn’t get out and the windows weren’t practical exits (very unlikely situation).  If your main concern is being stuck inside an office, then having some food and water for a day or two and having a radio and flashlight with spare batteries, and a small medical kit, is a pretty good emergency kit.  Of course, being stuck, you might wish you had stashed a crowbar.  I actually have a crowbar in my office, because it’s a windowless office with a single door that opens outwards, and it’s not out of the question that it either jams or that something else moves outside of the door and blocks it from opening.
But more likely, you work far enough away from home that getting back home may be impractical if the roads are blocked or public transportation is down.  Around here in the San Francisco Bay Area, many people do bridge or tunnel commutes (Golden Gate Bridge, Bay Bridge, BART tunnel under the bay, etc.).  While one bridge down just makes people go to the next bridge, a failure on one bridge can make the authorities close the other bridges for a while, as Marin commuters discovered after the 1989 Loma Prieta quake when the Golden Gate Bridge was shut down in response to the Bay Bridge’s failure.  If you can’t get home, and stores and restaurants aren’t functioning, then your primary goal for an emergency kit is to tide you over with food and water, with flashlight and radio and probably medical kit, until you can get home somehow.  Hmm, sounds an awful lot like what I suggested for the first scenario.
Here’s one more thing to think about: if you are working within a somewhat long walking distance from home, and you typically work in uncomfortable shoes, think about keeping a pair of old comfortable shoes in the work place so that you don’t do that 2-mile walk home in high heels or uncomfortable men’s suit shoes.
When might you need an emergency kit in your car?  Being literally stuck inside your car is not impossible, but it would be a relatively rare consequence of an earthquake.  Much more likely, you have been driving around somewhere that is not in walking distance from home, and the roads home are too damaged or are gridlocked.  Food, water, comfortable shoes if you don’t wear them already, radio in case your car battery gives out, flashlight...it’s starting to sound familiar!  (In fact, it makes sense to have supplies like this in your car even if you live in a region that does not experience earthquakes.)  But in the car, compactness might be more important.  Also keep in mind that any emergency food supplies kept in the car probably will expire more quickly than the food you keep in your home and work kits, due to the car sometimes being left out in the heat.  Having a cable that enables you to charge your cell phone from your car battery is worthwhile.
One more thing to consider is that, more than what you might keep at work, the car kit could be even more useful if it is easily portable, like in a backpack.  I admit that as I write this, my emergency car supplies are wedged into spaces that accommodate them, like in the well with the spare tire; but if you find yourself needing to hoof it due to impassable roads and impossible driving conditions, carrying your emergency supplies with you could be quite nice.  It all depends on what you have room for permanently in your car trunk.
Big emergency kit for home, little emergency kits for work and car
If you are worried about really getting stuck inside your car, due to an earthquake, dramatic fall from a bridge, or unfortunately timed discovery of a living Tyrannosaurus rex, having a Life Hammer® in the car can help you cut seat belts and smash side windows.  I got one of those a couple of years ago.  It’s still on my desk, as I try to figure out how to mount the darned thing.
I’m sure many people will have other ideas of what should be stashed in these places: foldable rain jackets, etc.  You might want to think about what is in your home kit and decide whether it is worthwhile to you to have more in your work or car kit.  What I have described is the basic situation for both places.  In fact, if any readers out there have personal experiences from 1989 Loma Prieta, 1994 Northridge, or other situations in which you had to leave your car taking the supplies, feel free to use the comment feature on this blog to tell people what worked well for you and what you lacked but wished you had.  That means that interested readers should check back later to see if anyone posted suggestions. 
One of these days, there will probably be an iPhone app that not only lets the phone double as a radio, map, and flashlight, as it already does, but also makes it become edible and wearable on both feet.  Until that day, having emergency supplies at work and in the car makes a whole lot of sense, since you never know where you will be when you have to rely on them.

Link to this article Back to top

Where should I keep that emergency kit?
I get asked this a lot, and it’s a great question.  Should it be by the front door so that you can grab it on your way out if you have to evacuate ( AFTER the shaking stops )?  Should it be in the deepest depths of your home so that if you are physically stuck in there and can’t get out through doors or windows, you’ll have supplies while waiting to be freed?  Should it be scattered around all of the rooms in your home so that you won’t be without supplies no matter where you might get stuck?  Or how about outside your home, so that if you leave the building (again, AFTER the shaking stops ) and are not allowed back inside, you’ll still be able to get your supplies?

Alas, there is no single perfect strategy.  The bottom line is that for any place someone puts a kit, I can come up with a scenario in which it was the wrong place.  For example, an outside kit doesn't help in the unlikely event that you are physically stuck inside your home for a while, and an inside kit doesn't help if it's inaccessible after something fell on it or you are away during the quake and are not allowed into your home.  Ours is in a closet; if we can't get the closet door open, it's not going to help; but it was the only place that made any sense in our condominium (more on this in a minute).
Since the most likely scenario for needing an emergency kit consists of you and your home being perfectly fine but the stores are closed for a while, I tend to go with whatever works best for the contents of the kit, while keeping access in mind.
I think if you have a free-standing house and a well-protected and secure storage place outside like a sturdy garbage bin, at least there's less of a chance that it will be inaccessible, assuming you are not stuck in your home.  However, it will be more exposed to the elements, so food supplies probably won't last as long after cumulative effects of hot days as they will last in a nice cool closet on the floor.  For that reason, I'd probably feel better with it indoors, but it's a personal choice.  Plus, you’d better take measures to ensure that your supplies don’t turn into a litter of baby raccoons.  And some people ARE stuck inside their homes after a damaging quake, although this is probably more of a problem for apartments and condos with only one door and perhaps windows that don’t lead anywhere except 7 stories down, so those people probably don’t have a good outside storage location anyway.  You may have a parking garage storage locker, and then you still have heat or mildew as potential problems.
The exception is water.  The recommended amount is a gallon of water per person per day for 3, 5, or 7 days depending on who’s talking (I shoot for 6-7 days).  In a couple of places I’ve lived, there was an outdoor storage locker in the parking garage and most of the water was stored there due to limited indoor storage space, with two gallons in the apartment stored in the closet.
Where should I keep that emergency kit?
Here’s an example of what I mean about nothing being perfect, which I like to pull out when people ask me this question.  In our previous apartment, we had a walk-in closet that was really the best place for our emergency kit from a practicality standpoint.  We have a rather large portable kit and another Xerox box full of MREs, cans, and other supplies; and it is pretty heavy (photos are at my main earthquake preparedness website ; click on the first photo gallery called “Basic precautions”).  The only place that really worked out with our otherwise-jammed-to-the-brim organization was to put it on the floor right inside the closet near its door.  You can see in the floor plan figure that the box just cleared the moving edge of the door.  Well, one day I realized that if the heavy box slid over just a few inches in an earthquake, it would block the door from opening and I would not be able to get to the kit!  I’m embarrassed to tell you how long it took for me to notice that… but lesson learned. 
However, there was really no other place to put it that made sense, so I wedged a couple of door stops under the outer edge of the box so that if it started to shake, it would have less ability to move away from the wall.
By the way, this is also worth keeping in mind when deciding where to store a person.  My office at work is a windowless room with a door that opens outwardly.  There’s a desk in the outer room that is against the wall near my office doorway, and we realized that in the unlikely but possible event that the desk moved in a quake to block the door, I’d be trapped.  So we had the desk bolted down to the floor!
And don't forget a few supplies in your car and at work, since you might find yourself stranded at work with no way to get home after a quake, or stranded in your car in various other circumstances.   
At any rate, you could argue that at least the portable kit should be right next to the front door so that you can grab it as you evacuate in an emergency, but if you really think about it, it’s a pretty unlikely circumstance that an earthquake in a place like California will be reason to run out with urgency.  As this blog has discussed before, it is not recommended to run out of a modern building during an earthquake because you have more of a chance of being injured by things falling off the outer walls than if you simply take shelter under something sturdy ( NOT next to something ).  If you decide after a quake that the building is unsafe for continued occupancy, then you have that extra few minutes to get your kit from its storage place.  If there’s no earthquake but a fire is about to engulf your home, then at least in most such cases, you’ll be in a relatively small number of people affected and the emergency kit will not be all that crucial to you.  So in a large earthquake, my own take is to try to make the kit accommodate your home’s set-up rather than the other way around.
Basically I prefer to try to eliminate the 99% of the things that can go wrong, take steps to minimize the problems that could result from a remaining 0.9%, and not fret too much about the few things that could theoretically still go wrong.
This is why we don’t take parachutes with us when we fly a commercial airline.  We take precautions, like flying on reputable carriers, perhaps knowing where the nearest emergency exit is, and knowing that if we see a guy in the seat next to us attempting to light his shoe on fire, tackle him first and ask questions later.  But we are resigned to the fact that if the 0.001% (or whatever) chance comes true that the airplane is going down, then oh well.
Notice that I managed to get away without actually telling you where to keep your emergency kit.  But the main point is hopefully clear: make it a place that it will be safe and well-preserved, accessible in the context of your own home, somewhere that you will remember, and I might also add that if it is too inconvenient to access, then you will be less likely to check it every year or two and replace things that have expired.  Based on all of these considerations and your own personal situations, you should be able to come up with something reasonable.


Back to article index

Link to this article Back to top

Bracing, Fastening & Household Hazards

22 articles

Furniture, shelves, cabinets, pictures, lamps, plants, display objects, and other preventable hazards.

Command Picture Hanging Strips vs Gravity and Murphy's Law, Which is Winning?

I’ve posted three articles about use of double Velcro-style Command Picture Hanging Strips to hang light or medium-heavy pictures, with the advantage that the picture is flush against the wall, and there’s no movement to cause swinging since all four corners are adhered to the wall rather than the object hanging from just one hook at top center.  However, longevity has been a concern, especially given occasional anecdotes from people about the strips not sticking well to walls in hot or humid climates.  

My 2016 article introduced the concept and was entirely positive, based on a short period of time in my old home.  I was subsequently there for another year before moving to my current home, and had no failures during that time.  

The 2018 article was written about 5 months after moving to my current home and thus having gone through a new round of mounting pictures and other objects: new walls, and some new items belonging to my wife (who was already there).  The Command Strips were still doing well, although the picture frames being mounted were more variable and sometimes not flat, or didn’t have a good full surface to which I could optimally stick a strip.  I pointed out some of the challenges posed by these variations and noted that one of the picture frames was a bit warped, so all four corners could not be tightly against the wall at the same time and one of them only had part of the strip against the wall; but it was holding up well despite that.

The 2020 article was written because I had started to see failures in the more challenging situations that I had mentioned in 2018.  The warped picture frame had a corner that had separated a bit more from the wall, but 3 1/2 strips were still adhered.  However, one picture fell spontaneously; it had waxy paper on the back and had been mounted by putting duct tape on the paper and sticking the Command strip adhesive side to the duct tape.  The Command Strip had not failed; it was the duct tape that had separated from the backing paper.  I figured this was a special case.  Some small framed photos in the bathroom had only a thin plastic rim on the back rather than a full surface and thus had started slowly sliding, and ultimately fell (2018 and first 2020 photo below).  The Command Strips ultimately had failed in that sub-optimal situation, so I cleverly built up extra material and stuck the Command Strips to that (second 2020 photo below).

Command Picture Hanging Strips vs Gravity and Murphy's Law, Which is Winning?
The challenging bathroom frames in 2018 failure in
2020, my solution in 2020, and failure again in 2025
(click to enlarge)
SO, it’s the very end of 2025, and how are they all doing?  Well, it’s pretty abysmal; I’ve had 6 or 7 pictures spontaneously fall at different times!  However, the Command Strips were not the weak link.  The bathroom frames for which I had to jury rig a surface to adhere with the Command Strip just turned out to be too challenging; it was the extra material I had built up that failed (see photos at left).  The frame on the stairwell that had the one warped corner finally fell, and then when I put it back up, it didn’t take long to fall again.  My wife has similar frames for some pictures in her den, and 3 of the 4 have fallen one by one—these also seem to be a little warped.  So the Command Strips seems to be doing ok when sticking a flat surface to another flat surface, with both surfaces being at least as big as the Command Strip, and none of them having “non-stick” surfaces involved.  I think it’s still worthwhile to occasionally glance at Command Strip-mounted items from the side just to make sure that there has been no warping nor resulting partial separation of a strip.

Command Picture Hanging Strips vs Gravity and Murphy's Law, Which is Winning?
Photos from my 2018 article. I did not take new
photos for this article because they look identical
now to how they looked when first mounted 8
years ago, including side view (click to enlarge).
Notably, EVERY item that I had mounted at my old home described in the 2016 article not only stayed securely mounted there, but also has remained securely mounted for the last 8 years in my current home, including items near doors where one expects more temperature and humidity changes (photos at right).  Clearly, some kinds of back surfaces are better than others for mounting with Command Strips.

I should point out something very important: ANY of these methods of hanging pictures could potentially fail one way or another, so never mount/hang anything, with any method, over the head of a bed, crib, dog bed, etc. that you would not want to fall there.  That includes Command Strips, maze picture hoods, regular picture hooks, and nails.  Note that the Command website also emphasizes that you should never mount something over a bed.  I got a useful comment last month on my 2020 Command Strip article from somebody who apparently had a spectacular failure after 5 years.  I was hoping to find out more details, like whether the Command Strips had separated from the picture, the wall, or themselves, but never got a follow-up.  I’m including a screenshot of that useful dialogue (screenshot is below).

Command Picture Hanging Strips vs Gravity and Murphy's Law, Which is Winning?
Timely, recent comment on the 2020 article
with my reply (click to enlarge). If this
commenter sees this, I've love to learn
more details.
So what have we learned?  The differences between the two home situations are different kinds of paint on the walls, and the pictures that my wife had were in some cases warped already.  I want to emphasize that in all of the cases where the Command Strips were used to stick flat, full-surface frame backs, made of material that didn’t resist sticking, there were no failures in 8 years.

So here’s a rule of thumb.  If, after having stuck a picture to the wall with Command Strips, you find yourself patting yourself on the back and saying, “Aren’t I clever to have figured out a solution?!”, it is an inauspicious sign of things to come!

Link to this article Back to top

Command Strips for picture hanging, 3 years later: A couple of failures to report
I’ve written two articles ( here and here ) about hanging pictures with Command Picture Hanging Strips (the interlocking double Velcro style), and I continue to be pretty impressed by them, but it’s important to come back a few years later and discuss how they have been holding up.  Since these work by non-permanent adhesion rather than by a physical object like a nail in the wall, we basically take it on faith that the adhesive will hold.  

As it turns out, I’ve had three partial or total failures, but don’t panic; they are special cases.  None of the optimally mounted pictures have fallen.  Here are the conditions that have caused problems:

Command Strips for picture hanging, 3 years later: A couple of failures to report
Command Strips on picture mounted in 2017.  The one on the right has
pulled away from the wall due to having been adhered to a warped frame.
(Click the image to enlarge)
#1  Warped picture frame:  I’ve known about this problem since shortly after I mounted the picture in 2017.  The wall is flat and the picture frame was warped, so when I pressed all four corners to the wall (actually the top corners and the bottom about 1/3 up as they suggest), it didn’t take long for the frame’s natural warp to defeat the adhesive of the strip in that corner.  However, part of that strip is still adhered and the other strips are adhered, and it doesn’t appear to have shifted since I mounted it; so I consider it more of an FYI than a failure.  I actually mentioned this in my 2018 follow-up article about Command strips and included the figure that I’m re-using here.

#2  Non-stick backing paper:  Ok, it’s probably not meant to be non-stick, but it basically is.  This is an illustrated flat soft (probably balsawood) multi-panel that my wife has had for years; that is, several panels next to each other with a single piece of backing paper that results in flexible joints between panels, but when it’s completely flat, the panels make one unbroken surface that is illustrated.  My wife had mounted it to the wall by putting a single small nail between the two center panels, and a slight bulging out of the panels had partially pulled out the nail so it was rather precariously hanging… over the toilet in a bathroom.  Since I figured it would not even take an earthquake to make that thing fall, I re-mounted it with Command strips in 2017.  However, I found that it was hard to do because the paper was slightly waxy and it didn’t seem like the adhesive strips were sticking very well.  So, I put duct tape wherever I planned to put a Command strip, and adhered the strips to the back of the duct tape rather than to the backing paper.  Smart, eh?

Command Strips for picture hanging, 3 years later: A couple of failures to report
Multi-panel wood wall hanging with uncooperative backing paper
(Click the image to enlarge)

Except that it turns out that even duct tape doesn’t stick perfectly to that backing paper (I always thought duct tape sticks to EVERYTHING).  The darned thing spontaneously fell a few months ago (the toilet lid was closed, thank goodness) and it turned out that the Command strips themselves were still strongly attached to both the wall and the duct tape, but the duct tape had separated from the backing paper!  The panel with its backing paper had slowly slide down against the duct tape that was adhered to the Command strip, and finally failed.  So without any really optimal way to mount that panel, I started over again, put MUCH larger pieces of duct tape on the back so it will be much harder for it to slip against the backing paper, put the adhesive strips on the duct tape, and put another nail in where the original one had been.  The nail alone was not sufficient originally, but putting it back prevents the panel from sliding down due to gravity, and the combination should work I think.  I neglected to photograph the back while I was doing this, and it’s a pain to get it lined up so you don’t get to see it, but here are photos of what the panel looks like and side views of the Command strips  and the duct tape.  You might be able to see the nail in the close-up; I colored it in so it’s not obvious.

This is a pretty unusual case, and might even be exacerbated by being in a bathroom in which showers are taken frequently; humidity probably did not help.

Command Strips for picture hanging, 3 years later: A couple of failures to report
Poor adherence to plastic trim (Click the image to enlarge)
#3  Frame with a step:  It’s pretty obvious that an adhesive surface works best when completely matched with the surface to which it is supposed to stick.  However, we had two small framed photos in a different bathroom on a wall and I wanted to make sure they would not fall in a quake because Milo the dog actually likes to fluff up the little rug around the toilet and then lie down on the OTHER rug by the sink (don’t ask me why), right under those pictures.  I don’t like having things above that spot that can fall, even if small and light.  These frames aren’t conducive to maze picture hooks , so I originally stuck them up with Command strips (there were photos in my follow-up article to illustrate how black Command strips can be better for black frames even on a white wall).

However, similarly to what I described in #2, they started sliding down slowly and one of them finally failed.  In this case, they had been attached directly to the back of the frame, so this really is an example of the adhesive not being strong enough.  There’s no shower in this bathroom so we can’t blame humidity.

What made this another unusual example was that these frames were odd; the back of the frame was very thin and the picture and backboard were pushed in relative to the frame back, so there was essentially a thin trim and a step.  The adhesive strip thus did not have a full surface to stick to, and I just stuck them to the trim and some of the adhesive was just out in the air.  Apparently, this plastic is somewhat hard to stick to, and the combination of that and the small area actually being attached resulted in them losing their adherence over time.
Command Strips for picture hanging, 3 years later: A couple of failures to report
Leveling out the step to bring the backing into the plane
of the plastic trim 
(Click the image to enlarge)
My solution was kind of like what I did for #2 but more complex, as you can see in the photos.  First, I put thin boards that I happen to have (they used to be dividers in small drawers) in the areas that I wanted to attach with Command strips.  They are just thick enough to fill the gap behind the frame “step” so now there’s surface area for the entire adhesive strip to contact; and some of the material is the wood rather than the plastic; better adhesion.  I taped them in place with LOTS of duct tape.  I stuck Command strips to the combination trim/boards, and this time, I used larger Command strips than before.  They seem to be pretty stable.

I should also acknowledge what I have heard from a few people, that adherence of Command strips to interior walls is pretty reliable in temperate climates, but places that have more extreme temperature swings can experience shrinking and expansion of the walls that weaken the bond.  I would think that interior temperature control would prevent that, but perhaps it’s a problem where people set their heaters and AC conservatively.

So the bottom line then is that I still like these Command picture hanging strips for sticking items to the walls, but it seems like straying too far from their officially intended use can be risky.  

Hmm, I must be losing my touch; I like to end articles on a pun whenever possible but I can’t think of any I haven’t already used.  I’m stuck—OH!

Link to this article Back to top

Earthquake Safety: What about Hanging Art from Picture Moldings?
This month, Quaketips hosts guest blogger Fred von Lohmann.  Fred attended one of my talks and absolutely stumped me with a question about hanging pictures on picture moldings (a.k.a. picture rails) in homes with lathe and plaster walls.  In all these years, nobody had ever asked me about that before, and in all these years, I had never lived in a home without drywall and simply wasn’t aware that these things existed.  Now I know they were the only game in town for a few hundred years, until just about 80 years ago.

Fred said he’d find some more information about the topic for me, and got back to me with basically an entire article, so he agreed to let me run it as a guest article pretty much as is, with no editing on my part other than to stitch together a few of his photos.  So without further ado, take it away Fred, and thanks!

~~~~~~~~~~

Earthquake Safety: What about Hanging Art from Picture Moldings? Before the 1940s, it was common for houses to have picture moldings (also known as crown moldings, or picture rail moldings) for hanging art, rather than using nails and picture hooks affixed to the wall. And since nearly half of San Francisco’s housing stock was built before 1940, a lot of us rely on these picture moldings today (renters often have no choice, as leases frequently forbid making holes in the lath-and-plaster walls that are common in 100 year old houses). Surprisingly, however, there’s almost no discussion out there of how to secure art hung this way in the event of an earthquake.

Here’s a picture of a small frame hung in my house from a molding hook in the traditional manner. I’ve used fishing line (sorry, hard to see!) tied to eye hooks on the back of the frame. The fishing line then rests on the lower hook of the brass molding hook, while the upper portion of the molding hook rests on the molding itself.
There are several different sorts of picture molding hooks out there (see photo below), but all of them seem vulnerable in the event of an earthquake. First, there is nothing to prevent molding hooks from jumping off the picture molding in the event of a big quake. Second, the wire or cord holding up the picture frame could jump off the molding hook. (The good news, however, is that since the wire or cord is generally attached to the back of the picture frame, at least that connection will be secure.)

Earthquake Safety: What about Hanging Art from Picture Moldings?
So what can be done? Well, one possibility is to screw the molding hook directly into the picture molding. Some brass molding hooks come with a hole to make this relatively easy (see photo below). But this still leaves the problem of the wire or cord attached to the picture frame jumping out of the relatively shallow lower part of the hook. This lower hook could probably be bent to make it deeper and more secure, and the wire or cable could perhaps be looped around the hook twice. But without having any way to close the top of the hook, the risk remains (although friends have suggested using museum putty to fill the gap).

Earthquake Safety: What about Hanging Art from Picture Moldings?
In my case, after doing quite a bit of online searching, I discovered picture molding hardware that seemed to solve most of the problem. A company called Gallery System Art Displays sells a hanging system designed for picture moldings that solves two out of three problems (here’s a UK alternative system that looks similar, but I’ve not tried it). The system consists of a molding hook (you can have brass or stainless steel) that has a captive metal cable that hangs down. A separate secure hook attaches to the cable, from which you can hang pictures (up to 44 pounds) using whatever you would use to attach it to a nail and picture hook. The secure hook slides up and down on the captive wire, allowing you to adjust the height of your picture. This also makes it much easier to adjust than the “cable triangle” that you have to rig up with traditional molding hooks. The bad news is that it’s not cheap: the hardware comes to about $20 per painting. As usual, a few photos make all this clearer than words. (You’ll see that I’ve left the additional wire hanging below my picture to the right, but you can trim the “tail”, if you prefer.)

Earthquake Safety: What about Hanging Art from Picture Moldings? This system still leaves the risk that the brass molding hook will jump off of the picture molding. In order to mitigate (but probably not eliminate) that risk, I added a pat of museum putty between the hook and the molding, which should help prevent it from jumping off, particularly since the design of the cable system should prevent the picture from putting any upward pressure on the hook itself.

As with lots of things, it’s not perfect, but it strikes the right mix of strengths for me.

~~~~~~~~~~

(As mentioned up top, this article was guest-written by Fred von Lohmann.  Feel free to add comments, but you can e-mail Fred directly with questions at fred [at] vonlohmann [dot] com.) 

Back to article index

Link to this article Back to top

A novel solution: bracing floor lamps with plants
In 2016, I posted an article in which I asked “ Can you seismically brace floor lamps and house plants? Should you? ”.  I was addressing the challenges specific to torchiere-style floor lamps, which can be difficult to brace to prevent them from falling over and causing damage or injury with their axe—I mean bowl—on top unless they are the type with plastic bowls; and various challenges with houseplants caused by the drainage saucer that they frequently include.

A novel solution: bracing floor lamps with plants
Well, one company got in touch with me and let me know about a really innovative solution to both of those problems: combine them!  No, I’m not talking about glowing plants or Christmas trees, I’m referring to their SmartFit Planter that is a floor plant pot that wraps around the pole of a floor lamp and weighs it down to the floor (see the original external source for details and very clear explanations and images about how it works).  They asked my opinion about the concept, and I looked into it and sent them my thoughts, and then realized that my reply to them looked an awful lot like a Quaketips article.

So this is not officially a product review per se, but I do think it’s worthwhile letting you know about this inventive concept and its pros and cons.

A novel solution: bracing floor lamps with plants
The planter is essentially a plant pot that wraps around a central hole, through which the light post sticks up.  So it’s really a solution to the torchiere problems that uses a plant; not as much a solution to the plant problem unless you want to put all of your plants into these planters.  The plant pot has a self-watering mechanism that uses a wick to keep drawing in more water from a 1.5 liter reservoir as the soil dries.  This wicking approach keeps the water away from the lamp power cord.

I would say that with regard to the goal of preventing floor lamps from falling over without attaching them to walls or floors, this is a great solution.  This concept really is ingenious; it looks like it not only adds weight to the base but also increases its footprint, both of which minimize the likelihood of it toppling.  And the self-watering wick/tank concept is really neat.  Coming in 5 colors is a nice feature.

A novel solution: bracing floor lamps with plants As a plant pot, I did have one reservation [note added in proof, no, I’m not a plant pot]: I had someone at a garden center tell me once about the importance of letting water drain out of plants rather than just evaporating because of waste products that build up in the soil and need to be occasionally removed.  He was suggesting that rather than trying to water sparingly enough to limit water draining into the little drainage moat around the base of the pot, I should be ensuring that a reasonable amount of water comes through; appropriate fertilization would replenish lost nutrients but waste products would be removed.  So there's one disadvantage in a system like this, although I imagine this is more important for some plants than for others, and it would probably just reduce the effective lifespan of the plant rather than killing it outright.

A novel solution: bracing floor lamps with plants
A potential solution to that problem is an interesting variation on the self-watering wick, which is that just as it moves water from a reservoir to drier soil, it can also reverse-wick and remove water from saturated soil if the other end is just hung over an empty pot.  I guess if the build-up of waste products is a concern, one can occasionally water heavily and remove the excess water (and waste products) by reverse-wicking.  Repotting frequently enough is another option.  When I asked the folks at the company about using their reverse wicking strategy for this purpose, they answered, “Yes, this may work, but we haven’t tested whether all the unwanted salts are removed by wicking.  Using salt tolerant plants and repotting every few years is recommended for non-draining planters.  After we accidentally stained a carpet by over-watering a draining planter decades ago, we have used non-draining planters exclusively for a wide range of house plants varieties, with good results.”

One potential problem is price.  For the bracing of a $40 torchiere and even housing a $100 houseplant, the price tag of $257 for the SmartFit Planter is going to limit the inclination of people to get a bunch of them unless they are really doing a major investment.  For example, I have 11 torchiere-style floor lamps in my home, so this moves out of the inexpensive why-not consumer solutions range into the major interior seismic bracing project range; which in itself is not a deal-breaker but certainly changes the equation!  On the other hand, it’s hard to put a price on the ability to sleep at night without worrying about a lamp falling on your dog.

I imagine that even if someone did not want to put a plant in that spot where the lamp is (perhaps there is no natural light, or just for personal preference) the planter could be filled with some stones or even (gasp) artificial plants.  The company folks commented on that piece of feedback and warned about children getting the stones and ingesting them or scattering them; basically, earthquake safety does not get one off the hook from the non-seismic safety concerns when it comes to kids.

One additional consideration is that it changes the aesthetically sleek and minimalistic look of a torchiere into something potentially more visually obtrusive; which would not always be a problem but could be for some people.  The folks at SmartFit Planter replied to that concern by pointing out that the bulkier look is also protective against kids, pets, or clumsy adults, yes indeed!  Also, since the center of the pot is reserved for the lamp pole, you can't use this pot for a central stem set-up as you might want with a small tree; it works better with shorter bushy plants as you can see in the photos at their website.

By the way, there is a super cool animation on that website showing how to assemble the system and how it works.

I might summarize my impressions by saying that this may not be an ideal solution for ALL of someone's floor lamps, but if there are a couple that are in particularly dangerous situations where falling over could be a big problem, it might be worth investing in this as a solution.

Let me just conclude by saying that I haven’t received any kind of compensation for mentioning this product and writing about it, and it’s not an advertisement, but this is the kind of innovative solution that I think deserves being mentioned!  I kind of reminds me of the classic commercials for Reese’s Peanut Butter Cups : “Hey, you got a lamp in my plant!”  “Well you got plants all over my lamp!”  “Hey, looks great!”… while preventing scenarios more reminiscent of the also-classic “Shake ‘N Bake.”

Back to article index

Link to this article Back to top

How I braced a monster wardrobe and protected Narnia
As always, click on the images for full sized versions
This is one of those articles I do every now and then about how I have solved some special challenges.  I have a freakishly large free-standing wardrobe from Ikea that I’m using for storage of various things; I won’t bore you with the details but it’s gigantic.  In fact, I walked into it the other day, kept walking past coats, found myself in an icy wasteland with English kids and a talking lion—oh wait, wrong story. ..  At any rate, suffice it to say that I’m using this wardrobe in such a way that it defies straightforward seismic bracing (preventing it from falling over, preventing the doors from swinging open, and preventing the contents from falling apart), and it took a while for me to figure out how to make it reasonably safe.

Here’s my story, in case any parts of this overall solution are relevant to problems being faced by readers:

How do I stop the massive doors from swinging open?

These doors are about 7.5 feet tall, with lots of loose objects behind them.  If they want to open, they aren’t likely to be thwarted by the typical quake-resistant cabinet latches like push latches and Murakoshi latches about which I’ve written.  The tall doors are floppy enough that they are unlikely to be controlled by a push latch in any one place, and even the Murakoshi latch at the top would probably not be very effective.  The double door is the most problematic because of all of the contents piled up behind it, so I concentrated on that section first.

The first thing I did was to figure out a simple way to essentially clip the two handles together so that it would prevent the two doors from swinging open away from each other.  I did not want it to be a pain to open the doors though.  I tried a bunch of types of clips but they were either too inconvenient to use, or too pliable to actually hold against much force.

How I braced a monster wardrobe and protected Narnia My solution was either a stroke of alien genius or luck or a bit of both.  I noticed at the hardware store a very long-shank padlock, and if I leave off the lock part and just use the shank, this hardened metal U shape easily slides over the two handles and does not bend at all.  I just slip my finger under the top of the U, slide it up and off, and then drop it back into place when I close the door.  I can even do it without leaving fingerprints on the mirrored doors!  Why, a pre-language ape could do it!

How I braced a monster wardrobe and protected Narnia
That’s great, and doesn’t look bad at all; but it’s an awful lot of pressure for a single pair of door handles to hold, so I tried adding a latch to work in concert with the clip holding the handles together.  I suspect push latches just aren’t effective here, but after experimenting with those Murakoshi latches, I got a few more and added a pair to the top of these wardrobe doors.  Alone, they would be ineffective, but together with the clip, I think it’s pretty secure.  I used the white ones, which go better with the grey door and white back than the brown ones do.

How I braced a monster wardrobe and protected Narnia
For the single door, there is nothing to clip, but there are a couple of strong shelves that won’t be going anywhere.  I decided to install two brown Murakoshi latches on the same door, one at the top and one at a shelf (orange and yellow arrows) so there would be two different sections of the door being prevented from opening.  It really seems to work; I can hear that comforting “thunk” sound that you get whenever you open a door with the Murakoshi latch, but I’m hearing it from two different heights simultaneously.

How do I stop the contents from falling apart and out?

Well, suffice it to say that I did not make matters any easier for myself by arranging the contents of the wardrobe.  As you can see from the first photos, I have a chest of drawers INSIDE the wardrobe, some musical instruments on the chest, and a hulking shelf laden with heavy music (no, I don’t mean it’s all Mahler and Wagner, I mean that sheet music weighs a lot).  I would not want the chest of drawers to topple and crash through the doors, and I wouldn’t want the shelf to collapse under the weight of the music and come down on the instruments.

How I braced a monster wardrobe and protected Narnia
For the shelf, I was less concerned with the shelf itself breaking because it’s a really thick strong wooden shelf and it doesn’t seem like it is in any danger of bending or collapsing.  I’d be more concerned with the little pegs holding it up on both sides, as I’ve already written about experiences with these things failing suddenly and shelves crashing down even without an earthquake.

How I braced a monster wardrobe and protected Narnia If you look closely at the pictures, you can see two different kinds of pegs under the shelf.  The brown ones are the pegs that were there originally, but they have been turned around.  These have a screw and a plastic peg at right angles to each other, and the screw was attaching it to the bottom of the shelf while the plastic peg was in the hole; and we know what can happen to plastic pegs in holes bearing weight !  (I couldn’t find a photo of the exact peg, but the photo shown here on the left is of a metal version; pretend this is brown plastic and you’ll get the picture.)  I kept the original pegs but turned them so that the plastic pegs were sticking up into the holes underneath the shelf, and the thick metal screws were going into the holes in the sides of the cabinet.  Then, still worried about all that weight on three screws per side that might not be great with shear force, I added three new plastic supports with metal pegs like the ones shown on the right. (Note: if you do something like this, the holes to drill for the additional pegs won’t be at exactly the same level as the pre-drilled peg holes; you’ll just have to bumble your way through it like I did.)

How I braced a monster wardrobe and protected Narnia Now how about that dresser.  This is holding a lot of stuff and is very heavy.  It’s an Ikea dresser (yep, I put it together all by myself; took all evening but it was worth it!) and ironically, the Ikea dressers now come with kits to brace them to walls and little inserts that say you must do this to prevent little kids from climbing up the front and getting seriously injured or worse.  And of course, we all brace our dressers to the wall in Earthquake Country, right?  And even though it is behind closed doors that were secured as I just described earlier, a large enough earthquake could still make this dresser want to fall forward and it might just punch through the doors.  But it was not practical in the wardrobe to brace the dresser to the back because that back is just flimsy backing board, not structurally sound.  I ended up screwing in metal L brackets on one side and on the bottom front as pictured in the accompanying figure.  Yeah I know, this is not the strongest configuration, but it was all I could do and I think that in combination with the secured doors, it will prevent the dresser from falling forward.

How do I prevent this massive thing from falling over onto my head?

How I braced a monster wardrobe and protected Narnia That’s an important question because my desk is about 5 feet in front it the wardrobe; if it falls away from the wall, it’s headed right toward me!  The wardrobe already had two of the cabinet straps from Quakehold/Ready America at the top, and I added a third, all in wall studs of course .  Because this is so large and heavy, I didn’t just rely on the adhesive holding the fuzzy part of the Velcro strap to the top of the wardrobe; I screwed in the little short wood screws that come with some of the straps so that the assembly was more securely attached to the furniture.  You can kind of see the screws in the middle photo and one is clearly shown in the righthand photo.

How I braced a monster wardrobe and protected Narnia I’ve been a bit concerned, however, that this was larger and heavier than anything I had ever braced and I wasn’t sure whether the straps would really hold it.  They probably would, but then I heard about something, ironically, from my next door neighbors, of which I had not been aware.  The Japanese have poles that go between the top of tall furniture and the ceiling, compressed, so that the back of the top can’t get any higher, which it would need to do if the furniture was falling away from the wall.  I could not find these on Amazon, etc., but a search brought up one Japanese source and fortunately I was able to successfully order them, despite return messages being in Japanese.  In case you can’t find them, here is a link to the product that works currently; if it changes, try the original external source .  The instructions are all in Japanese; you can figure it out somewhat from the diagrams but make sure you realize the following:

(1) Find solid ceiling.  The instructions seem to want you to find wall studs in the ceiling rather than hollow drywall; my ceiling didn’t have anything at regular intervals but there was about a foot of solid material above the ceiling right next to the wall so I was able to place them under that solid part.  Either way, you want them bracing the back of the cabinet rather than the front, because if it tips over, the back goes up and the front goes down.

(2) You are supposed to line up the different parts of the telescopic tube and screw in a sharp screw right through them, to keep the two parts at a specific length just shorter than what it needs to be.  Then you turn the ring around the bottom to extend it and put pressure between the furniture and the ceiling.  I do not know how tight it should be; I made it as tight as I could by hand without really cranking on it, because I don’t want it slowly cracking the drywall over time.

How I braced a monster wardrobe and protected Narnia (3) There’s a red line on the bottom tube showing where it is over-extended; you don’t want that red mark to be exposed when it is put together or it won’t be a strong.

Finished and braced!

So here is the final product.  I think it looks great, and while I put a LOT of effort into this, I do feel better about knowing that it is not going to be a massive death trap in a quake.  In fact, I am feeling pretty confident about this now, and I suspect that if my entire home were to completely fall apart in a giant quake, this wardrobe would still be standing right here intact and closed and upright; gateway to Narnia and all.  Although, if you are expecting any English kids to emerge back out of the wardrobe, you should probably take that clip off of the handles…

Back to article index

Link to this article Back to top

Earthquake-resistant cabinet latches revisited: an alternative to push-latches that is worth considering
(A long one… but much of the length is a technical description of installation that you can just skim over unless you are actually going to be installing these latches)

E-mail subscribers: this particular article is probably best viewed online in the blog itself , rather than in the e-mail message, due to all of the videos.

Earthquakes frequently make cabinet doors swing open and knock out everything in the cabinets, creating a massive mess in the best case, and serious damage or injury in the worst case.  Consider not only the breakable dishes and glasses in those cabinets, but also all the different kinds of oils and vinegars and liqueurs and condiments and sauces and bottled-that and jars-of-this that could tumble out and smash onto the floor… well, I suppose a revolutionary new culinary combination taste sensation could come out of it (or, if the earthquake is well-timed with an electrical storm, perhaps a new life form), but it’s generally a good situation to avoid.  Having quake-resistant cabinet latches, especially in the high cabinets of a kitchen, is a really good idea.

There are several different kinds of products that call themselves quake resistant latches.  I’ve long been a big proponent of push latches (touch latches) and have used them for about 25 years now in multiple apartments and condos.  These are the latches that prevent your cabinet doors from opening unless the door is pushed in first to make them disengage, and then they re-engage when the door is pushed in again to close.  I wrote a long article about tips and tricks for installing these latches in 2012 and for a while, it was the most widely viewed post on this blog.  However, the question has been raised occasionally about whether an earthquake could shake the door just right so that it jiggles inward and disengages itself, defeating the whole purpose of having the latch.

Earthquake-resistant cabinet latches revisited: an alternative to push-latches that is worth considering
The two latches being compared: push latch (left) and Murakoshi latch (right)
I’ve felt this was unlikely, and anecdotally have heard that push latches do well in quakes.  However, I have recently learned about evidence that these latches can open under the right conditions, and have also been made aware of a different kind of latch that I want to tell you about: the “ Murakoshi Perfect Lock PFR-TSAα: Earthquake-proof latch for hinged doors” from Japan (referred to below as the Murakoshi latch).

First, some important disclosures:

- The Illinois company that is exploring marketing and distributing these latches in the US, Tuson Corporation , which also deals in RV braking safety technology as well as manufacturing for various industries, contacted me initially to get my opinion about the potential US market.  They supplied me with some complimentary test samples to try out that I was free to keep and use.  Other than these test samples, I have not been compensated in any way to evaluate these latches, the company has known from the start that I would write an honest assessment even if negative, and when I decided to get more of their latches, I purchased them at full price.

- Based on my experience with different latches, I volunteered as a favor to review an early draft of their English translation instructions and made suggestions from the standpoint of someone who would try to follow them and install the latches.

- Unlike my decades of experience with push latches, I have only used these Murakoshi latches for a few months and therefore can’t advise from personal experience that they will work in a quake or will not freeze up with normal use.  However, I am told by Tuson that these latches have been used in Japan successfully for a couple of decades (I have not attempted to independently verify that claim) and that they are on their third generation of latches.

- Some of my conclusions of how push latches and Murakoshi latches compare are based on seeing videos provided by Murakoshi itself.  However, I found the videos to be pretty convincing.

I also want to discourage a subsequent wave of companies asking me to review their products, since I don’t have time to open myself up to that.  However, in this case, Murakoshi’s approach was intriguing and I feel that the information I have learned about these latches is well worth passing along.

Comparing the different strategies for quake-resistant latches

I don't like latches that are always closed and you have to push something out of the way every time you open the cabinet, like the typical child-proof cabinet latches; too much interference in everyday use of your kitchen.

I also don't like latches that engage when they sense shaking from a quake, because if some mechanism in the latch has to fall due to the quake, the door could have already opened.  I tried the “Shocklock” many years ago and I had to shake it violently for it to finally activate after many seconds.  Similar products have been marketed subsequently by some well-regarded seismic bracing companies and I admit I have not tried those latches, but in general, I feel it is a weak concept that success hinges (pun intended) on something in the latch that has to move before the door moves.

I do like the push latches, other than the potential for them opening as described here, as the extra pushing motion is really not inconvenient and is even nice because the door than springs toward you as it opens.  One concern is that if your guests try to open your cabinet without realizing it has a push latch, they can potentially damage the latch or themselves!

When Tuson contacted me and described the Murakoshi latch, I was initially prepared to dismiss it as just another motion-activated latch.  However, they have a really neat reverse twist on the concept:  this latch is always in the position to prevent the door from opening but it moves out of the way when the door opens.  However, a little pendulum mechanism inside the latch has to be centered to allow this, and any displacement of the pendulum prevents the latch from moving out of the way when the door opens.  Sounds hard to picture but it works quite well (look at the videos a few paragraphs down).  This means that nothing has to move into a lock position before the door opens.  When the shaking stops and the pendulum rests in the middle again, the latch can open again; unless something has fallen and is pushing the door from the inside, in which case it doesn’t release until you push the door back inward.  Ingenious.  And it works.

These latches do have a few disadvantages.  First, they are expensive.  Mine were $12.50 per latch (they are sold in pairs); about double the cost of push latches, which adds up if you are outfitting an entire kitchen.  Second, they can only be installed in certain cabinet configurations (more on that later).  Third, they are, to put it simply, a pain to install.  Even after having installed quite a few of them now, I still find the process to be a mini-ordeal and prefer to not attempt to install more than two of them in one session.  However, this article will take a similar approach to my previous article about push latches: tips and tricks for installation and descriptions of how I dealt with some unusual situations.

Do push latches really open up in earthquakes?

Earthquake-resistant cabinet latches revisited: an alternative to push-latches that is worth considering
Video (below) showing cabinet doors with push latches not opening in
an"armquake" and photos (above) showing the latches in that
cabinet; note the "tenting out" of the cabinet doors (click to enlarge image).

Oh, did you notice in the video that my plant pot is stuck down??
I think having push latches is far better than having non-quake-resistant latches, and I think under most circumstances, they would not open in a quake.  As I said in a reply to someone’s comment at the end of my push latches article , I think the angle and motion of the shaking would make it difficult to open the latches because the latch end and the hinge end of the door, along with the rest of the cabinet, would be moving simultaneously, rather than having the latch end pushed in with a radial motion around the hinge.  It's difficult to model this with a cabinet built into the wall.  However, I have a free-standing cabinet (usually braced to a wall stud) in which I had installed these latches, with a double door and latch on each door. I tried shaking the cabinet back and forth in the direction perpendicular to the wall, with various forces and magnitudes and frequencies (kind of like my “armquakes” to test Command Strips for picture hanging ).  For what it's worth, these doors did not budge; you can see the video below ( or online directly ).  The accompanying figure shows the latches on the middle shelf and you can see the doors “tenting” out a bit. That doesn't mean that someone's cabinet won't open up, if given the perfect motion for that cabinet, and much could depend on the particular door and its width, but it doesn't appear that the doors tend to unlatch from general shaking in that direction.


CAN push latches really open up in earthquake?

However, I have now seen videos of earthquake simulation tests (from Murakoshi; see disclosures above) of various latches and I've witnessed with my own eyes the push latch disengaging in some cases, with the Murakoshi latches remaining closed.  Take a look at these videos below showing a push latch and Murakoshi latch in the same simulation of the huge 2011 Tohoku earthquake.  I have seen several videos of push latches and several of Murakoshi latches, each with simulations of different large Japanese earthquakes from the last few decades, but I’m showing you just one representative of each; the other videos are similar and some smaller quakes also disengaged the push latch.  What makes it compelling is that you can watch from outside the cabinet and also from another camera inside the cabinet, showing what the latch is doing.  (You can watch small videos below, or better yet, click these links for larger videos of the push latch and Murakoshi latch  and watch them on the full screen setting.)


Another caveat here: I can’t discount the possibility that the simulations and latch installations were optimized to encourage push latch failure and Murakoshi latch success.  However, I believe that the several push latch videos I saw do indicate that they CAN open, and that Murakoshi latches held under these rather violent circumstances.

One thing that occurred to me while watching these push latch videos is that the chances of these jiggling open are increased if there is relatively little resistance to the “push” motion to open the latch, and relatively short distance to travel from the starting position to the push-in position.  As I discussed in my push latches article, cabinet doors that use push latches can’t rest in the most fully closed position because then there would be no more room to push in to open them, so they have to stick out a little, which has aesthetic disadvantages for double-doors because of the “tenting” look.  However, in these Murakoshi videos, I see that the push latch cabinet door did not have to move very far to reach the push-in disengagement position.  Minimizing the distance with push latches makes them look the most normal so people might intentionally strive for that situation.  However, perhaps the best way to install push latches is to have a healthy distance (like in my figure above), therefore having a greater resistance to push in, reducing the chances that parallel jiggling of door and cabinet in a quake could reach the opening position.

So, I think the push latches will prevent the doors from opening in most quakes, especially if you give the door a little extra distance between its resting and opening positions, and I suspect that they will open in some quakes under the right circumstances; but it’s still far better to have push latches than to not have quake resistant latches at all.  If I had a kitchen full of push latches, I’m not sure I would actually replace them all with the Murakoshi latches, but I might adjust their positions to make the cabinet doors stick out a little more.

So how about those Murakoshi latches?

However, while I DID have a kitchen full of push latches, Tuson contacted me a few months before I was already planning to move to another home in which the cabinets had no latches at all, so this was a great opportunity to test the new ones and consider installing them instead of push latches.  I now have them on most of my upper kitchen cabinets, and what follows is a guide to how I have determined is the best way to install them, including a few extra steps to deal with a non-optimal situation in which the cabinet has a slight step down from its ceiling to the top of the frame (hard to describe; see photographs).

Earthquake-resistant cabinet latches revisited: an alternative to push-latches that is worth considering
Murakoshi latch, click to enlarge image
First, here’s what the latches look like when installed.  Two issues are already evident in these photos: first, as with the push latches, the only brown latch color available is much darker than the blonde wood cabinets and I really wish that manufacturers of plastic cabinet latches would offer a version that better matches this popular cabinet color.  Second, you can see that step down that I mentioned a few sentences ago; these latches are designed to go on a FLAT cabinet ceiling but I was able to add an extra step to the installation to flatten out that step-down with thin pieces of wood or synthetic material (I needed to use slightly longer screws for the back of the latch to compensate for the extra material).  This is similar to my approach a couple of homes ago with the push latches in the last figure panel of my push latches article .

How do the latches work?

I took the liberty of dissecting one of the latches because I think it’s difficult to believe that the concept works until you see it with your own eyes.  The three videos are below and I am also including links to the larger versions online (again, you will have the best results by clicking on the following links and watching the high resolution videos on full screen).  In this first video (with audio) , I have popped the top off and I’m showing you how the guts work.  In the second video (with audio) , I’ve re-assembled it and I am demonstrating how the latch works while in my hand, not installed.  In the third video (no audio in this one), you can see how the latch works after it’s been installed.  Note that the catch on the door is supposed to freely slide up and down to ensure that the latch and the catch will fit together perfectly; the catch gets pushed into the correct vertical position when it first meets the latch.


INSTALLATION

I’m making the installation instructions available here as a pdf , the instruction sheet that came with most of my latches.  Haha, guess what, it’s in Japanese!  If you end up obtaining these latches from Tuson, you will probably have to specify that you want the English instructions, which came with the first latches they sent me and which are available here .  Now, I did review an earlier version of the English instructions to make suggestions, but I have to say, even the current version is a bit difficult to follow because the process is a bit complex, so I’ve laid out a step-by-step procedure here based on photos taken while I installed one of the latches.  You’ll probably find yourself removing the contents of the top shelf and then removing the shelf itself, so allow room for the power drill.

IMPORTANT: if you have never done this before, start with double door cabinets because if you screw up one and can’t open it for some reason, you’ll still be able to access the latch from the other open door.  This also gives you the opportunity to look at how the latches are closing by sticking your head into the other open door, as in the video above.

Earthquake-resistant cabinet latches revisited: an alternative to push-latches that is worth considering
Silicone bumper dots push the cabinet door farther away.
Click to enlarge image
NOTE: There are two extra steps in my procedure that you might not need to worry about.  The first is the addition of the extra flat pieces of material that I used to fill in that upper step-down that I mentioned before.  The second is that if you have bumper dots on your cabinet doors like I do, to cushion the closing of the doors and cut down on the slamming sound, they keep the door further away from the cabinet frame and you need to install the latches slightly farther forward so that they reach the catches on the doors.  Fortunately, there’s an easy trick to do that as you’ll see below.

Step 1, test the latch:  Take each latch individually and before you install it, temporarily remove the two red protective pieces and confirm by hand that the hook part does not move when you jostle the latch, and that afterward, you can get it to move again by holding it perfectly still against the bottom of a cabinet.

  • Yep, I really do recommend this, for EVERY latch, because (especially in a single door cabinet) if you close the door and the latch does not open even when stationary, the cabinet could be stuck in the closed position!  Out of the original 6 latches I was sent to test, one of them actually would not reliably let me open it again (in my hand) after jostling; in fact, that’s the one I dissected because I was already attempting to fix it and popped the cover off in the process.  In the batch that I purchased afterwards, I’ve installed 9 more latches so far and none of them have exhibited this problem.  Murakoshi says this problem should not occur and mine might have been a rare fluke, but knowing that such a defect (or perhaps damage in transit) is possible, play it safe and test the latches first.

Earthquake-resistant cabinet latches revisited: an alternative to push-latches that is worth considering
Step 1, testing each latch.  Click to enlarge image.

Step 2 (optional, only necessary if there is a step down from the cabinet ceiling), fill the gap:  Determine PRECISELY how thick a flat piece of wood or some other material you need to fill the gap.
Earthquake-resistant cabinet latches revisited: an alternative to push-latches that is worth considering
Step 2, filling any step-down
  • I had a very hard flat foam board that I had cannibalized a couple of years ago from the bottom of some old luggage; I also have some flat lightweight wood planks coincidentally of the same thickness.  My step is about 7 mm deep and two of these planks together are almost 7 mm.  I found that if I used double stick tape to make a two-layer piece and then put 4 more layers of double stick tape on the top, I could stick the whole thing to the ceiling of the cabinet with that tape and it was perfectly flush with the cabinet frame; the extra layers of double stick tape let me get an exactly flush mount that is necessary to avoid torqueing the latch when the screws are tightened.  For these rear holes only, because of the extra material in the step, for Step 6 I used my own 3/4” flat-Phillips-head #6 screws instead of the 0.55” flat-Phillips-head #6 screws supplied with the latches.
(Clearly the latches were not designed with this kind of cabinet in mind, but you can make them work quite nicely if you are willing to go through this extra hassle.  Fortunately, once you figure it out for the first one, assuming your cabinets are consistent, you can just repeat the same conditions for the others.  Some people with this kind of cabinet will probably just opt to not use this kind of latch.)


Step 3, position the latch:  Make a mark on the wood where you want the latch to start.
  • The instructions specify putting the latch 0.8 inches (2 cm) away from the edge of the frame (single door) or center line (double doors), but I found that putting it 3 cm away instead gave me a little more room that was crucial for my power drill/screwdriver to fit in a single door situation.  (The instructions only suggest making a mark for the double door but I like doing it on single doors also so that all of my latches will be in consistent positions; I think they look better that way.)

Step 4, mark position of rear holes:  (If you have the ceiling step-down, stick your extra layer to the ceiling of the cabinet with the double stick tape.)  Hold the latch with its red plastic jig in place up against the cabinet ceiling (I do NOT expose the little built-in tape piece on top of the latch yet), pushing toward the back of the cabinet until the front tabs of the red plastic jig press against the front of the frame, and use a pencil to trace the oval rear holes on the ceiling or the extra layer, depending on your situation.  Remove the latch.
  • It’s important to press both red tabs against the frame firmly as you mark the holes so that you don’t end up with a skewed latch.

STEP 4 ALTERNATIVE IF YOU HAVE BUMPER DOTS:  Before you hold the latch up to make those marks, put some spare bumper dots of similar thickness to those already on your door right behind the tabs of the red plastic jig and press the tabs against those dots, rather than the bare cabinet frame, as in the figure.  This ensures that your latch will be forward enough to clear the real dots and connect with the door catch.  I have 4 bumper dots that I just keep putting up and taking off as I install a series of latches. 

Earthquake-resistant cabinet latches revisited: an alternative to push-latches that is worth considering
Steps 3 and 4, positioning latch.  Click to enlarge image.

Step 5, drill rear holes:  Use a sharp pointed tool like an awl to punch a dimple into the very center of each oval.  Then drill a pilot hole up into the frame.  (The instructions say to tape the latch in place and then drill with the bit going through the oval hole, but I found that very difficult and prone to causing the latch to move and be attached unevenly.)  I found it best to use a drill bit that is slightly on the large side for what you might normally use for the #6 screws that they supply or their equivalents, large enough to let the screws be tightened without too much difficulty; i.e., 3/32” rather than the 1/16” suggested by the back of my box of #6 screws.  I usually lay some aluminum foil over whatever is below to catch sawdust.

Earthquake-resistant cabinet latches revisited: an alternative to push-latches that is worth considering
Step 5, drilling rear holes.  Click to enlarge image.


Earthquake-resistant cabinet latches revisited: an alternative to push-latches that is worth considering
Step 6, installation of rear screws.  Click to enlarge image.
Step 6, install rear screws:  Here’s where my advice and Murakoshi’s instructions differ considerably: You already put the rear holes in exactly the right place before attaching the latch, so now you can screw in the rear screws.  However, still remove the cover of the built-in sticky tape to limit the latch’s ability to twist around as the screws are being tightened, which caused some frustration in my first few installations.  Screw both rear screws in while keeping the latch firmly pressed in position because there is play in the rear holes.  (I have not found the ability to slide the latch back and forth at this stage to be advantageous.)  Then you can remove any temporary spacer bumper dots or you can leave them until the next step.
  • A power screwdriver will make this job MUCH easier, but they tend to be bulky, so invest in an extended Phillips screwdriver attachment so that you aren’t limited to that stumpy short one that probably came with your tool.  

Earthquake-resistant cabinet latches revisited: an alternative to push-latches that is worth considering
Step 7, positioning the catch.  Click to enlarge image.
Step 7, position catch:  If you have removed the red plastic jig, snap it back in its position in the latch.  (The red and white cardboard insert should still be in place.)  Peel off the white backing of the sticky black tape on the back of the catch and insert the catch into the holes in the latch.  Make sure the catch is resting in its ideal position and gently close the cabinet door, press closed for a few seconds, and gently open it  The catch should remain stuck to the cabinet door as it opens, in the correct position.
  • It’s nearly impossible to pull that white backing off; I’ve reported this to Tuson and suggested that Murakoshi include a little overhang; we’ll see.

Step 8, drill and screw in catch:  The catch has a thin red tape that prevents the moving part from sliding at this point; leave it on.  Punch guide holes exactly in the center of the metal holes where the screws will go and then drill into the door with the catch in place.  Screw in the supplied catch screws and then pull the red tape off, enabling the catch to slide up and down.
  • This requires some dexterity and the picture makes the danger quite obvious: don’t drill through the door! 
Earthquake-resistant cabinet latches revisited: an alternative to push-latches that is worth considering
Step 8, positioning the catch.  Click image to enlarge.


Earthquake-resistant cabinet latches revisited: an alternative to push-latches that is worth considering
Step 9, installation of front screws.  Click to enlarge image.
Step 9, install front screws:  Now you finally get to take off the red plastic jig and the red & white cardboard tag!  Punch guide holes in the center of the front metal holes and drill up into the wood, and then screw in the supplied front screws whether or not you used the supplied rear screws.
  • Tighten securely but don’t over-tighten, and make sure you aren’t torqueing the plastic of the latch.  Close the door; you may need to slide the catch around to get it to go into its home position rather than banging into the front of the latch, but once it is close enough to that position, it will take the exactly correct position as the door closes.  Open and close it a few times to make sure you hear the “thunk” of the latch moving up and down.  If you are installing in a double door cabinet, reach in the “other” door to feel the latch as you close the latch’s door and feel the hook moving in and out; and to convince yourself that things are lined up functionally, press on the back piece of the moving hook while that door is closed and make sure you can’t open the door as long as you prevent that piece from moving. 

You’re done!  If you are used to push latches like I was, you may find it unnerving to not hear the click that accompanies the closing and opening of the doors with those latches; that feedback was constantly in the back of my mind telling me that the latch had engaged and disengaged.  The lack of the click required a bit of a leap of faith that this new latch will actually work.  However, there is that comforting soft “thunk” sound of the Murakoshi latch moving out of the way when the doors open, so there’s still audible feedback that the latch is behaving as expected; it’s just at a different time.  It was disconcerting at first but I got used to it pretty quickly.

Warped doors create a problem

Earthquake-resistant cabinet latches revisited: an alternative to push-latches that is worth considering
Warped door increased the distance between the latch and the catch; fixed by
extending the catch with an extra wood spacer.  Click to enlarge image.
I did encounter one door in which the latch unexpectedly would not work, and upon looking more closely, I realized that this cabinet door was warped so that the top where the latch was actually farther away from the cabinet then the rest of the door.  The top bumper dot did not even touch anything.  That prevented the latch from being fully closed to the point that the hook would be far enough down to stop the catch from opening.  You can kind of see it in these photos; when closed, the top of the door is a little more open than the bottom, and when you look at the open door straight on the edge, you can see a little of the inside of the door at the top but not at the bottom.  This was enough warp to cost those precious few millimeters at the top.  My solution is shown in the last photo; it works quite well.  Not shown, I also replaced the bottom bumper dot with a felt dot to bring the whole door slightly closer to the frame.

Thoughts on closing

Haha yes, that pun was intended…  These latches need to be under a surface that reaches all the way to the door; they cannot be on top of a surface and they can’t be under a surface that stops prematurely.  (By the way, not being on top of a surface means that they don’t take up room on your shelf, which is nice.)  That means they can’t be used on most floor level kitchen cabinets because there are usually drawers or some kind of empty space above the lower cabinets; there’s nothing on which to put the latch.  Push latches are also not the best in lower cabinets in the kitchen because you’ll constantly be opening them with your knees.  For these reasons, I have not put quake resistant latches on lower cabinets, figuring that in most cases, things falling out of a lower cabinet won't cause many problems.  I did install a very stiff latch on one lower cabinet in my previous home that had a bunch of stacked serving dishes; figured it was better than nothing.  You can always put a catch style latch if you need to, but that looks, well, industrial (see the second-to-last figure in my push latch article).  And I guess the point of those move-a-lever child-proof latches are to keep the toddler away from the bleach below your kitchen sink.  Still, someone really needs to come up with a good solution for quake resistant lower kitchen cabinet doors.  [Revised 10/8/18 - Hey, someone did!  Tuson points out that a 90 degree bracket can be fastened inside the frame and the latch can be attached to the bottom of the bracket, as shown in this extra photo added in this revision.  Hopefully they will come out with an official attachment for this purpose, but if you really want to, you can rig up something yourself.  The same could be done for push latches, although then the door would be at the mercy of knees and dogs.]
Earthquake-resistant cabinet latches revisited: an alternative to push-latches that is worth considering


Updated 7/8/19; 6/8/26:  Tuson now offers these latches through their own online store .  If you have questions, you can contact Tuson directly at inforvbrakes [at] tuson [dot] com.  Again, Quaketips has not gone commercial and it’s unusual for me to provide direct marketing information in this blog, but I think it is appropriate in this case to let you know where to find them.  I have no financial connections with Tuson, Murakoshi, or any other latch manufacturer/marketer for that matter.  And I repeat, while I’m impressed with the latches and have installed them in my own kitchen, I do NOT have enough experience with these latches (and won’t for many years) to feel comfortable “endorsing” or “recommending” them over other types.  So let’s just say I’ve started a long-term experiment; the next time there’s a big quake, please fill up the comments section for this article saying what kind of latch you have (or no latch at all) and whether your doors opened!  (I hope I am not unlatching Pandora’s box…)

Back to article index

Link to this article Back to top

No Gripes about Gripeez: A way to use clear gripper pads to stick down display objects resting in stands
One of the types of display items on bookshelves and mantles that is difficult to brace is the common plate or other flat object that rests in a folding or non-folding stand, like the ones shown in these photos.  This can be tough because depending on the object and the shape of the stand where the object rests on it, it can be hard to affix the display object to the stand, and even harder to affix the bottom of the stand to the surface.  Sure, you can put a massive gob of quake putty on each part but you’ll see it and it can look ugly (no offense to quake putty).  Sometimes, these objects are light and having them fall would not be a problem, but for those that you want to prevent from flying and damaging themselves or something/someone else, it would be nice to be able to stick them down.

No Gripes about Gripeez:  A way to use clear gripper pads to stick down display objects resting in stands

In some cases, I have used putty and simply scraped away as much as possible so that it isn’t obviously visible, as shown in the first set of photos.  But I have some thin geode slices sitting on clear plastic stands, and while quake putty was fine to stick the backs to the stands, even small dabs of putty on the stands’ feet looked bad showing through the clear plastic, as shown in these photos of the blue geode slide.  I would usually use quake gel for clear objects but quake gel is runny, and doesn’t work well with very small feet of stands; it’s better for broad surfaces.

No Gripes about Gripeez:  A way to use clear gripper pads to stick down display objects resting in stands

I solved this problem with one of my new quake-proofing friends, Gripeez.   I’ve written about these magic clear sticky gel pads before and I keep coming up with new uses for them.  (I have no financial ties to the company, and I imagine there are other similar products from other companies.)  In this case, I cut small rectangles of Gripeez that were the size of the feet of my stands and put them under the feet, with quake putty sticking down the back rest of the stand that can’t be seen from the front.  It took a bit of finessing to get the sticky things to remain on the feet without twisting as I removed my fingers before placing the stand on the surface, because they kept sticking to my fingers, but I managed to do it.  It looks great!

No Gripes about Gripeez:  A way to use clear gripper pads to stick down display objects resting in stands
Click the figures to see larger versions
Because the Gripeez is thick (around 3 mm), the stand feet don’t rest directly on the shelf and the stand can move slightly from side to side, which isn’t ideal, but it seems to be holding this pretty well.  In a large quake, it would probably come off, but I think this would discourage the objects from sliding or flying in a medium quake that might otherwise knock objects off shelves.

I also started using small pieces of Gripeez under the two lower corners of framed pictures if they were on maze picture hooks, to keep them straight, in my previous home.  I used to use putty for that but the putty can leave shiny marks on some flat paint walls, and the Gripeez didn’t leave any trace on the paint in that home.  However, some unexpected home repairs involving water damage have made me need to temporarily remove some of the framed pictures that I hung with maze hooks a few months ago in my current home, and I have found to my annoyance that the little squares of Gripeez that I had cut out and placed under the corners left the paint slightly shadowed, as if it was a little wet.  I was annoyed to see this because the whole point of using these things instead of quake putty was to avoid shiny marks on flat paint, so seeing these shaded areas isn't much better.  In my old home, which had a similar paint job, the Gripeez left the paint absolutely unaffected, so I guess different paints react differently.  I did notice that they are extremely sticky though, so very small squares should still be effective and might leave less noticeable marks.]

By the way, these Gripeez are also really fun to play with; as they are sticky and squishy and stretchy and can offer hours of entertainment to otherwise mature adults, based on personal experience…

Back to article index

Link to this article Back to top

How to protect fine wine glasses from themselves and their brutish cousins
I’ll start this article with material that many of you know already, and then hit you with something you may not have thought about.

Here’s what you might already know, especially if you have attended one of my talks.  Even if you have taken measures to prevent your kitchen cabinet doors from swinging open in a quake*, which would allow the contents to fall out and shatter or cause other problems, those contents can still get jostled around inside the closed cabinet and break.  I think the most likely candidates for getting broken inside a closed cabinet are delicate crystal wine glasses.

[* See my discussion of push latches , including some recent questions about conditions under which they might fail; a large article about different latches is forthcoming.]

How to protect fine wine glasses from themselves and their brutish cousins If you don’t use those glasses very often, you can take steps to preserve them by sticking them down with several small pieces of quake putty under the edge of the base.  Now if you do this, you need to be able to pick them up again to use them, and this ironically risks breaking the glasses if you try to hold them by their bowl sections (the drinking part), since the stems will easily snap.  The secret is to grasp a glass by its flat base and gently twist the base while slightly tilting the glass (again, only by holding the base).  At first, it might seem like you can’t do this, but a gentle insistent twist/tilt will ultimately convince the base to separate from the shelf.

Ways to prevent them from getting too difficult to lift up include using really tiny pieces of putty (smaller than the ones in the old photos above, like the size of a coriander seed), and not pressing them too hard onto the shelf when placing them initially.  Using quake putty usually involves twisting an object and pressing hard onto the surface, but in this case, just gently press the base down, no twisting, and don’t flatten the putty balls too much, just enough for the glass to feel firmly attached to the underlying surface.  Also, don’t put them too close together, because that little tilt means that the top of the glass moves sideways, and if there is another glass in its way, you could have problems.

I’ve noticed that if you pick up a glass within a year or two, the putty easily peels off the base without leaving any trace to be cleaned up; but if you pick up one after many years (like eight, in my case), they can be a little harder to lift up, and there might be a trace of putty that you end up needing to clean off.  It’s still better than cleaning up shards of shattered crystal wine glasses on the floor after a quake.  Remember to leave the putty balls on the shelf because you can reuse them when you put the glasses back.

Ok, now for the part you may not have considered.  It’s admittedly a pain to do this to your wine glasses, and you will probably only do it for the expensive delicate ones, leaving cheaper wine glasses and also regular drinking glasses un-fastened.  But that means that in a substantial quake, the delicate glasses might not fall over, but the crude and thick cheap glasses will be flying around and will crush the fastened delicate expensive ones!  I solved this problem in my previous home, and have recreated it in my new home, by putting a wire shelf divider like the one shown in these photos, onto the shelf between the cheap ones and the expensive ones.  These are available at places like the Container Store (not an endorsement; it’s just where I got mine) and most certainly from online merchants.
How to protect fine wine glasses from themselves and their brutish cousins
Click image for larger photo
One limitation of these dividers is that they have large gaps through which smaller glasses, pieces of glasses, or edges of intact glasses could still hit the adhered delicate glasses.  I actually did not think that the following idea would work when I first tried it, but it was magnificently successful: I put a piece of white card on the side of the divider closest to the cheap glasses, and adhered it to the divider with… guess what… quake putty!   The uses for that stuff just keep getting more numerous!  It is on the side closest to the cheap glasses because those are what we are trying to stop from going through the divider; if they were on the putty side rather than the card side, they could theoretically push through and knock the card off, and proceed to cause the mayhem we are trying to avoid.

How to protect fine wine glasses from themselves and their brutish cousins
Click image for larger photo
If you get the type shown in the picture, it is very stable and does not easily slide on the shelf or tip over; it’s a very solid combination.  I assembled the one shown in the photo in 2009 for my old home, it was still solid in 2017 when I pulled the divider off of the shelf, and it remained solid through the move and being tossed in a pile so that when I put it on the shelf in my new place as shown in the picture, I didn’t have to do anything to it; it was as strong as the day it was put together.

How to protect fine wine glasses from themselves and their brutish cousins
Note that this card was somewhat glossy and smooth, and made a good surface for the putty to stick.  Had it been more fibrous or porous paper, I doubt this would have worked.  But any smooth, non-floppy surface to which the putty will stick, including smooth card, plastic, light weight metal, etc., will work well.  Of course, if you want, you can use any of a number of glues or cements.

The moral of this story is: always be thinking one step ahead of potential earthquake-caused problems, including putting up a fence to keep the bullies out.

Link to this article Back to top

Special bulletin about Gripeez leaving marks on some painted walls
This is a special short bulletin regarding the use of Gripeez to stabilize the bottom corners of pictures hanging on maze picture hooks , which I have recently been recommending  as an alternative to using pieces of quake putty to stabilize the corners.

This worked wonderfully in my previous home.  However, some unexpected home repairs involving water damage in my current home have made me need to temporarily remove some of the framed pictures that I hung with maze hooks a few months ago, and I have found to my annoyance that the little squares of Gripeez that I had cut out and placed under the corners left the paint slightly shadowed, as if it was a little wet.  I was annoyed to see this because the whole point of using these things instead of quake putty was to avoid shiny marks on flat paint, so seeing these shaded areas isn't much better.  In my old home, which had a similar paint job, the Gripeez left the paint absolutely unaffected, so I guess different paints react differently.  I did notice that they are extremely sticky though, so very small squares should still be effective and might leave less noticeable marks.

I've updated some recent articles in which I had mentioned this use of Gripeez but wanted to post a new bulletin in case anyone already read those articles and won't be reading them again.

Back to article index

Link to this article Back to top

Command Picture Hanging strips for earthquake resistant picture hanging: A follow-up
Command Picture Hanging strips for earthquake resistant picture hanging: A follow-up Here’s an update on sticking pictures to walls with Command Velcro-style picture hanging strips, about which I wrote before .  (If you haven't read that article already, I suggest reading it before reading this one.)  I continue to be very impressed with these, but I have additional experience that I would like to share with people here as I’ve been putting up a lot of pictures in my new home.

First of all, as you might guess, these are not a good option for frames that have paper on the back.  They will stick, but if you were to try to remove them by unzipping the Velcro-style connection between the two strips, you run the risk that the strips would remain together and the paper would rip off.  Therefore, for such pictures, I continue to use maze picture hooks.

If the frame already has a picture wire, then you can usually remove the hardware that holds the wire in place, like screw-eyes, because they will prevent the back of the frame from getting close enough to the wall for the Command strips to work.  Also, if you have a hybrid frame that has a fold-up kickstand for tabletop display, and you don’t want to rip that off, then you have to make sure it is thin enough so that the Command strip sandwich will still connect the back of the frame to the wall.

Command Picture Hanging strips for earthquake resistant picture hanging: A follow-up
I also realized in my current round of picture hanging that if the frame is not completely flat, it can cause problems.  As you can see in these photos of a couple of small framed pictures in a stairwell, they are working very well but there is one frame that apparently has a slight bend to it, and that prevented the sticky back of the Command strip against the wall from sitting flush on it (rightmost photo, upper part of the strip; you can click on the picture to enlarge it)).  I am not too concerned though, because most of the strip is on the wall and I haven’t seen evidence that it is slowly peeling off; it is just off of the wall in the part where the frame is bent.  The rest of that strip, and all of the other three strips, seem fine.

Command Picture Hanging strips for earthquake resistant picture hanging: A follow-up By the way, other than this one instance of the sticky part of the strip not completely being flush with the wall, I have not observed any other instance of these becoming separated, either at the sticky surface or at the Velcro interlocking faces.  I mentioned these Command strips at one of my talks and someone in the audience said that they had had a bad experience with them coming off, and I was hoping to find out more about that and requested that they e-mail me details afterward but they didn’t contact me afterward, so I don’t know if it was a situation like this one instance I’ve described here.  It does not appear likely to me that the interlocking Velcro part will spontaneously come undone, and the sticky parts of regular Command strips (i.e., not the Velcro style, but the single strips that attach hooks to walls) have been very stable over many years in my experience.

I also used the Command strips to stick this ornamental plate to the wall (shown above); two strips at the top and one in the middle.  Quite nice!

One disadvantage of using the Command strips is that if you decide to repaint your walls, you won't just be taking pictures off of hooks and pulling nails out of the wall temporarily.  You'll either have to paint around the wall-mounted half of the Command strip pair (which means you'll see the footprint if you later remove that strip to reposition the picture), or you'll have to permanently undo the whole set-up and start again from scratch after the paint job.

Command Picture Hanging strips for earthquake resistant picture hanging: A follow-up Now here’s one more issue: I put a couple of small pictures on a bathroom wall with the command strips and they look great from the front, but you can see in the photo that the pull tabs of the strips are somewhat visible from the side on the wall, and very obvious in the reflection of the frames in the mirror!  Even though the wall is near white and the pull tabs are white, they show through the shadows easily (upper photos; click on the figure to enlarge it).  These Command strips are also available in black, and I had avoided those because I figured they would clash with a white wall.  However, I tried them in this case and I was completely wrong before: the black ones don’t clash with the white wall; instead, they blend nicely into the shadow (lower photos).  MUCH better looking in this case than the white ones.  I actually tried a hybrid in which a white one was on the wall and a black one was on the picture frame, but that one white pull tab was still visible.  So don’t be afraid to use the black ones in a shadow situation if the frame is black.

By the way, in case it doesn’t go without saying, I don’t suggest determining what size strips to use by the weight capacity listed on the package.  That figure is set to avoid spontaneous failure on stationary walls, NOT for separation during shaking in an earthquake.  I would err on the side of larger strips.

Command Picture Hanging strips for earthquake resistant picture hanging: A follow-up Well, it’s been about a year and a half since I first started experimenting with these Command Strips and wrote my original article about them.  Having used maze picture hooks as much as possible before these, what is my current default approach to hanging pictures?  Actually, I would say I have about half maze hooks and half Command strips.  I’m using Command strips for framed pictures that are relatively light-weight and no more than about 3 feet wide (no magic number there; I’m just going by the feel of it), for unframed pictures even if they are larger if they have a broad enough back edge for the strips to stick, and for objects like that metal plate above that can’t take picture wire (see the couple of examples shown in the accompanying figure).  I’m using maze picture hooks for the larger, heavier framed pictures.  If they are just very large but still relatively lightweight (for example, if I can easily pick it up with two hands and position it on the wall), I’m using a single maze hook nailed into the drywall, or two maze hooks several inches apart lined up horizontally if the picture is wide enough that I want extra stability.  If the picture is REALLY big and heavy, like the very large picture shown below, then I go for two maze hooks lined up horizontally 16 inches apart and bolted into the wall studs .  As I wrote about in an earlier article about maze hooks , I also use these for heavy objects suspended from string like metal gongs on the wall, with the hook bolted into a wall stud.

Command Picture Hanging strips for earthquake resistant picture hanging: A follow-up One more evolved part of my strategy is that I no longer use small pieces of quake putty in the lower corners to stabilize the pictures from rotating or swinging out, because that does involve risk of shiny marks on otherwise flat paint surfaces.  I am now routinely using small cut-out rectangles of “Gripeez” ( see my 10/23/17 article ), which is one of the modern polymer-based tacky gripper pads that stick well with no adhesive residues and no alteration of painted surfaces of which I’m aware.

[update (3/12/18): regarding the use of Gripeez to stabilize the bottom corners of pictures hanging on hooks, as mentioned above, some unexpected home repairs involving water damage have made me need to temporarily remove some of the framed pictures that I hung with maze hooks a few months ago, and I have found to my annoyance that the little squares of Gripeez that I had cut out and placed under the corners left the paint slightly shadowed, as if it was a little wet.  I was annoyed to see this because the whole point of using these things instead of quake putty was to avoid shiny marks on flat paint, so seeing these shaded areas isn't much better.  In my old home, which had a similar paint job, the Gripeez left the paint absolutely unaffected, so I guess different paints react differently.  I did notice that they are extremely sticky though, so very small squares should still be effective and might leave less noticeable marks.]

So now remember, if someone asks you, “so you’re following that Springer guy’s blog, what did you think of it?,” be sure to use words like “gripping!,” “suspenseful!,” or perhaps “hooked!” (but hopefully not “tacky”…)

Back to article index

Link to this article Back to top

Simple ideas for making sure your phone and eyeglasses stay on your nightstand
Simple ideas for making sure your phone and eyeglasses stay on your nightstand Here’s a relatively short article with some simple ideas for preventing the useful items on your nightstand from flying away in an earthquake.I already described how I keep my flashlight easily accessible a few years ago.However, I also keep my eyeglasses and my cell phone on my nightstand when I’m sleeping, and it would sure be nice if they remained handy if a quake hit while I was in bed.My approach is not rocket science but I figured I’d share it.
The astute reader will discern several things by looking at this photo of my nightstand.  (1) It’s in terrible shape (it’s an end table from the 1970s currently in its 10th life), but that is not really relevant.  (2) My eyeglasses case is right next to me under stationary conditions.(3) My iPhone is charging in a nice convenient stand. 
You can kind of see the flashlight on the lower level, but concentrate on the upper level.Here’s how those objects are held in place.
Simple ideas for making sure your phone and eyeglasses stay on your nightstand First, the cell phone.Pretty simple: that charging stand is stuck to the surface of the end table with quake putty , since I never need to move the charging stand and it even makes it easier to remove the phone from the charger with one hand.I might have been hesitant to put quake putty on bare wood if the nightstand was some great antique, but considering my nightstand is a non-great “antique” full of water marks, I’m fine with it.
Second, the glasses case.I like to be able to pick up the glasses case when putting my glasses into it at night or taking them out in the morning, so I didn’t use putty.One could potentially come up with a Velcro-based solution, but I decided to use magnets and my favorite 3M Command Strips (the sticky tape with a tab that you can pull to make it stop being sticky and release from a surface).In this case, I used the clear Command strips, so you don’t have ugly white tabs on the dark wood furniture.Again, I would hesitate to put these strips on good wood furniture.I used those strips to stick down a couple of strong magnets, figuring I’d attach other magnets or a metal plate to the bottom of the glasses case.However, as luck would have it, the glasses case was already paramagnetic so I didn’t have to add anything else to it. I just stuck down the magnets to the table, and now if I even put the case close to the right place and let go, it jumps right to where it should be; quite helpful in the dark.
Simple ideas for making sure your phone and eyeglasses stay on your nightstand Now, these may still fly off if the quake is large enough, but it’s nice to know they are at least discouraged from leaving.  Velcro might be safer, but I do like the idea of being able to pull the glasses case off without making an audible noise that could wake up someone else in the bed.
The touch light visible in the photo is actually also stuck down with putty. None of the other objects are stuck down , like the wireless remove for my floor heater or the wired remote that adjusts the firmness of the bed.
Simple ideas for making sure your phone and eyeglasses stay on your nightstand I’m sure that those reading this could easily come up with similar solutions on their own.The point of this little exercise is really to plant the suggestion in your head that it’s worthwhile to keep important objects at hand if a quake hits while you are asleep in bed.As I pointed out at the end of the flashlight article, this is all moot if the nightstand moves away from the bed, so you might consider discouraging it from sliding if necessary, perhaps by putting rubber non-skid pads under the feet.  
Of course, if these essential objects stay on the nightstand and you tumble out of bed, then I guess the joke is on you.  Somehow, resorting to velcro pajamas and bedsheets seems like a bit much, although it could possibly benefit the space program.

Link to this article Back to top

Special bulletin: potential evidence that push latches can fail during shaking
I have been recommending that people use push latches (a.k.a. touch latches) to prevent cabinet doors from opening for several years.  There have been discussions and debates about whether shaking in the right direction can cause the door to wiggle enough that the latch would disengage.  There are various accounts from people who have experienced quakes while using these latches that the doors don't open, and I have shaken a cabinet and noticed that since the hinge is moving along with the rest of the cabinet, the door doesn't move relative to the hinge so it does not jiggle in and out and the latch does not open.

However, that doesn't mean that some kinds of earthquake motion can't disengage the latches.

Evidence is now emerging from simulations of actual earthquakes of various intensities that these latches may fail more easily than previously thought.  While I don't yet have enough information to warrant no longer recommending the latches because they may still be protective in many earthquake scenarios, I feel the responsible thing for me to do is to alert people about this issue now, and I will post a new article with more comprehensive information in the near future when I have looked into it more fully.

Back to article index

Link to this article Back to top

Do you have a ticking time bomb in your cupboard? Better check what is supporting your shelves!
If it seems like I can be fixated on kitchen cabinets, it’s because they frequently are not on the radar screen of people trying to prepare their homes for earthquakes, but there are actually multiple ways in which they can be vulnerable.  You’ve read many references in this blog to keeping the cabinet doors from swinging open and letting everything fall out, with potentially disastrous consequences, by putting quake-proof latches on the upper cabinets .  I also have occasionally mentioned that quake putty can be used to stick down rarely-used expensive wine glasses in the cupboards, since even if the doors don’t open, the contents can get knocked over and fly around and break inside the closed cabinets.  However, there’s another potential problem, and some of you have it in your cabinets right now!

The shelves.

Yep, those sturdy boards on which very heavy loads of dishes, glasses, liqueurs, etc. are sitting.  Nope, I am not saying that the boards will buckle under the weight, but look for the weak link: what is holding the boards up??

In many cases, those boards are sitting on pegs that fit in holes on the inner sides of the cabinets.  Multiple holes enable you to select the optimal height of the shelf.  I’m not telling you anything you don’t already know... except that some of you have pegs that can spontaneously fail.  Yep, it’s true!

Do you have a ticking time bomb in your cupboard?  Better check what is supporting your shelves! Here’s a true story from my own condo building.  It’s a modern building that was opened in 2007, good quality.  The shelves are supported by plastic pieces that sound like a great idea; they are not only pegs but they include a wide flat support on which the shelf sits, and then a thin piece of plastic sticks up next to the board and around on the top, clipping it in.  That not only supports the board, but also stops it from sliding around.

It turns out that it’s not as smart as it sounds.  A few of my neighbors have had experiences over the last couple of years in which the plastic peg suddenly fails, shearing off where it sticks out from the hole, and people have had shelves and all of their contents spontaneously pancake down in their cupboards with a crash.

Do you have a ticking time bomb in your cupboard?  Better check what is supporting your shelves! In fact, a neighbor experienced this, got a whole bunch of metal pegs, and replaced the plastic supports with the metal pegs to prevent this from happening in the future.  He had a bunch left over and gave me some so that I could do the same when I managed to get around to it, to prevent this from happening to me.

Do you have a ticking time bomb in your cupboard?  Better check what is supporting your shelves! Well, Mr. Preparedness here never got around to it.  A few days ago, there was a clunk in the kitchen that I could not identify and I figured it was something shifting in the drying rack.  Then a couple of days later, I needed to get a tall pot out of the back of the lowest shelf in one of my cabinets, and as I was pulling it out, it was scraping against the bottom of the shelf above it.  Since it’s never scraped before, I was very confused, and a few seconds after I pulled out the pot, that whole shelf, supporting lots of heavy serving platters and ceramic bowls, came crashing down!  It turns out that the clunk I heard before was one of the supports giving way, and the corner of the shelf falling just a tiny bit onto the pot.  When I pulled out the pot, the rest of the shelf gave way.  As a result, I replaced the plastic gizmos with the metal pegs for all shelves that were supporting heavy and/or breakable objects.  Fortunately for me, nothing broke.

Do you have a ticking time bomb in your cupboard?  Better check what is supporting your shelves! Ok, so anyone want to guess what this has to do with anything?  Well, if everyone in my building has cabinets in which the plastic shelf supports are degrading over time to the point that they might spontaneously fail when they are not moving, what do you think is going to happen in a moderately-sized earthquake?  Every shelf support that was going to spontaneously fail without an earthquake, say in the next year, is going to fail when the cabinet and contents start quaking!  Cabinet doors stay closed, expensive wine glasses don’t fall over, but the shelves all pancake and everything breaks anyways.

If my kitchen has plastic shelf support pegs, some of you have the same problem in your kitchen.

You can prevent this Murphy’s Law scenario easily; just check what is supporting your shelves and if they are plastic, replace them with metal pegs before the next quake hits!
Do you have a ticking time bomb in your cupboard?  Better check what is supporting your shelves!
[1/5/24 update: I've had queries about the specific pegs I use, so it's worth mentioning that I'm no longer using these paddle-style pegs because I've found others that are still metal but have more useful support platforms.  Some have a hole so that you can screw the bottom of the shelf onto them, if you are concerned about the shelf jumping off of the pegs in a major quake.  Others have a nice top platform with a little extra piece that hugs the side of the shelf and prevents the peg from even sliding out (the first ones mentioned have this advantage also).  I'm adding a photo spread.  These are easy to find in hardware stores or online; just make sure the diameter of the peg matches the diameter of your hole.]

Link to this article Back to top

Are Command Picture Hanging Strips as good as maze picture hooks for quake-proof picture hanging?
Embedded videos appear below.

(Videos may or may not play on iPads; this is a recurrent problem with the original embedded players and iOS.  Reading on a computer is recommended.  Google Chrome browser seems to be more reliable than Safari for these videos on a Mac.) 

Are Command Picture Hanging Strips as good as maze picture hooks for quake-proof picture hanging? Wall hooks are great for holding up pictures as long as gravity is free to do its job.  However, during earthquakes when the wall is shaking up and down, pictures have an annoying and sometimes destructive tendency to jump off of the hooks and come crashing down.  (Although amazingly, some of them stayed on their hooks during the great 1906 San Francisco earthquake .)  When it comes to preventing pictures from jumping off of their hooks, the gold standard is the “maze” pictures hooks that trap the wire in a zigzag slot.   I’ve written about these terrific but simple devices before.  However, the maze picture hooks have some disadvantages.  They still allow the picture to jump around a lot, potentially causing other problems (I tend to put dabs of quake putty at the lower corners to stabilize them).  Furthermore, these plastic hooks are so thick that they cause the picture to lean forward at an extreme angle, especially smaller pictures.  This is also somewhat ameliorated by the thick gobs of quake putty to push the lower corners away from the wall but then the whole picture is sticking out rather than being flush with the wall (see the example photos of some pictures in my home).  (However, the putty can leave shiny marks on matte flat wall paint. ) [Update 1/21/18: I have switched to using small cut-out rectangles of clear "Gripeez" or other similar modern gripper pads; they are quite sticky but leave no residue and reduce the chances of any marks on the paint.] [Update 3/12/18: regarding the use of Gripeez to stabilize the bottom corners of pictures hanging on hooks, as mentioned above, some unexpected home repairs involving water damage have made me need to temporarily remove some of the framed pictures that I hung with maze hooks a few months ago, and I have found to my annoyance that the little squares of Gripeez that I had cut out and placed under the corners left the paint slightly shadowed, as if it was a little wet.  I was annoyed to see this because the whole point of using these things instead of quake putty was to avoid shiny marks on flat paint, so seeing these shaded areas isn't much better.  In my old home, which had a similar paint job, the Gripeez left the paint absolutely unaffected, so I guess different paints react differently.  I did notice that they are extremely sticky though, so very small squares should still be effective and might leave less noticeable marks.]

Are Command Picture Hanging Strips as good as maze picture hooks for quake-proof picture hanging? Are Command Picture Hanging Strips as good as maze picture hooks for quake-proof picture hanging? I’ve been experimenting recently with 3M's Command Picture Hanging Strips that are essentially a version of Velcro composed of two identical rows of interlocking plastic hooks, on those amazing now-you-stick-it-now-you-don’t adhesive strips that lose their adhesion when you pull the tab.  They are nice because the picture is flush against the wall rather than hanging out at the top (see example photos below of more pictures in my home).  They also have the advantage of not requiring any holes in the wall, a bonus for renters and for anyone who likes to keep their walls intact.  These are extremely strong and advertise that four pairs of large strips will hold up a 16 lb picture.  However, I presume this rating applies to vertical stability on stationary walls, so what would happen if the wall was shaking violently in an earthquake?

Are Command Picture Hanging Strips as good as maze picture hooks for quake-proof picture hanging?
I finally did the experiment, just for you, lucky Quaketips Readers.  Because I don’t really have time to hang up pictures and sit around waiting for major earthquakes to strike, I attached pictures to a painted piece of drywall and simulated an earthquake using my low-tech-but-effective “armquake” technique; that is, holding the board in my arms and shaking it violently.  I shook it at a magnitude of 10 on the Matt Springer Scale.  (The Matt Springer Scale has only one value, 10, corresponding to shaking a new bottle of salad dressing before use.  In extreme cases, it can go to 11 , but I didn’t want to sprain my elbow.)

The verdict?

I’m impressed.

Are Command Picture Hanging Strips as good as maze picture hooks for quake-proof picture hanging? First of all, here’s how the experiment was done.  I wanted to come as close as I could to the actual situation of a picture hung on my wall.  If these strips could fail, it could be where one half of the mutant Velcro meets its other half, or it could be where the whole assembly meets the picture or the wall.  Therefore, I actually went to the hardware store, bought a real piece of drywall, painted it with a primer coat and then the same flat interior wall paint that I have on the walls of my home.

The first thing to try was to nail a standard picture hook into the wall and put a relatively light picture with a wire on the hook, and...ARMQUAKE!  Watch the video and see what happens to all these pictures on hooks in an earthquake.  If the result surprises you, well... please read the other articles in this archive, you need this!  (Click here for high resolution or if you can't see the video below.)


Then I nailed a maze picture hook into the wall and put the same picture on there.  ARMQUAKE!  Hey, the picture is still there!  Good thing this actually works.  However, it certainly bounced around, and as I mentioned, the maze hook has the disadvantage of pushing relatively small frames far out from the wall at their tops, leading to a very tilted picture that might be annoying to some.  (By the way, the fact that I’m mostly out of the picture in these videos is not an amateur mistake on my part; I’m not the important part of the videos!)  (Click here for high resolution or if you can't see the video below.)


Are Command Picture Hanging Strips as good as maze picture hooks for quake-proof picture hanging?
I then attached a very small framed picture to the drywall with four pairs of medium size Command Picture Hanging Strips.  (This picture is about 1 lb.)  I did it the way they recommend: clicked together the four pairs, attached them to the picture (two at top, two about 2/3 of the way down), pressed the picture to the drywall for 30 seconds, removed the picture, pushed the wall-mounted strips against the wall another 30 seconds, then replaced the picture and waited overnight for the bond to fully strengthen.  And then...ARMQUAKE!   And the picture was still there.  I shook and shook the thing in all directions and it simply did not budge.  (In case you are curious what the rattling sound is in the video, it's not that the frame is loose in its attachment to the wall; there is a loose piece inside the picture.)  (Click  here  for high resolution or if you can't see the video below.)


(Click  here  for high resolution or if you can't see the video below.)


Cool.

Are Command Picture Hanging Strips as good as maze picture hooks for quake-proof picture hanging? Ok, how about a bigger picture.  I tried the same framed picture that I used for the hook demonstrations above, although I had to remove the screw eyes and the picture wire from the back to allow the picture to lay flush against the wall, a requirement for the use of these Command strips.  This one is about 2 lb; I used the medium strips again.  I didn't make a video of this one, but after the ARMQUAKE, the picture had not moved.

Are Command Picture Hanging Strips as good as maze picture hooks for quake-proof picture hanging? I didn’t have a larger picture that I wanted to risk falling down, so I took a cutting board that is about 3 lb and used four pairs of large Command strips to attach it to the wall.  (That’s right, I created a wall-mounted cutting board and I suppose it could be useful for chopping very sticky food.)  Check out the video...ARMQUAKE!   A big armquake, in fact.  But the cutting board did not budge from the wall.  (Click  here  for high resolution or if you can't see the video below.)


How about even large pictures?  I would hesitate to hang giant or very heavy items with the Command Strips; that is not their intended purpose.  If you have something heavy enough that you would have bolted a maze picture hook to a wall stud rather than nailing it into the drywall, you probably should not use these command strips for that object.  However, let’s at least take it up another couple of pounds.  I didn’t have a convenient heavier object to hang on the drywall, but I cleverly took this one step further because I DID have a heavier object to hang on the cutting board: the drywall!  Yep, by holding and shaking the cutting board instead of the drywall, the ~5 lb drywall is effectively a picture hanging on the cutting board by the same Command Strips.  I didn’t bother to make a video of this one, but after my big ARMQUAKE, the drywall was still stuck to the cutting board.

Are Command Picture Hanging Strips as good as maze picture hooks for quake-proof picture hanging? So there you have it.  I can’t guarantee that pictures hung with these Command strips won’t fall in an earthquake, and my testing is by no means exhaustive.  I also did not shake the thing for minutes, just seconds, so it’s possible that extended shaking could dislodge them, although I think that is unlikely because the shaking did not loosen the attachments in the slightest.  All I can really report is that, under some representative shaking conditions, these Command strips performed admirably.  I also would not go by their recommended load limits for 4 pairs (up to 4 lbs. for small strips, 12 lbs. for medium strips, and 16 lb for large strips) because those rating assume no shaking.  Instead, I suggest that people be very conservative; I’ve been using 4 medium strips for small light pictures in my home, and 4 large strips for the larger objects in my test (I hadn’t wanted to put up larger pictures until I ran these tests).  If you have a very large or heavy picture (no, I don’t know where to make the cut-off), and don’t feel confident that the Command strips will hold it, it’s probably still best to use the maze picture hook and possibly bolt it to a wall stud; you will have to assess the individual situation and use your judgment.  If you use a maze hook, and want to stick the lower corners of the picture to the wall to stabilize it, I suggest cutting two small pieces of one of the many "gripper pad" products on the market and using those instead of quake putty (see photo at right for example); they are less likely to leave a mark on the paint years later (although I have not done a longterm test).

For a few extra tips on how to safely remove those strips from painted walls without damage, see my first note in the Comments section at the bottom of this article.  I should mention that I have no financial interests in 3M or Command products (or maze picture hooks, putty, Gripeez, or cutting boards for that matter).

PLEASE DON'T HANG PICTURES ON THE WALL ABOVE YOUR PILLOW, WITH THIS OR ANY OTHER TECHNIQUE.  Nothing is foolproof.

Well, that turned out to be a very useful exercise.  And I even managed to invent the wall-mounted cutting board.  Why would I want a wall-mounted cutting board, you ask?  To chop walnuts, of course!

Link to this article Back to top

Special challenges: Can you seismically brace floor lamps and house plants? Should you?
For many years, I’ve been bracing any furniture tall enough to hurt the shortest members of the household (including those with four legs), and have been sticking down objects on surfaces that could fall or fly off and cause injury or damage.  However, I’ve always been stumped by how to deal with tall floor lamps and houseplants, which would look terrible if braced by the ordinary approaches.

In fact, if you look at an online photo gallery that I prepared several years ago about special challenges and their solutions, you’ll see that I basically took a pass on the floor lamps and plants and said there wasn’t all that much that could be done in some cases.

Well, I’ve recently revisited these two issues and here are my recommendations.

Torchieres and other floor lamps

Torchieres are great in principal.  However, since these typically consist of a thin pole on a base and a wide bowl on the top, they have the potential to fall like a blunt axe onto objects or people that are 5-6 feet away from the lamp.  The base is usually heavy enough to make them prefer to wobble back rather than falling, but if they swing out too far from the center, they will continue to fall all the way: THWACK!

Special challenges: Can you seismically brace floor lamps and house plants?  Should you?
The big problem is that unless you want to physically attach the base to the floor, which usually is not practical, or to suspend multiple strands of string or cable between the central pole and one or two walls, which would look silly, you are limited to putting small wedges under the base to at least encourage it to fall in one chosen direction as in the accompanying figure.

The solution, in this case, has been to wait long enough until the modern lamps wouldn’t pose as much of a danger!

The original halogen torchieres had heavy metal bowls on top with relatively small bases.  The compact fluorescent light torchieres that initially replaced them were massive, and both styles would could fall over relatively easily with serious consequences if they fell on a person, pet, or valuable object.

Fortunately, while many of today’s floor lamps still have metal or glass bowls, there are quite a few with white plastic shades (labeled as “frosted” in some lamps).  Depending on the lamp, they do a terrific or mediocre job in diffusing the light so that it isn’t uncomfortable to view (see example of each in the figure below).  The multi-armed “octopus-style” lamps also have plastic shades.  All of these lamps are much heavier on the bottom than on the top, and in the unlikely event that one manages to fall over, being hit by the plastic top is likely to be just very annoying rather than breaking something or causing serious injury.  The metal or glass lamps could easily crack your skull or kill a pet if they fell.  I strongly encourage the use of these plastic shade lamps for the purposes of quake-proofing a home, with nice, lightweight, unbreakable modern LED bulbs to make them even less hazardous.

Special challenges: Can you seismically brace floor lamps and house plants?  Should you?


Houseplants

Not everyone needs to be concerned about houseplants, but I can think of two main situations in which houseplants can cause seismic concerns.  The first is when the plant is in a heavy pot that is on a high surface, such that it could fall down or fly off and hurt a person, pet, or object.  In this sense, it’s no different from any other heavy object on a surface, although if you have standing water in drainage trenches around the pot, you might also be concerned with water falling onto nearby valuable books or artwork.  Nonetheless, pots with unattached drainage saucers on top of surfaces defy the normal quake putty strategies.

The second situation is specific to pet owners and occurs when the plant itself is toxic to the animals.  It seems that most common houseplants, many of which are varieties of Dracaena, have toxicity varying from mild to severe if ingested by dogs and cats .  From what I can tell, most pets won’t nibble on plants that are in pots on the ground, and those on higher surfaces are out of reach.  (Know your pet; if it DOES nibble on things, then you need to consider this as with any other pet-proofing concerns like electrical wires, and teething puppies may be a concern.)  However, if an earthquake makes a plant fall over or leaves fall to the ground, a curious pet may be more likely to nibble.

And of course, when it comes to aromatic food plants that are toxic to pets, special care is called for.  For example, if you have a dog, you should never, ever, ever, EVER keep a glass of green onions or garlic rooting in water on the counter unless there’s some quake putty sticking down the glass to the counter at the very least.  Just like having a loose container of other dog toxins like chocolate or raisins on the counter, these situations put a dog in great danger in an earthquake zone if they are home alone for a while after a quake ( see my earlier article on the topic ).

Special challenges: Can you seismically brace floor lamps and house plants?  Should you? Getting to the point, I recently added a bunch of houseplants to my home, some short, some tall, some on surfaces; and they are all toxic to dogs and some are in heavy ceramic pots that would make dangerous falling/flying objects.  I thought a lot about how to secure them, and I’ll share with you what I decided.

For the floor plants, I have actually taken no special precautions for earthquakes.  I adopted various strategies to make sure that water doesn’t overflow onto the floor and that moisture doesn’t transfer from the tray into the floor over the long run; standard houseplant considerations that aren’t relevant to earthquake preparedness specifically.  The dog simply has no interest in eating plants growing from the ground, outside or indoors, and as long as there’s no standing water in the saucers that might tempt him to drink it, I’m not worried.  Not even the larger ones will fall over in a quake because the pots are much heavier than the plants above the surface of the dirt; they will slide if they move at all.

For those on surfaces, I took a few different approaches.  In the figure below, panel A shows the little “lucky bamboo” that was the focus of my earlier article about stopping items from sliding even if they aren’t securely stuck down, since this one has to be moved around the table depending on how else the table is being used.  That article described the easy use of a silicone sheet to make the bottom unslideable.

B shows a plant sitting on top of a cabinet that is itself strapped to the wall from the back, so I still needed to prevent the plant pot from falling off.  Plants in pots with built-in saucers could be stuck to a surface, but the built-in saucers are typically small enough that one worries about the drainage trough overflowing, and those with separate saucers can’t simply be stuck down with quake putty.  Even if the putty sticks the saucer to the surface, the pot can fall out from the saucer in a quake and the putty probably can’t be used to stick a pot to a saucer in standing water.  My solution in these cases has been to glue to pot to the saucer with epoxy cement, putting some toothpicks between the pot and saucer as spacers and making sure to leave areas free of cement so that water can drain.  That’s what I did here, and the saucer itself is stuck down to the cabinet securely with quake putty.  I had planned to water the plant in place, given the large drainage saucer, but realized by coincidence that the plant’s original plastic pot fit perfectly into this ceramic one so I never repotted it; the plastic pot is just resting inside the ceramic pot and I pull out the plastic pot to bring the plant to the sink, watering it there and avoiding the chances of overflow by waiting until the water finishes draining before returning it.  It’s a good fit and an earthquake won’t make the plant jump out of the outer pot.  (So leaving areas for water to drain into the saucer turned out to be moot in this case, but the concept was still worth pointing out.)

Special challenges: Can you seismically brace floor lamps and house plants?  Should you? C shows a plant perched on top of a tall display case; please NEVER have a ceramic pot in a position like this without sticking it down, especially if you have children or pets.  In this case, the ceramic pot has a built-in drainage saucer and the plant is in its original plastic pot that sits inside the ceramic pot, which is stuck down with quake putty.  I bring the plant to the sink to water it like in the B example.  Because there is no accumulation of water in the drainage trough and I’ve stuck it down with quake putty in such a way that there is still a small air space between the bottom of the saucer and the wood cabinet top, I haven’t used an extra mat.

(I should point out that quake putty can leave shiny spots on some wood finishes.  I’ve found that if I have moved an object somewhere else and there are shiny spots left on the wood top, treating the whole wood top with furniture oil evens it out and makes it hard to see.  Still, something to consider; see my article about quake putty .)

D and E show a countertop plant that has been repotted into a ceramic pot that I really like.  The built-in trough is way too small, so it is sitting in the much larger outer saucer.  Again, I have cemented the pot to the saucer, but in this case, it’s the bottom of the built-in tray that is glued to the saucer so I didn’t have to make any special accommodations for drainage; the inner tray will simply overflow into the outer saucer.  The saucer is stuck down with quake putty, but not directly, because I put a plant cork mat (single side coated) under the saucer  to protect the natural stone of the countertop from long-term moisture damage.  The bottom of the saucer is epoxy cemented to the cork side of the mat (which worked), and the coated side of the mat is stuck to the counter with quake putty.

So now your home can be well lit, green, and safe, all at the same time!

Back to article index

Link to this article Back to top

For objects that you need to move occasionally, an idea for how to stop them from sliding (or, Silicone: the Anti-Banana Peel)
I’ve written articles for this blog about quake putty , which you use to stick things down non-permanently that you don’t plan to move, and about how some items just aren’t practical to stick down , like TV remotes and cats.  However, there are items that you need to move around occasionally but not very often.  Here’s an idea about how to at least hinder those items from slipping off of surfaces.

For objects that you need to move occasionally, an idea for how to stop them from sliding (or, Silicone: the Anti-Banana Peel) My specific example: a little ornamental bamboo that I like to have on my dining room table.  It COULD be stuck down to the surface with quake putty, but it gets in the way if I’m having people over for dinner and want the flexibility of moving serving dishes around on the table without having an unmovable plant right in the middle.

Updated paragraph:  I had initially thought that this plant was not toxic to pets, since bamboo shows up on the ASPCA list of plants that are toxic to pets , as non-toxic to dogs, cats, and horses.  However, it turns out that this "lucky bamboo" is not bamboo at all; it's a completely different plant, Dracaena sanderiana, that DOES show up as toxic to dogs and cats (thanks to my sister for pointing that out).  So if you think your dog or cat might try to eat this if it were on the floor, this plant may not be the best example.  Even if your dog or cat isn't the type to try eating something like this, if you could at least discourage that little rock-filled ceramic pot from sliding off the table in an earthquake, then there would be one less thing to hit them.

The first thing I did was to stick it to a coaster with quake putty, to make the base wide enough that I don’t have to worry about it tipping over.  All it could really do in this state would be to slide off the table.

For objects that you need to move occasionally, an idea for how to stop them from sliding (or, Silicone: the Anti-Banana Peel) For objects that you need to move occasionally, an idea for how to stop them from sliding (or, Silicone: the Anti-Banana Peel)

Then I looked around for something tacky that would limit its ability to slide.  There are little rubber feet that you can get in the hardware stores, but they are small and meant to go under corners.  I wanted something to cover the entire bottom surface of the coaster.

For objects that you need to move occasionally, an idea for how to stop them from sliding (or, Silicone: the Anti-Banana Peel)
I had some “Ruggies®” left over from when I needed to stick down corners of area rugs that kept sliding around.  These are pieces of an amazing polymer that is extremely sticky, but if you peel it off, there’s no glue or any coating; it’s just a property of the material that it wants to stick to things.  I thought that would be perfect, but it was too good, and if I wanted to slide the bamboo over, I had to make a major effort to pry it off of the table.

Feeling a bit like Goldilocks and the Three Panda Bears, I looked around for some kind of rubber that would have great friction without actually being sticky.  I figured that silicone would be perfect, but it wasn’t straightforward to find a silicone sheet.

For objects that you need to move occasionally, an idea for how to stop them from sliding (or, Silicone: the Anti-Banana Peel)
Silicone bowl lid, middle photo shows textured top, right shows smooth flat bottom
I stumbled across one today in the hardware store without even looking for it.  They had different versions of a truly amazing product (I have no financial ties to that or any other use of silicone) that was a lid that you just put on top of a bowl and it forms an airtight seal, which had enough vacuum that it would not come off but was easy to remove if you lifted one corner.

For objects that you need to move occasionally, an idea for how to stop them from sliding (or, Silicone: the Anti-Banana Peel) Amazing product, but I purchased it so that I could bring it home and destroy it!  I cut a circle out of it slightly smaller than the diameter of the coaster, so that the randomly colored silicone wouldn’t be visible.  Many of these products are textured on the top, which wouldn’t be ideal for sticking it to the bottom of the coaster, but I found one in which the top texture was very minor.  I cut a circle of the right size and was then ready to stick it to the bottom of the coaster, when I discovered something not very surprising: it’s really difficult to stick something to silicone.  

Quakehold putty slid right off.  I rooted through my drawer and pulled out what I considered to be the three most likely candidates in the absence of really understanding the chemistry involved: Krazy Glue®, silicone cement (like aquarium sealant), and Shoe Goo®.

I took extra trimmings of the silicone sheet and tried to glue them to the main part of the sheet that I hadn’t used.  As you chemists have probably already predicted, the Krazy Glue didn’t stick at all.  The Shoe Goo also peeled right off; actually slid right off.  The silicone cement, which it would make sense to hope that it would stick to silicone, surprisingly did not bond to it; in fact, the silicone sheet even seemed to inhibit the silicone cement from curing.

I’m sure various people will have their own favorite ways of sticking things to silicone, but my solution wasn’t far from where I started: I discovered that even though Quakehold putty didn’t stick well to the silicone, the similar product Amazing Stuff (also called Quake Secure; same product), which is a bit gooier than Quakehold Putty and stretches more like chewing gum, stuck quite well.  You can see in the video clip* above how Quakehold Putty (left) and Amazing Stuff (right) compared in their adherence, and I think the other two clips* (below) are pretty compelling, showing how easy it was to slide the plant on the table before and after my little intervention.

*People who subscribe to this blog by e-mail may need to click on the link to the actual blog post to see the videos


And so I introduce the concept of leaving objects moveable but skid-proof, as a compromise.  This is just one suggestion.  Most products marketed to be anti-skid that I tried weren’t really practical for this application.  Perhaps those little pads you put on your car’s dashboard to hold cell phones might work, haven’t tried that; it might be like the Ruggies example above.  Others, like rubber sheets that you use to grip and open jar lids, only exert friction when you press on them.  Whatever you use, it’s best if it is very thin or else it will change the appearance of the item.  If you have your own alternative ideas, feel free to post them in the comments field for this article!

Link to this article Back to top

20 things you can do with quake putty – and helpful hints for Quakehold Gel
For this article, let’s take a closer look at one of the more versatile tools in your quake-preparedness toolbox, quake putty.  You’ll find a few variations of this stuff under different names including Quakehold Putty, Museum Putty, Amazing Stuff, Quake Secure, and a few related products like Museum Wax and Quakehold Gel, but they all have one thing in common: they let you non-permanently stick down small objects to prevent them from falling or flying in an earthquake.

Part 1:  At the risk of sounding like a commercial (I have no financial interests in any of these products), that’s not ALL you can do with them.  Here's a list of 20 varied uses I’ve found for this stuff over the years, and a few more as I let my imagination run wild.

1.  Non-permanently attaching posters to the wall (it’s actually sold for that purpose also).*
2.  Similarly, holding in place the lower corners of a framed picture that would otherwise be difficult to keep straight on its hook.*
3.  Holding the lower corners of a framed picture far enough away from the wall that the picture doesn’t tilt downwards too much from a 3D hook.*
       (* For use on painted walls, please see the comments at the end of this article for important caveats.)
4.  Holding random loose parts of things so that they don’t move (like a useless D-ring on the bottom of my violin case that would flip out and interfere with it lying flat until I put a small dab of quake putty behind it; see Figure 1).
 5.  Blocking ants from entering the bathroom through a hole in the tiles.
6.  Covering ugly screws visible in otherwise white plastic; see Figures 2 (before), and 3 (after).
7.  Non-permanently supporting part of cabinet touch latches that stick out over shelves (see my earlier article about touch latches ).
20 things you can do with quake putty – and helpful hints for Quakehold Gel 8.  Form a barrier.  We had a wireless router on a high shelf a while ago that we didn’t want to stick down, because I had to access the back panel every now and then, but didn’t want it slipping off and crashing onto things below.  I used quake putty to build a 3D ridge between the router and the edge; you couldn’t see it, but it would prevent the router from sliding forward without interfering with the ability to pick it up.
9.  Temporarily stick a recipe to the kitchen cabinet door while cooking.
10.  Hold music to a music stand if you are playing a gig outside (not great for page turns, though).
11.  Stabilize loose parts (such as thermostat covers).
12.  Support loose plugs that aren’t tightly held into their outlets (small bead between the plug plastic and the outlet plate).
13.  Stuff it into extra switches on alarm clocks that you don’t want to mistake for the on/off switch (such as ringer volume).
14.  Make a tiny snowman!  (Figure 4)  And the best part is that you don’t have to stick it down with quake putty; it IS quake putty!  (But don’t give quake putty to children as a toy.)
20 things you can do with quake putty – and helpful hints for Quakehold Gel 15.  Use as the equivalent of single-sided Velcro (having some exposed on a surface so that you can occasionally put an object there without it rolling or sliding away).
16.  Temporarily fill gaps, a non-permanent alternative to silicone sealant.
17.  Stop glass shelves resting on metal pegs in display cases from rattling when the door is opened or closed.
18.  Stop a paper plate from flying off the table during a picnic.
19.  Put a dab on your finger to help turn pages (if you are the finger-licking type).
20.  ...and...stick things down for earthquake preparedness!

Part 2:  Quakehold Gel is a great solution but watch out for some little glitches.  This is a nice product and I’m identifying it by name because, to the best of my knowledge, it’s the only such product that is clear, so I’m not endorsing one company over another.  Because it is clear, you can use it to stick down clear objects like glass and crystal that might look ridiculous if stuck down with cream-colored white putty (Figure 5).

(I recommend against using the Museum Wax, which is very strong but is awful to clean up and stains a variety of surfaces.)

20 things you can do with quake putty – and helpful hints for Quakehold Gel
One thing to watch out for is that you can’t use this stuff on porous surfaces such as unfinished wood, paper, or fabric.  It also isn’t very effective on rough surfaces because it oozes, unlike the putty which fills gaps and holds them.  This is best used on glass, crystal, plastic, finished wood, tile, etc.

The other thing to watch out for is that, as mentioned above, it oozes.  And I really mean it oozes!  This gel is essentially an extremely viscous liquid.  If you pull a clump out of the jar, there will be a big hole where that clump used to be, but come back an hour later and the edges will have smoothed.  Come back a day later and the hole is gone; it’s a flat surface again, probably with little hazy bubbles.  Come back a week later and it is a pristine clear surface.  So if you put a little too much gel under an object, it might look fine for a day, but a few days later, you might notice that some of it is oozing out, as if you put too much glue under something and pressed down onto a surface.  That’s ok, you can just scrape off the excess with a piece of paper or anything else, and if the remaining edge looks rough, it will smooth out by the next day.  You might find yourself doing this over and over again though, so just try to be sparing with it in the beginning.

One last caution, because of the properties described above, guess what happens if you stick something down onto a surface that is even slightly tilted...it moves!  Really slowly!  Like one centimeter per month!  And it leaves behind a trail of gel that looks like a snail’s slime trail!  Here’s an example of what I encountered when trying to stick down a couple of crystal goblets onto a glass shelf in a display case:

20 things you can do with quake putty – and helpful hints for Quakehold Gel
(click for higher resolution)
20 things you can do with quake putty – and helpful hints for Quakehold Gel These goblets have cut-out designs on the bottom (Figure 6), and I wasn’t sure whether it would be better to put a little gel around the rim, which would leave the facets open to reflect light but might end up with an uneven rim, or to completely fill the bottom with gel, reducing the pretty reflection in the facets but keeping everything even.  Well, here’s a photo of my initial attempt to fill it; lots of bubbles (Figure 7).  Over time (like many weeks), the bubbles moved and coalesced, so it didn’t look that bad (Figure 8), but I missed the pretty reflections of the light in the facets.

20 things you can do with quake putty – and helpful hints for Quakehold Gel I then rolled some gel as thinly as possible and gingerly put it in a ring under the outer edge of the bottom of the other goblet, and gently pressed it down.  It started out very unevenly (Figure 9), but by about 2 weeks later, it had evened out (Figure 10), and looks much better than the completely filled alternative in my opinion.

However, it certainly oozed!  Over the next several days, I found myself daily scraping away excess gel that was slowly seeping out from the sides.  I found that a razor blade worked well, since the shelf is glass, or I could take a couple of inches of a plastic drinking straw and flatten it into a mini spatula that could scrape around the edges of the glass.  Again, it looked rough around the edges initially, but smoothed out nicely afterward.

20 things you can do with quake putty – and helpful hints for Quakehold Gel
I thought I was done, but a few weeks later, I saw the slime trail!  Sure enough, the glass had crept closer to the front of the shelf (Figure 11).  I scraped that all away, and a week or so later, the glass had crept even closer to the front of the shelf and there was another slime trail.  I confirmed with a level that the shelf was slightly tilted so the front was a little lower than the back, just a bit, but enough to make the glass slide forward in super-slooooo-mooooo (Figure 12).  I put small pieces of dark brown paper under the front corners on the dark brown plastic shelf support, to prop up the front until the level said it was straight, and the glass has not moved since then; looks great.

And yes, I thought about using quake putty to prop up the front, but that white stuff would have looked terrible under the glass!  Sometimes, old fashioned low tech is better.

Link to this article Back to top

At last, helpful hints on installing push-latches for cabinets!
UPDATE BULLETIN AUGUST 3, 2018:   There has been discussion for several years about whether earthquakes can cause doors to shake enough to open up these push latches.  Despite a range of evidence that push latches work well in earthquakes, I have seen earthquake simulations that were able to jiggle cabinet doors and cause push latches to disengage.  However, I still like the push latches and feel that they still considerably reduce the chances that the door will open under most circumstances.  I have written a new article that discusses this and describes an alternative latch, and I encourage readers to check that out also.

If there was a moderately sized earthquake and your kitchen cabinet doors swung open, what would happen next?  Well, anything in those cabinets could (and frequently does) fall out: breakable bottles of various things, dishes, glasses, and even heavy appliances like blenders.  Look in your cabinets and imagine the mess, loss, and potentially even injuries suffered by small children and pets who might get hit by falling objects.  Even if nobody is hurt, if none of the humans are home but a dog or cat is there unattended , there’s now a bunch of sharp or potentially toxic things all over the floor for the pet to lick and eat before you get home.  Clearly, it’s better just to prevent the doors from opening in the first place with quake-resistant latches.
The problem is that many people are lulled into optimism by a variety of pinch-style latches, magnetic latches, etc., that can make the cabinet door tough to open without some effort.  Some cabinet doors are harder to open than others; but you know that if you pull hard enough on the outside, they will open.  Guess what: that means that if the items inside the cabinets are pushing hard enough on them, they will open.  In some cases, the vibration itself can make the doors swing open and then everything can fall out.

Some people install the child safety latches that allow the door to open an inch and you have to slide your fingers behind it to move a lever before the door can be fully opened, but because this can be really inconvenient, I have installed push latches on my cabinet doors.  That is, the door can’t be opened by pulling on it; you have to push first and the latch disengages, and then when you close it, you push again and it re-engages.  While it’s theoretically possible that vibration in just the right direction might make the door push itself and open, I think it’s unlikely.
I feel that the latches are pretty important, but they are a bit of a pain to install and they take some trial and error.  That’s where this blog comes in; I try to save people from having to go through the same learning process that I went through, so here I’ll be giving you some hints on installation; things I’ve learned in the several times that I have installed these latches.


Installation
At last, helpful hints on installing push-latches for cabinets!
There are a few different kinds of push latches (touch latches) out there, some of which are not very good.  All of my personal experience over many years has been with one type (shown here) and I’ll focus on that one for this article.  The two videos embedded after this paragraph show how they work.   I occasionally see them in hardware stores but not very often, and these days, I just go straight to the Internet.  The two sites at which I have found them are Sunset Enterprises* and Woodworker’s Hardware .  The prices vary slightly; and at the time of this writing, the latter site actually has a better selection of colors and also a low-profile version that I have not tried yet. [*Update comment on 4/28/14: this Sunset Enterprises site no longer works and a current site for the company makes it difficult to look up products, so I've deactivated the link.] These can be a bit tricky to install, because unlike normal latches that can keep the door closed to the maximum extent, the push latches only work if the door can be pushed in slightly farther than the "closed" position to disengage the latch.  In fact, if you accidentally install them without enough extra pushing space, then you close the door and never open it again!  (That happened to me once, on a single cabinet door, so there was no way to access the latch; I had to pry the darned thing open and it was really hard to do!  That reassured me that the doors will not easily open if objects inside the cabinet are trying to push their way out.)  For this reason, if you have double and single cabinet doors like most kitchens do, I recommend that you do the double doors first just in case you have beginner’s unluck.


At last, helpful hints on installing push-latches for cabinets! These latches have a claw that is attached to the main cabinet on a shelf, and a ball-on-a-peg that sticks out from the inside of the door and gets caught by the claw.  Some of the latches come with instructions about how much distance to have the claw part protrude from the shelf, but I have found that those instructions sometimes give you too much space and sometimes not enough.  Too much pushing space is not good either, because the less closed the door is when latched, the less flat it will be, and with double doors, you can get a slight angling or tenting effect.  You’ll have a little of this anyway but you might as well minimize it (there's a photo of this several paragraphs below).  By the way, these come in dark brown, white, and black, but don’t be afraid to mix and match if it suits your cabinets better, as you can see in this photo from my kitchen (above right).  (Alas, they don’t come in light brown; they should!)

At last, helpful hints on installing push-latches for cabinets! The best way to become familiar with how this should look is by starting with one door of a double door, with the other one open so you can see inside.  Have a pencil, some tool with a sharp point or nail to make starter holes, double-stick tape, an appropriate screwdriver, and an electric drill (optional but useful).  Engage the peg in the claw to make one unit, put the whole thing into roughly the desired position, and hold it down to the shelf with one hand tightly so that it can’t slide (as shown in the photo at the left).  With the other hand, close the door and experiment a few times to see where the latch needs to be to make it disengage and re-engage with the door is pushed a few times.  Find the spot at which there’s the minimum space necessary to allow the latch to disengage.  Don't let the claw part move.  You’ll see that the main body of the claw part is probably sticking out slightly over the shelf, but as you can see in the group of three photos (below) from different cabinets in my kitchen, sometimes the optimal position is even with the edge, and sometimes it’s recessed a bit.  It depends on how that particular cabinet is put together and how far away the edge of the shelf is from the inside of the cabinet door.  The instructions assume that all cabinets are built the same; don’t make this assumption!
At last, helpful hints on installing push-latches for cabinets!
Now that you have this basic feel, leaving the claw part firmly held in place with one hand, take a pencil and mark where the holes are.  Some of the holes are actually wide enough to give fudging room so I try to outline the entire hole with the pencil if I can.  Remove the claw and use the sharp pointed tool or nail to gouge a starter hole right in the middle of the pencil mark.  Then, if you can fit your electric drill into the space (not always possible), make a small hole in the wood appropriate in size for the screw (that is, slightly smaller than the diameter of the main part of the screw not including its threads, so that it will still take some effort to screw it in).  Please don’t drill all the way to the other side...  Then attach the claw part to the shelf with the included screws (the screws for the claw are different from the screws for the peg; don’t mix them up!)
At this point, I’m always tempted to use my power screwdriver, but I rarely can because I find it usually does not fit due to the hole being so close to the main body of the latch.  Just be ready to use a manual screwdriver and some effort.
You are probably wondering what to do with the single doors.  You’re right; unless you knock out a wall of the cabinet or enlist the services of a small elf, you can’t really test the latch in the way I just described for the double doors.  In this case, you can put the latch (in one unit as before) loosely on the shelf where you will mount it, but sticking out too far; and then slowly and gently close the door all the way and open it again.  The complete latch should get pushed back by the door to about the right place, but too far because there's no extra room to push.  Move it ever so slightly forward, about 3 mm, to give yourself some push room, hold it down firmly without moving it but make sure that it is straight, trace the holes, and proceed as above.
Either way, now that your claw is in place, put some double-stick tape on the back of the peg and close the door.  Push again to open the door and the peg should be stuck to the door in the correct position.  Take your sharp point and press through the hole, through the tape, to make a puncture mark that will still be there when you remove the peg and tape.  Then you can drill it (DEFINITELY don’t drill through to the other side) and attach the peg with its screws. 
At last, helpful hints on installing push-latches for cabinets!
Try it out and see if it works well.  The first time you do this, you might have to reposition a bit.  The newer versions of these latches have pegs that actually are free to float a little within the part that holds them to the door (compare the two types of pegs in this photo and also look at the first picture in this article), which means that there’s a little extra fudge factor if you didn’t do it perfectly, but it’s still best to strive for perfection.  This floating peg actually makes it harder to position, so when putting on the double-stick tape, try to position the floating part dead center in its window.
At last, helpful hints on installing push-latches for cabinets!
Some of these latches are now being shipped with a little bit of quake putty that you can use to stick the peg to the door while positioning.  This is meant to be left in place during the installation.  I can’t imagine why anyone would want to do that; you can see the putty when you open the door and it holds the peg farther out from the door, leading to larger gaps and more tenting effect.  The double-stick tape works just fine; keep the quake putty for use elsewhere as...quake putty!  (One of these days, I will write an article about the hundreds of other things you can do with quake putty .)  A little tenting is unavoidable, as you can see in the upper photo at the right, taken from below the cabinet looking upward, but from the front as shown in the lower photo, it’s not that bad.
Special circumstances
That was a description of the ideal case, but I keep running into non-ideal situations that I need to solve, so here are some examples of solutions:
At last, helpful hints on installing push-latches for cabinets!
In one cabinet, there was no room for the latches on the bottom shelf due to a large spice rack, so I needed to put them on a middle shelf, which was too shallow to reach the inside of the closed door.  That meant that the latches had to stick out into thin air to reach the door.  Here, the quake putty really came in handy; as you can see from the photo taken from below that shelf, I used the two rear screws and then wadded up as much quake putty as could fit into the fortuitously placed crevices in the underside of the latch.  Between the two rear screws and the quake putty, those latches are actually quite firmly stuck to the shelf (see photo at right, taken from below the shelf).  This would have been really difficult to do with a single door; being able to hold the latch in place while positioning was crucial.
If you attach them to a middle shelf that isn’t attached to the cabinet, make sure that it can’t easily slide forward because then you haven’t really latched the door to anything solid.
At last, helpful hints on installing push-latches for cabinets!
One thing they don’t warn you is that if the door is narrow enough, and closes with a tight arc, the peg will move into the claw with a strong curve and the mechanism might not work.  One solution is to mount the claw sideways on the wall of the cabinet rather than on the shelf; as shown in these photos from my desk cabinet door.
At last, helpful hints on installing push-latches for cabinets!
On the other hand, look at this funky kitchen cabinet that houses the duct for the over-stove fan vent.  There’s no place to put the latch at the edge of the cabinet, and putting it in the middle by that blender didn’t work; and doing a side mount just wasn’t practical.  The blender is heavy; I didn’t want that falling out.  My solution was to forgo the push-latch altogether and install a catch on the front of the doors; effective, but less convenient and certainly not pretty.  A sliding bolt would have worked as well.  For pairs of doors that are hardly ever opened, you could even put a heavy rubber band between the handles, although that doesn’t look very refined.
At last, helpful hints on installing push-latches for cabinets!
My last example is from an apartment in which we were renting, which had two problems; the difficulty in putting holes in the woodwork of a rental, and the fact that the shelf was slightly lower than the edge of the cabinet (as in the photo).  I had installed these things in cabinets in a previous apartment without much thought because the cabinets were archaic and full of holes already, but this was a brand new apartment, never used.  My solution, as shown in the photo, was to use plenty of quake putty (love that stuff) under a piece of plywood that brought up the level of the shelf to match the edge.  Then, to avoid holes, I used 3M Command strips (the adhesive strips that release when you pull the tab) to attach the latch to the plywood.  For the pegs, well, I admit that I put some holes in the inside of the door, but in my defense, there were actually starter holes in the right place already as if they had been made to accommodate a latch of some sort...and I filled those tiny holes with wood putty before moving out.
The challenge faced by renters in making effective quake preparations in their apartments is a whole topic itself, which I will tackle in a future article.
By the way, I suggest that you do NOT use the “shocklock,” which is supposed to have a piece fall into place when the shaking starts to prevent the door from opening.  I got one of these things and tried my hardest to make it work by shaking violently; the piece fell occasionally and only after many seconds of shaking, and only if the shaking was in the right direction.  I think it has been discontinued.  There are better versions of this for industrial lab cabinets that look pretty good from what I can tell (I’ll explore them in the future), but they are too big to be practical in a home kitchen cabinet.
Here’s one more issue to consider, do you remove the handles from the cabinet doors?   Handles are meant to be pulled, and YOU know that you should push the door first, but any helpful guest will automatically pull the doors open, and either they are in for a shock, or they will keep trying until they break something.  In the old apartment with archaic cabinets, I removed the handles (I kept them for when I moved out) and temporarily filled the holes with a waxy wood filler that matched the color of the cabinets.  That can work, somewhat imperfectly, with dark stained wood; although I think it would be pretty obvious with light wood.  In our current kitchen, the handles are still on the doors and we just warn guests when they go into the kitchen.  It’s a great way to trick them into an impromptu discussion about earthquake preparedness!

Link to this article Back to top

Do I really have to stick down EVERYTHING? What about my TV remote?

When I give talks about earthquake precautions and I mention the concept of sticking down loose objects, I sometimes wonder if people are picturing a home in which absolutely nothing is moveable, with TV remotes, dinner plates, pencils, cats, you name it—all stuck down to surfaces.  Well, that’s probably the safest set-up for earthquake preparedness but it would not be very fun.
I confess: if I want to pick up my cordless telephone, I can!  The stapler and other odds and ends on my desk, the water filter jug on our kitchen counter, my electric razor on the dresser top; they are all perfectly usable.  And our little dog wanders around unimpeded.

It comes down to a concept that I’ve mentioned in this blog several times before: these precautions are a matter of playing the odds .There’s no such thing as perfect preparation, so we try to reduce the chances of problems as much as we possibly can within the confines of financial ability, schedule time, and of course, the need for a functional household.
So for example, sitting on my desk at home are a bunch of loose items: stapler, wireless router, cordless phone handset, electric pencil sharpener, and even a few loose notebooks; but it also has some small but dense decorative knick-knacks that are stuck down with quake putty and quake gel , and the printers and computer monitor are attached to their desktops and cabinet top with buckles and straps .  Ironically, my laptop, the thing on the desk about which I’d probably care about the most, is not attached to anything except a couple of cables, because of course, laptops need to be mobile.  Fortunately, the pull-out keyboard tray on which my laptop lives has a small lip around its edge that would probably limit the computer’s ability to slide off.
In the kitchen, we have lots of knives, too many good quality knives to be shoved in a drawer, and I’ve never quite trusted those wall-mounted magnetic knife-holding strips from an earthquake safety standpoint.  The knives are in knife blocks, and the knife blocks themselves are stuck down to the counter, initially with quake putty and more recently with double-sided Velcro squares .  Sure, it’s conceivable that the knives could fly out of the knife blocks, but in order to do that, they’d have to be shaken out at the perfect 45 degree angle to fly up and out of their slots.  I think it is pretty unlikely.  However, if any budding entrepreneurs out there want to invent an earthquake-safe knife block with easy-to-use mechanisms to prevent knives from flying out of their slots, go for it!
There are a few unavoidably loose items on surfaces in the kitchen, like the electric mixer and the food processor, although the processor blades are stored safely in the cupboard.  Our drip coffee maker is on the counter; my wife pointed out to me at one point that the glass carafe that I stored right on the coffee maker burner would be the first thing to fly off and shatter into dog-unfriendly glass shards , so now we keep the carafe in the cupboard above the coffee maker.  I could not stick down the salt shaker or pepper grinder without making them absolutely useless, and I did not stick down the sugar container but we did replace our old glass sugar container with a plastic one.  The vitamin pill bottles will certainly have fallen down, but will still be closed.  Our Brita water filter pitcher gets picked up each time we pour water out of it, so we’ll just have to deal with some water on the floor.
Do I really have to stick down EVERYTHING?  What about my TV remote?
I admit that we take chances with flower vases.  If we have flowers on the dining room table for a few days, the vase tends to get shoved around depending on what else is on the table, so it just doesn’t make sense to stick it down.  Similarly, small potted plants that sit in water drip trays are not straightforward to stick down, so I got rid of the jade plant that easily dropped leaves that I knew were toxic to dogs .  But most of the decorative objects that never get moved are stuck down with quake putty, such as these four objects in the photos.
Are you getting the idea?
So what would our showcase-level wonderful example of a prepared home look like after a major earthquake?  Well, there would be stuff all over the floor!  But for the most part, it would not have broken and would not pose any hazards to us or even to the little dog even if home alone during the quake .  The TV remote would be on the floor, so perhaps we’d return home to see the little dog watching TV while happily shredding the napkins that will be everywhere, lapping up the water from the toppled water filter pitcher, and generally oblivious to the fact that the other 95% of the large and small objects in the home were in the same place they’d always been.

Link to this article Back to top

Double feature Part I: If you install a closet organizer system, don’t skimp on that last screw.

(Haven't posted in a while, so this month you get a double feature.)

Double feature Part I:  If you install a closet organizer system, don’t skimp on that last screw. How many of you have closets that look like this (Figure A)?  These are closet organizing systems, a big business, with companies like California Closets and the Container Store (Elfa brand) making it possible for a small space to accommodate lots of shoes, slacks, shoes, sweaters, shoes, suits, shoes, and if you are like some people I know, shoes.  You install these yourself, or the company will come out and install them for you, and they can make a huge difference.  They work by installing shelves and clothes-hanging rods that are all cantilevered from vertical rails on your wall (Figure B), which themselves are hanging from a horizontal strip of metal fastened to the wall at the top (Figure C).  I installed one of these Elfa systems in our closet a couple of years ago.  It’s pretty impressive, and can hold a couple of hundred pounds in the configuration that I used. 

The amazing thing about this popular system is that it is only attached at the top to that thin horizontal strip of metal that is fastened to the wall by one small bolt every 16 inches (wall stud spacing).  The rails have hooks at the top with which you literally hang them from a groove in the strip (Figure D).  That means that the rails and everything else attached to them can swing out as a single unit from the wall attached only at the top--but they don’t, I’ve been told, because all that weight is pulling the rails down against the wall and it’s remarkably stable.  The heavier the junk is that you put on the shelves, the more it presses against the wall, and those handful of bolts at the top are sufficient to keep the whole thing in place.   In fact, if wall studs are not handy in the right positions, you can even go right into the dry wall with the appropriate anchors because (they say) there will never be a force outward, just downward.
They do sell little fasteners that you hook onto the bottom of the rails and screw into the wall just to ensure that the rails don’t swing out if you have pull-out drawers in your system (Figure E).  That’s supposedly the only time you’d need such things.

Double feature Part I:  If you install a closet organizer system, don’t skimp on that last screw. Double feature Part I:  If you install a closet organizer system, don’t skimp on that last screw. Well, what’s missing from this picture?  The San Andreas and Hayward faults, of course, or your favorite other local earthquake source.  I would never DREAM of having a system like this without fastening the bottom ends in any city that experiences decently-sized earthquakes.  The right kind of back-and-forth shaking could start that whole unit swinging away from the wall and back again, and now you’ve got force at the top pulling straight out from the wall with some twisting, torqueing, and shearing thrown in for good measure.  That’s NOT what you want for bolts in drywall, and even with bolts in wall studs, it’s not a great situation, especially when the rails are just hooked on.
Bottom line:  I think any such system should use rails fastened on the bottom if your closet is the kind that shakes.  I highly recommend spending the extra few bucks on one fastener for the bottom of each rail, and if attaching it into dry wall, I recommend using an anchor that spreads on the other side of the wall like a toggle or molly bolt .  That last screw could be the straw that saved the camel’s back.

Link to this article Back to top

“Be sure to bolt your furniture bracing straps to a wall stud”…ok, now for the other 95% of the population who doesn’t know how to find a wall stud:
I have been meaning to post for the last few days and kept getting too busy, so then Colorado had its largest earthquake in 40 years, then the east coast of the US had its largest quake in 67 years*, and then that evening I myself felt a small tremor in San Francisco that was centered on the Hayward fault in the East Bay…ok, ok, I’m posting already!
*The last quake that large on the East Coast was…New York, 1944!  (See my earlier post, “ Why the heck do you live in that place with earthquakes ”)  Please remind your East Coast friends: DON’T run out of the building , DON’T believe that “Triangle of Life” e-mail spam , and DO drop, cover, and hold on .  Better yet, direct them to this blog !
In my talks, I always feel like my description of how to brace tall furniture to the wall is incomplete, because I say that you need to bolt straps to the wall studs, rather than drywall or plaster, but that I don’t have time to describe how to find wall studs and work with them.  That just gets too far away from the topic and there isn’t enough time in the talk; but really, if you want to brace your furniture safely, you need to know about the wall studs.  So, today let’s get around to that topic.

Most walls aren’t as solid as they feel.  In fact, in a modern building, you can probably get from one room to another without using the door (if you are so inclined) if armed with a reasonable sledgehammer.  Plaster and drywall (sheetrock) crumble and powderize, as you know if you have ever tried putting a short screw into a wall without a wall anchor. 
“Be sure to bolt your furniture bracing straps to a wall stud”…ok, now for the other 95% of the population who doesn’t know how to find a wall stud: If you brace your tall furniture to the wall with straps or brackets and put the bolts directly into the drywall, then it won’t take much motion for the furniture to want to fall away from the wall hard enough to simply pull the screws right out of it.  There are various anchors and toggles that expand within the drywall or open up on the other side of it, but a heavy object like a book case or file cabinet pulling away from the wall still runs the risk of defeating the structural integrity of that drywall and turning it into dust (giving the term “anchors away!” another meaning).
Fortunately, every 16 or 24 inches (center to center) in decently modern buildings, and at various intervals in some older buildings, there are vertical structural supports called wall studs that are an integral part of the main structure of the building; they will not simply disintegrate under most imaginable circumstances.  They are typically wood beams (left photo below from www.woodaware.com) in shorter buildings, and metal struts (middle photo below from www.cdcbgreenhome.com) in taller buildings.  (In older buildings with lath and plaster walls, thin wooden slats called laths are nailed across the studs to support the plaster, shown in the right photo below from wikipedia.org, but these laths are not structurally sound.)  If you bolt something through the drywall or plaster and into the studs, it isn’t going anywhere.


“Be sure to bolt your furniture bracing straps to a wall stud”…ok, now for the other 95% of the population who doesn’t know how to find a wall stud:

This means you have to be able to do two things: find a wall stud, and bolt something into it.
Find your wall studs
The old-fashioned method that I used in college to find wall studs was to tap the wall with my finger or the butt end of a rubber-handled hammer.   Most often the sound will be hollow, and as you move sideways, the tapping sound will get less resonant and tighter until you reach the stud, where it sounds less like tapping a drum and more like tapping a brick; then will get more hollow again as you keep moving.  The least resonant part is where the wall stud is located.  If you find a few of these and they are at regular intervals, you are probably in good shape (note that some older buildings may not have a spacing of 16 or 24 inches, so assuming is dangerous).  This method of finding studs sometimes works, but frequently it is difficult to actually tell the difference between the sounds. 
“Be sure to bolt your furniture bracing straps to a wall stud”…ok, now for the other 95% of the population who doesn’t know how to find a wall stud:
A technological step up from this is to use a stud-finder consisting of a swinging rod magnet.  You can buy these cheaply in hardware stores.  The rod magnet will be flopping around as you slide the stud finder along the wall, but if you slide it past a metal nail in a wooden stud, or past a metal stud, the magnet jumps toward the wall and the other end of the rod sticks straight out as a result, showing you where the nail or metal stud is located.  This can work well but can also be frustrating, especially in wooden studs, because there are only nails in specific locations up and down the stud, and if you aren’t sliding the stud finder in the correct plane that contains the nails, you’ll sail right by that stud without noticing it.  The baseboard is a good place to start, but if it is not accessible, then you basically have to keep sliding the stud finder around at different vertical levels until you find a nail, then mark the horizontal location and search for others.  If you know your stud spacing, you can use it as a default, but it’s nice to confirm by actually finding a nail somewhere in the other studs.
“Be sure to bolt your furniture bracing straps to a wall stud”…ok, now for the other 95% of the population who doesn’t know how to find a wall stud:
After my last move, I found myself in a place with metal studs and decided that it was time to go high-tech.  Even though the magnetic stud finder works a bit better with metal studs,  I dropped a few more bucks on a better, electronic stud finder that somehow senses when an object is behind the wall and beeps when it is nearby.  It isn’t foolproof, and you cannot use it with lath and plaster walls, but it is way better than the magnetic kind if you have drywall.
Before we go on, here are some little hints.  You want the object into which you screw or drill to really be a wall stud, NOT a wire conduit, water pipe, or some random metal box put behind the wall for who-knows-what reason.  This is why it is nice to find a few studs and confirm that these objects are showing up at regular intervals.  If there’s an object where you would not expect to find a stud, better not drill into it!  Also, know what is on the other side of the wall from you.  I found a strange extra “stud” running vertically all the way up the wall where it shouldn't be, and then realized that the bathroom was on the other side of the wall and the shower head was right there, meaning that there were water pipes!  Lastly, rather than find the studs near the floor when planning to put bolts in higher up on the wall, it’s safest to confirm that the stud pattern is how you think it is on the approximate level where you want to put your bolts.
Bolt things to your wall studs
Now let’s say you know where your studs are.  Better know WHAT your studs are, as well, because there are different rules for bolting into wood or metal studs.
“Be sure to bolt your furniture bracing straps to a wall stud”…ok, now for the other 95% of the population who doesn’t know how to find a wall stud: For wood studs, a nice long woodscrew or lag bolt of the sort normally supplied with earthquake bracing straps is just fine.  These are thick, sharp, and long (like 2 inches) so that they reach through the drywall and into the wooden stud for about an inch.  The threads of a screw may not seem like much, but all those threads carved into the wood and compressing it in the process hold extremely well when pulled upon.  Use a drill bit that is just slightly smaller than the solid part of the screw, so that the core of the screw will not need to displace very much wood but the threads will tightly cut spirally into the wood.  WHILE WEARING GLASSES OR GOGGLES, and preferably with work gloves, drill into the wall in front of the stud.  The drill will go through the drywall quite easily (proving why you shouldn’t just put your bolt into the drywall) and then will hit the stud and encounter more resistance; drill in all the way.  Then pull out the drill bit and screw in the screw.  A little resistance is good, but if it is too hard to screw in, you may have to take a larger drill bit and widen the hole a tiny bit.  A power screwdriver is nice here.
(Hint: it’s wise to have newspaper on the ground to catch the crumbled drywall and the wood sawdust.  What?  You read your newspaper on your iPad?  Well, I GUESS the iPad will catch the sawdust but probably not the best idea…  Actually, I also like to tape a small piece of foil sticking out from the wall under where I’m drilling to catch most of the dust.)
“Be sure to bolt your furniture bracing straps to a wall stud”…ok, now for the other 95% of the population who doesn’t know how to find a wall stud:
For metal studs, some sources say that you can just drill an appropriately sized hole in the metal stud and screw directly into that, but I would not suggest it; not for something heavy that may want to pull away from the wall.  Instead, you should really use a toggle bolt.  This is the metal contraption on a bolt that is spring loaded so that you can shove it through the hole in the metal and its two wings spring open on the other side, leaving the screw part of the bolt sticking out of the wall.  When you screw a nut onto that bolt, trapping the furniture bracing strap or anything else, you can tighten the nut so that it and the expanded wings squeeze together on the front and back of the metal stud.  Now your bolt is literally part of the main structure of the building and will be very sturdy. 
“Be sure to bolt your furniture bracing straps to a wall stud”…ok, now for the other 95% of the population who doesn’t know how to find a wall stud:
I’ve included a photo here of various anchors that you should NOT use for this purpose.  The three on the right are anchors designed to work directly with drywall and won’t work with metal studs.  The all-metal device 2nd from the left is a molly bolt, which works by the flexible part of the metal sleeve collapsing and spreading outwards on the far side of the wall as the bolt is tightened.  Theoretically this would work just fine with the metal stud, but I recommend against it unless you have experience with molly bolts because there is no obvious event that tells you that it has spread, unlike the toggle bolt that snaps into place with an obvious click.  The plastic blue variant on the far left also works by collapsing and spreading as the bolt is tightened but is meant for drywall; I fear that the sharp edges of the hole in the metal stud might gradually cut through the plastic.
The unavoidable disadvantages of doing this are that, first, the hole in the wall must be much larger than the bolt because the spring-loaded part is large when compressed.  So instead of using, say, a 1/8 inch drill bit to make the hole for a screw into a wooden stud, you might be making a 1/2 inch hole or more in the metal and, unfortunately, the wall.  The larger the toggle bolt needed, the wider the hole will need to be.  If you are not sure what size toggle bolt to use, tell the sales associate at your hardware store what kind of furniture you are trying to brace, and they’ll tell you which toggle bolt to use.  The second disadvantage is that once a toggle bolt expands on the far side of the stud, you’ll never get it back again.  If you later abandon that site and want to patch the hole in the wall, you won’t be able to pull it out but you can simply push it further in until it falls into the hollow part of the wall, never to be seen again.
Drilling into the metal stud is similar to drilling into wood, except that the metal stud is thin so you will encounter resistance for a while but then will punch through to the other side, unlike a wooden stud, in which case you just keep drilling until the bit can’t go any further.  Also, metal is hard!  Make sure that your drill bit is rated for metal, and be prepared to go through the metal extremely slowly.  You may actually think it is not working for a couple of minutes, until it punches through.  Be careful to prevent the bit from moving sideways as it starts the hole.  And it will be VERY LOUD and set up quite a vibration.  It can be easier to drill a smaller hole first, then follow up with a larger drill bit in the same place. 
It’s best to try to drill into the center of the stud rather than at one side, because the metal stud is shaped in cross section like a U with the “base” of the U being to one or the other side; you’ll be drilling into one of the two “arms” of the U.  That means if you are too far to one side, instead of punching through the metal layer, you’ll keep encountering more of the “base” and won’t make much progress; plus, you won’t have a complete hole into which the toggle blot can be secured.  Also, please keep in mind that rather than annoying sawdust, you will now be dealing with sharp metal shavings that can irritate your skin and should under no circumstances be allowed to fall down to where a child or pet can step on them or eat them.
Last word
All this hassle!  But it is worth it, as you know if you caught that funny episode of Modern Family on TV in which there was an earthquake and the book case fell over, almost hitting the kid, because the dad had been procrastinating while telling his wife that he had already braced the bookcase.  What a nice advertisement that episode was for earthquake safety!  But once you spend the half hour to do this and brace your bookcase, file cabinet, or whatever else you want to prevent from falling over, you can rest easy knowing that it simply is not going to fall unless the rest of the building is falling with it, in which case you probably have other things to worry about anyway!

(Thanks to the folks at Cole Hardware in San Francisco for checking this article for accuracy)

Link to this article Back to top

An amazing story from the past, AND more about hanging pictures that won’t come crashing down (the wired and non-wired varieties)
Even though I don’t plan on posting very often so  I don’t add to the e-mail overload of people who subscribe, it just makes sense to post something on April 18th, the anniversary of the great San Francisco earthquake of 1906.  There are two items on today’s plate: first a link to a then-young woman’s amazing description of what she experienced in the 1906 quake, and then I wanted to discuss a bit more about hanging pictures on the walls safely.


Leonie von Zesch speaks to us from the past
On Sunday, the San Francisco Chronicle ran an amazing narrative from a young San Francisco dentist, Leonie von Zesch, who wrote for an unpublished autobiography about her experiences during and after the 1906 earthquake and whose writings ended up in the attic of her niece, who stored them for decades without knowing about the remarkable voice hidden inside until recently.  It’s fascinating and fun; here’s an example: “When finally the tremors stopped, we got up and dressed. I put my right shoe on my left foot and vice versa for the only time in my life, and didn't know it until later. Then we hurried up to the roof to look down over the city.”  You can read Sunday's first half here , and Monday's second half here .
Hanging pictures on the wall safely
In my talks, I recommend using “maze” picture hooks to prevent framed pictures from crashing down in earthquakes, since they can easily jump out of the typical picture hooks.  Surprisingly, the story from 1906 that I just described above mentions that the pictures swung out from the wall but didn’t fall; that woman was lucky!  Pictures frequently jump out of their hooks even in smaller earthquakes.
An amazing story from the past, AND more about hanging pictures that won’t come crashing down (the wired and non-wired varieties) An amazing story from the past, AND more about hanging pictures that won’t come crashing down (the wired and non-wired varieties) However, I admittedly oversimplify this in my talks, because we frequently have pictures that are in frames with saw-teeth or other kinds of built-in hooks, with no picture wire.  So what then?  Here are a few ideas of how to best use these maze hooks (I have no financial interest in this).
First of all, if your frame does have picture wire, there are a couple of little annoying aspects of the maze picture hooks that are easily avoided.  First, they are taller than normal picture hooks, so sometimes when the picture hangs from them, the very top of the white plastic hook is visible above the top of the frame.  If this happens, you just need to shorten the wire, and usually you can easily find a length that still works and doesn’t show the plastic.
An amazing story from the past, AND more about hanging pictures that won’t come crashing down (the wired and non-wired varieties) Second, these maze hooks can hold the wire a little farther out from the wall than the typical hook does, so the picture can have more of a tendency to tilt downward since the top is farther from the wall than the bottom.  You may not care, but it this bothers you, a neat trick is to take two small pea-sized chunks of quake putty (the kind you use to stick small objects down to surfaces) and put one between each bottom corner and the wall.  This not only holds the bottom out from the wall and straightens the picture a bit, but it also has the added bonus of preventing the picture from tilting side to side.  You center it once, and it can even be a little bit off center, but the putty will hold the picture straight.
Now, what do you do if the frame doesn’t have picture wire?  Add some!  With most wooden frames, it’s simply a matter of taking two screw-eyes and screwing them into the wood.  Usually, no drilling is required.  You can just take a sharp metal object and punch a small starter hole, then put the screw eye’s sharp tip into that tiny hole and twist it with pliers to screw it in until the metal ring part is just about flush with the wood.  You don’t have to push, just twist and it will thread itself.  I typically break about 1 in 10 of the screw eyes in the process, and have to start again, so have more than you need.  Usually about 1/4 to 1/3 from the top is a good location.  If they are too high, then it will be harder to prevent the top of the plastic maze hook from showing; and if they are too low, the picture will hang at a strange angle and not be very stable.
What if the frame is not wood?  Frequently there are clips that are holding the frame together, and if they are strong enough, the picture wire can be attached directly to two of these clips.
There are some frames to which you simply can’t attach picture wire without glue.  I avoid these when I buy them in the first place.  For some smaller picture frames, like some very light-weight frames for 5x7 photos, I admit that I just hang them on normal hooks from whatever hole or hook is built into those frames, but only if they are light.
And don’t forget, you can always opt to post such small things directly on the wall without a frame.  That quake putty is really good for this also, a tiny bead behind each corner; or the 3M Command strips that have the pull tab for release; some of these are meant for posters.  Just make sure you do that in a way that allows you to have access to the pull tab in case you ever want to remove it!
An amazing story from the past, AND more about hanging pictures that won’t come crashing down (the wired and non-wired varieties) An amazing story from the past, AND more about hanging pictures that won’t come crashing down (the wired and non-wired varieties) By the way, one more thing about these hooks: in addition to the little diagonal nail hole for standard mounting, they also have a larger horizontal hole for screwing or bolting it into a wall stud.  This allows the hooks to be used for heavy objects.  I have a couple of gongs (about 2 feet diameter) hanging on the wall by cords (shown in the picture on the left), and the cords used to be in regular hooks but they currently are hanging from the maze hooks.  They are heavy enough that I wasn’t convinced that they would remain attached via that little nail, so I have screwed them into a metal wall stud using the large hole and fastened it with a toggle bolt (as the other photo shows, I painted over the bolt to make it match the plastic hook and the wall).  In a quake, those gongs aren’t going anywhere, unless the string breaks.
Remember, even with the maze hooks, please don’t hang heavy objects over the head of your bed, because if you have nailed it into drywall, that chunk of drywall could potentially fall apart if a quake is large enough; and even if you bolted it, nothing is foolproof!

>> Back to article index

Link to this article Back to top

Quaketips reference section

During an Earthquake

Know which actions are protective—and which familiar pieces of advice are unsafe.

During an Earthquake

6 articles

What to do while shaking is occurring, including common myths and dangerous reactions.

Situational awareness: The step BEFORE the first reaction to an earthquake
In my talks and in this blog, I’ve spoken frequently about specific things that you should or shouldn’t do during a large earthquake.  You may be well-versed in all of these specific recommendations, and yet, if you ask me: “WHAT IS THE FIRST THING YOU SHOULD DO IN A LARGE EARTHQUAKE?”, you may be very surprised at my answer.  It isn’t “get into a safe place” or “assume a safe pose” or “strike a confident and heroic position just in case anyone is taking photos with their cell phone.”  Pretty much all of those answers are generic and assume that you are in a standard situation.  However, how often is anyone in a “standard situation?”

No, my answer is: “BE AWARE OF YOUR SITUATION and know what specific risks you face in that very moment.”

This points directly to a concept that is crucial for personal response to emergencies: “situational awareness.”

Actually, I’m cheating a bit, because the situational awareness is not the first thing you should do in a large earthquake; it refers to something that you should have already done before the earthquake starts.  And since you don’t know ahead of time when an earthquake is going to start, you should practice situational awareness as an every-day state of being.  This will help you to react to not just earthquakes, but to any unexpected dangerous situation.

You’ve heard about situational awareness before, from those poor unappreciated flight attendants who try to tell you before takeoff to look around because the nearest emergency exit might be behind you.

Here’s an example more relevant to earthquakes, which will seem rather familiar to people who read my earlier article about candles and earthquakes .  Let’s say you are sitting in your living room relaxing by candlelight, and suddenly there’s a jolt and then several seconds of swaying.  You dive under your kitchen table to protect yourself from falling objects, and then say to yourself, “DAMN, I have a candle on the living room cabinet that might fall over,” or perhaps “@#$%!, what’s that burning rug smell and why is the room filling up with smoke,” or even “@&#)*@&%$#$!!!!!!! I have a burning candle on the living room cabinet and what’s that gas smell??”

Point made?

In the first few seconds of realization that there’s an earthquake and you need to do something, it’s more important to snuff out that candle than it is to do just about anything else you may have learned about how to react to an earthquake.  Unfortunately, you’ll probably be dealing with a bit of panic, surrealness, and even difficulty in moving where you want to move, and the SITUATION that was already in place gets shoved to the fringes of your mind.  However, if the very act of lighting a candle brings a quick note to keep in your mind that “there’s a candle burning; extinguish it if anything unexpected happens,” then your situational awareness is already in play and you’ll have a better chance of heading for the candle first, and cover afterward.

It sounds like an annoyance but it really takes no extra effort and doesn’t even interfere with your relaxation.  After all, the very act of lighting a candle is not brainless; you know to not wave the lit match near a stack of papers, to not put the match directly on a flammable surface after blowing it out, and perhaps to put it in water ASAP to avoid the smoke detector going off.  This is just one more thought.

Cooking over a gas range is a less hazardous situation because it can’t fall, but it is still a problem in a quake because something might fall into the flame.  Therefore, if you have something on the stove and a quake hits, turning off the stove is the first priority; especially important if you went into the other room (and please don’t turn on the stove to simmer something and then head out on an errand, for obvious reasons).

I have similar situational awareness thoughts when I have chocolate or grapes or pills out on the counter because I don’t want them to fall in a quake and get slurped up by the dog (chocolate and grapes are among the human foods that are highly toxic to dogs ).

Situational awareness: The step BEFORE the first reaction to an earthquake In fact, you may think I’m obsessed, but I play the violin and whenever I briefly leave my violin in its case with the lid open, I’m extremely aware of what is around it, in case a quake might make something fall on it or might make the case slam shut with the violin not nestled all the way into its protective position.  Why?  Because I’ve already seen Murphy’s Law in action in that situation (Murphy’s Law—“anything that can go wrong, will” in case you are from a different culture and aren’t already familiar with it—is the Yang to the Yin of Situational Awareness).  A few decades ago, I was playing violin and percussion in an outdoor orchestra concert and I left my violin in its open case on the ground near the percussion equipment to play percussion for that piece.  There was a pair of bongos on a drum stand roughly 4 feet high, about 4 feet away from my open-faced violin case, and a gust of wind toppled the bongos on a path that was to become both a demo(nstration) of trigonometry and a demo(lition) of my violin’s fingerboard.  The damage was actually easily fixable, but I don’t count on being that lucky the next time!

It might be useful to do a mental exercise every now and then when you are otherwise unoccupied:  what are some other things you might need to deal with first if a quake hits?  What if you had something being crunched up in a food processor?  What if you were counting or cutting pills on the table (and have a pet)?

Are you sitting around with nothing to do bored out of your skull?  (Of course not, you're reading this blog!  But perhaps later today...)  Try running through random situations in your head; what would you do if a quake hit right now?  (You might be sitting in your car or walking down the block, or performing brain surgery, etc.)  That would be the other part of situational awareness, the random uncontrolled situations where you suddenly might find yourself in the middle of a quake.  I was pretty proud of myself in the 1989 Loma Prieta earthquake, because I was outside and instinctively looked up, saw if any electrical wires or tree branches could hit me, saw if any building exterior walls could hit me, determined that a clock tower that was about as far away from me as it was tall was the only thing that could reach me (having a flashback to bongos and an outdoor orchestra concert), and kept an eye on the clock tower and nearby tree branches as I tried to stay standing.  Yes, I now know that it would have been better to have hit the ground and made myself small, but at least I had the presence of mind and the situational awareness to assess my surroundings.

Of course, I can be all proud like this now, but perhaps if I had been indoors with 25 different objects flying at me from different directions, I might have not had such a model reaction!  History is written by the victors...

(For more on the subject of situational awareness, I can't recommend enough the book "The Unthinkable" by Amanda Ripley.  I could not put it down, which is kind of ironic because if an earthquake had hit while I was reading the book, I might not have noticed the earthquake; situational awareness prevented by reading about situational awareness.  That makes my head hurt, but check out the book anyway and if there's an earthquake while you are reading the book, Amanda and I both apologize...)

Back to article index

Link to this article Back to top

Did the movie San Andreas suggest the “Triangle of Life” myth? Just kind of.
(Spoiler alert...but only if you haven’t already figured out that the movie San Andreas includes some really big earthquakes)

Poor San Francisco.  My favorite city just keeps getting destroyed, and I know all about this because I go to the movies and see it for myself.  Let’s see, just in the last few years, we’ve been run over by Godzilla and friends, we’ve been trashed by a gene therapy experiment gone wrong followed by a bunch of angry intelligent apes, we’ve had the Golden Gate Bridge uprooted from Marin and attached to Alcatraz by a magnetic mutant, we’ve seen the future in which a starship crashes into the Financial District, and now in what seems positively normal in comparison, we get devastated by a massive earthquake while Dwayne “The Rock” Johnson runs around with film crews closing off access to residential streets and creating inconveniences.  When will it stop??

Did the movie San Andreas suggest the “Triangle of Life” myth?  Just kind of.
Milo acting dramatic
That last example, of course, is the movie San Andreas, which came out this week.  I went to see it today, not only because it’s rare to witness San Francisco being destroyed by an earthquake while in San Francisco without having to worry about being hit by flying objects, but also because they filmed on location in my part of town so it’s fun to see the result.  In fact, I really wanted to see if my dog Milo (who is very dramatic, see photo) managed to get into the movie.  They were filming around AT&T Park, home of the San Francisco Giants (and let’s just say that a 4th winning World Series in 6 years at AT&T Park seems unlikely in the plot of this movie).  Milo was out on a walk and ended up near the filming, where a huge crowd of extras was assembled for the movie.  At one point, the crowd was told to panic and start running, toward Milo in fact, and he started barking like crazy.  So I’ve been wondering if scenes of devastation and panic near AT&T Park would include a familiar-sounding barking.  I listened but there was a lot of noise!  I suspect that if a bunch of buildings collapsed and a bunch of people screamed and a dog barked, it would sound about like what I heard.  On the other hand, the credits at the end of the movie listed “Rescue dog: Snowy” so perhaps it was Snowy barking; I’ll never really know.

I actually enjoyed the movie quite a bit.  I was expecting to see exciting earthquakes and cool effects with a lame plot, but actually, I thought the story and acting were all good, despite what some of the movie reviewers have been writing.  Incorporating Sia singing a very amped-up version of California Dreamin’ at the end (not a spoiler, don’t worry) was a nice touch.  In 3D, the earthquake effects were terrific and the devastation was pretty impressive.  For some reason though, the first view of the San Francisco skyline was compressed vertically so the buildings were too short; really ironic for this movie!  The movie poster that I saw as I entered the theater showed downtown San Francisco on the wrong side of the Golden Gate Bridge, which would have been impressive destruction indeed, but they didn’t actually do that in the movie.

Did the movie San Andreas suggest the “Triangle of Life” myth?  Just kind of.
Close-up of part of the poster showing Golden Gate Bridge
sticking out in the wrong direction (compare with below)
Did the movie San Andreas suggest the “Triangle of Life” myth?  Just kind of.
The real orientation
Still, I was mostly curious to see how accurately they handled issues of earthquake response in ways that might influence the public’s behavior in a real event, for better or for worse.  Here, I give it an A-.  Paul Giamatti’s character, the Caltech seismology expert (who had one of the movie’s best lines, about Caltech; you’ll just have to go see for yourself) did the real-world public a great favor when the quake first hit LA.  Not only did he and his staff dive under a desk (correct move), but when a reporter who was in the room instinctively went to a doorway (incorrect move despite what you learned as a kid), he literally pulled her out and said something like “no, get under here; drop, cover, and hold on!”  That was quite an advertisement for correct response to an earthquake .  He also did not attempt to run out of the building , good for him and the script writers.

However, the one part that I wish they had handled differently was when Dwayne Johnson’s character, Ray Gaines, uttered a phrase that raises the hair on the back of the necks of the earthquake preparedness community: “Triangle of Life.”  Without giving away details to detract from your future movie viewing experience, I’ll just say that he sees people outside in a downtown street (not far from my own home) with no shelter during the earthquake, with debris raining down and lots of people screaming (and probably a dog barking somewhere), and he herds them all to crouch down near the wall of a large cement structure.  By being there, they manage to avoid tumbling large antenna poles and are generally sheltered from most of the things flying through the air.  When the grateful people ask him how he knew that they would be safe there, he answers “Triangle of Life.”
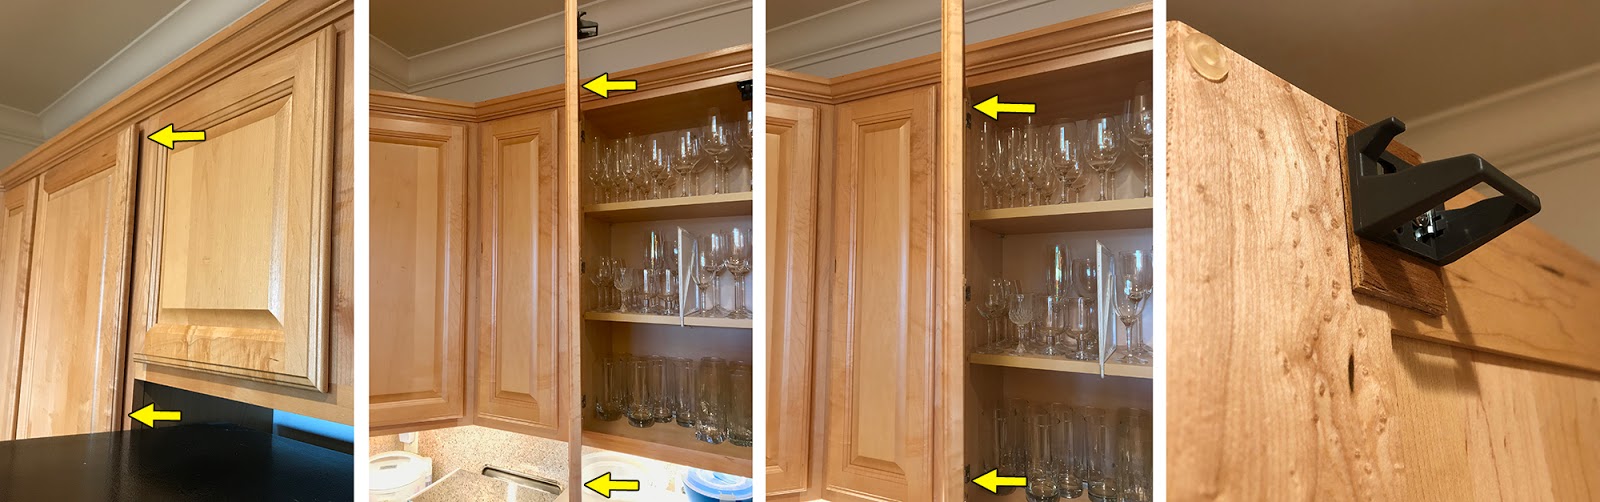
The problem?  Two actually.  First, the advice is a mutation of what you are supposed to do if you are INSIDE and if you have NOTHING TO GET UNDER.  In that case, you are supposed to crouch down covering your head near an interior wall, in case a ceiling beam comes down (which is pretty rare).  We were even taught this in a San Francisco Fire Dept. Neighborhood Emergency Response Team (NERT) class, with the trainer even using the term “Triangle of Life” to refer to the partially sheltered zone near where the ground and the wall meet.  However, if you are outside, you want to avoid being near walls because of the glass and bricks and anything else on those walls that might fall straight down.  This is why you are not supposed to run out of a building during a quake ; because you want to avoid the very spot that Ray Gaines told people to assemble.  In defense of Ray and the script writers, the scene in the movie showing an earthquake larger than any ever recorded was not your typical earthquake scenario.  With buildings falling over and rubble flying through the air, since this particular structure didn’t have windows or bricks, perhaps being next to it would have been safer than being in the middle of the street with glass shards flying around, but it’s not considered good advice for most buildings in most quakes!

Did the movie San Andreas suggest the “Triangle of Life” myth?  Just kind of.
Please tell the kids to get UNDER the desks, not next
to them! ( 1983 Coalinga earthquake, photo from the original external source Wayne Bennett. )
My bigger problem is that, as frequent readers of this blog have seen me hammer in repeatedly, “Triangle of Life” is also a name that has achieved notoriety as part of a widely discredited viral e-mail that has been propagated for years by well-meaning but clueless people, in which a self-described emergency response expert claims that you should not seek shelter under a sturdy object during a quake, but instead should get next to it.  He claims erroneously that the desk that you'd be under would be crushed along with you, and that getting next to it would protect you in a safe triangle next to the desk, which is completely contradicted by the facts.  Please re-familiarize yourself with the issues by reading my earlier article , but the bottom line is that this e-mail is based on misconceptions and outright false statements , and contains advice that could put people directly in harm's way .  Unfortunately, the two versions of the “Triangle of Life” have some similarities and are easily confused.  I worry that viewers of the movie will come away with the idea that “Triangle of Life” and “get next to something” are good advice, and then when they see the spam e-mail of the same name, they will assume erroneously that the advice to NOT get under a sturdy object is good.  Had Ray not uttered that problematic phrase, the real-world public would have been better served.

Fortunately, Paul Giamatti’s scientist indoors told people to get under something; neither he nor anyone else in the movie suggested that people should get next to an object instead of getting under something sturdy.  And, Dwayne Johnson recorded this public service announcement for FEMA in which he recommends the Drop, Cover, Hold On approach; good for him!

I think it is also important to keep in mind that the advice you hear from real-world earthquake preparation/response experts is about real-world quakes.  There’s always a hypothetical scenario that can doom good advice to failure, like the advice to lock your front door isn’t really helpful if there’s someone on the outside with a bazooka, and the advice to get under something in a skyscraper during a quake is kind of moot if the whole skyscraper is falling over due to all-powerful script writers.  Having push latches on your cabinets and bracing the bookcases to the wall  are precautions against the magnitude 6.0-8.5 range of earthquakes (the vast majority), and probably won’t help all that much in a 9.5 Armageddon!  I hope that this movie won’t make people throw up their hands in helplessness and stop taking reasonable precautions against the earthquakes that are expected in their region.

Much has been written already about the various liberties taken with earthquake science, such as having a tsunami in the San Francisco Bay caused by a strike-slip fault, or the massive size of the quakes (magnitude 9.1 and 9.6) that seismologists say are simply too large for a fault like the San Andreas to generate.  However, because of the various high-profile earthquakes in the last few years, including three of the largest eight quakes ever recorded all occurring within the last 11 years (2004 Indonesia at magnitude 9.1, 2010 Chile at 8.8, and 2011 Japan at 9.0), it’s worth pointing out that these massive quakes occur in a different kind of fault system, known as a subduction zone .  In these regions, one tectonic plate is diving under another, leading to massive rips in the earth’s crust and displacing vast amounts of water, leading to tsunamis.  The San Andreas fault, like the other faults in the southern ~85% of California, is a strike-slip fault , in which one tectonic plate slides sideways against another plate, and the theoretical maximum size earthquake that occurs in these systems is about 8 (which is one tenth as large as a 9 because this is a log scale).  The great San Francisco earthquake of 1906 was about 7.8, although most of the damage was caused by the fire.  The recent Nepal quake was also 7.8, but most of the damage was due to poor building construction.  I think it’s interesting that the largest quake ever recorded was a 9.5, and the movie gives us a 9.6; so they actually kept it within a realistic monster quake size, but they did it in the wrong place!

Did the movie San Andreas suggest the “Triangle of Life” myth?  Just kind of. At any rate, after the movie, I emerged from the Metreon theater to see downtown San Francisco on a beautiful sunny Sunday afternoon, completely intact, so I guess we are ok regardless of what I had just watched.  However, according to the movie poster that I saw as I exited the theater, San Francisco is going to be eaten this summer by a giant Pac-Man.  I am not sure how to take adequate home preparations for invasions of giant Pac-Men, but I'm sure there's a good blog about that topic out there somewhere.

(For a good synopsis of the facts and fictions about earthquakes in the movie, see the Earthquake Country Alliance website )

[if gte mso 9]> 0 0 1 52 298 UCSF Cardiology 2 1 349 14.0 Normal 0 false false false EN-US JA X-NONE
6/5/15 update:  An article about the movie being widely disseminated over the AP erroneously says that "If you're outdoors when the ground moves, experts recommend bracing against a wall."  In fact, the USGS and other emergency organizations emphatically state on their Earthquake Country Alliance website that crouching near a wall is not recommended if you are outside.

Back to article index

Link to this article Back to top

Do the collapsed buildings in Nepal mean that you should run out of a building during an earthquake?
As readers have no doubt already heard, a major earthquake hit Nepal today, estimated at magnitude 7.8, or roughly the strength of the 1906 San Francisco earthquake.  Earthquakes of this size are not that unusual, but this one unfortunately hit in such a manner and location that it claimed at least 8,000 lives according to the most recent numbers that I've seen (numbers are being updated after this article's initial posting).

The reason that I'm posting a quick article here is that this earthquake collapsed some major buildings and there are photos everywhere of the tower, the temple, and other buildings that have been reduced to rubble with people inside.  This type of event, understandably, makes people wonder if the typical advice to NOT run out of a building during an earthquake should be ignored.

First, I hope that people will review a more in depth article that I wrote about this issue that focused on the 2011 Christchurch, New Zealand quake, which I feel gives a good explanation about how the odds work in a situation like this.  Basically, if a few notable buildings collapse into rubble and most of the buildings don't collapse, and those that don't collapse are surrounded by rubble from the outer walls that fell into the street, then people who ran out of any building had a greater chance of being buried in rubble than people who stayed in any building.

Do the collapsed buildings in Nepal mean that you should run out of a building during an earthquake?
Typical scene from Nepal showing part of the exterior of the building that has collapsed outwardly (Kari Stiles on Facebook via CNN.com)
Do the collapsed buildings in Nepal mean that you should run out of a building during an earthquake?
Here's where that part of the exterior wall ended up, next to the building (Jesse Anderson via CNN.com)

If only there was a way to know ahead of time which buildings will collapse, then we'd know when to stay and when to go.  However, in most cases, you don't know, and the cruel way that chance works is that if everyone does what gives them statistically the best chance of survival, then more people will survive, but some still will not.

Please look at the news coverage about the damage from this quake and you will see something notable: in photos of a collapsed building that shows the surrounding area, it appears that most of the surrounding buildings have not collapsed.  Look at more photos; there is rubble in the streets everywhere; and in many cases the outer walls have collapsed or bricks from the exterior have fallen, creating a deadly situation for those who tried to run through the danger zone outside those buildings during the quake.  This happened in Nepal, it happened in Christchurch (killing many people right outside of buildings), it happened in the 1989 Loma Prieta quake in the SF Bay Area (killing five people who were next to a building at 6th and Bluxome in San Francisco, the second largest group of casualties), and it happened in the South Napa quake in Northern California last year (lots of rubble next to some buildings, although fortunately nobody died from rubble inside or outside in that quake to my knowledge).

Do the collapsed buildings in Nepal mean that you should run out of a building during an earthquake?
Rubble in the streets; better to have stayed in these buildings (Prakash Mathema/AFP/Getty via CNN.com)
Do the collapsed buildings in Nepal mean that you should run out of a building during an earthquake?
Collapsed temple surrounded by intact buildings, some of which have piles of rubble around their exterior (Sumil Sharma/Xinhau/Landov via CNN.com)

It's also worthwhile pointing out that the building standards in Kathmandu and surrounding areas are insufficient for such earthquakes, making the advice to not run out of the building even more cogent in countries with good seismic building standards.

Of course, if you think there is a good chance that the building you are in is not structurally sound, then it may make more sense to run out; it is impossible to give one-size-fits-all advice in a case like that.  If you are in a part of the world in which building standards are woefully inadequate, as was the case in the Haiti and Sichuan earthquakes in recent years, then I am not sure what to tell you. However, remember that if you DO run out, you are not safe when you get through the door; you are in the firing line.

And of course, there is always a possibility that an unprecedented monstrous quake may flatten every building in a modern city, but this advice is felt to cover the most likely scenarios; plus, in that case, I don't know if you'd be safe anywhere!

I will close by saying that my thoughts are with those dealing with the aftermath of this quake, as in all such quakes, but also that (and this is important) there is no perfect fail-safe strategy to avoid being trapped in a collapsed building in an earthquake.  All you can do is to give yourself the best odds.  If everyone stays in buildings during a strong quake that collapses some buildings, then some people will get trapped under rubble.  However, if everyone runs out of buildings during a strong quake that collapses some buildings, the odds are that even more people will get trapped under rubble.  If you follow the advice to stay inside, it may end badly for some of you, but if you run out of the building, then the odds of it ending badly for you are larger.
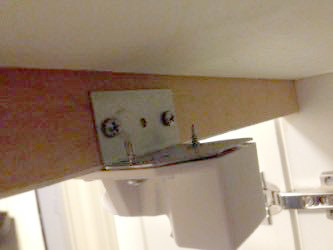
(Legal disclaimer:  I cannot repeat enough times that the advice to stay in a building will NOT guarantee that you won't be injured or killed in a major quake, it just reduces the likelihood. This advice is well-established by emergency management experts and was not created by me.)
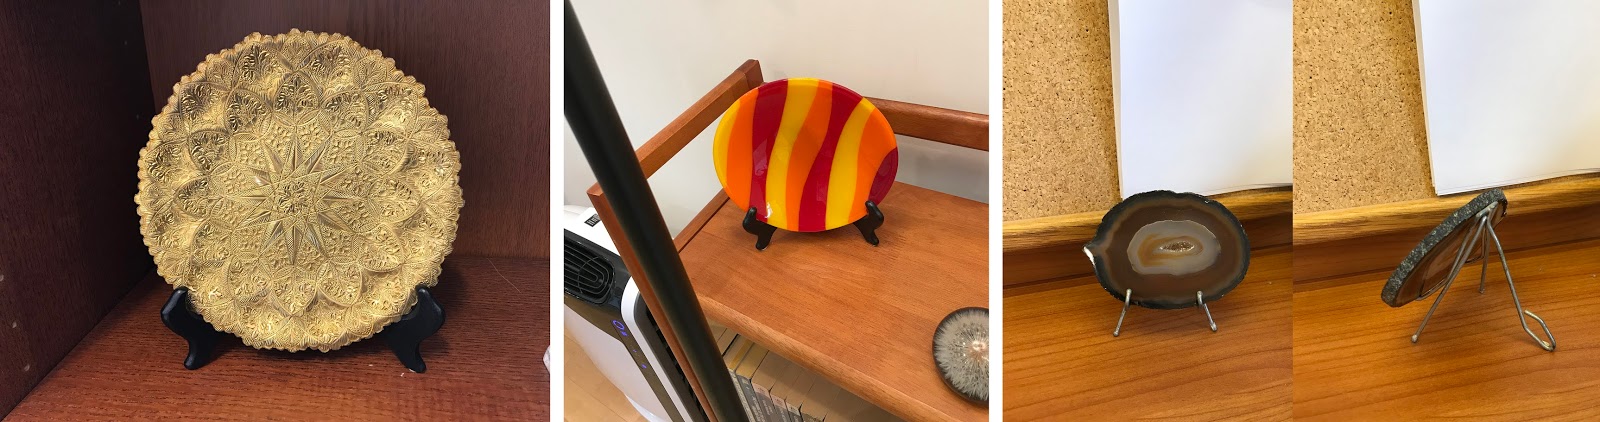
Back to article index

Link to this article Back to top

A burning question: what happens to unattended holiday/memorial candles in an earthquake?
(This article is longer than I had intended it to be... I would suggest that if you don’t want to commit to the whole thing, you read the first section, at least scan through the subsequent section headers for whatever might be relevant to your own situations, and then please be sure to read the last section!)

One of the basic rules of living in an earthquake zone is to avoid having loose objects that would cause great danger if they fell, right?  Do you store unsheathed swords sitting loose on the top shelf, or unattended loose boxes of live rattlesnakes on the coffee table, or armed land mines sitting loose on the kitchen counter?  Certainly not.  Got unattended fire on the table while you are in the other room or away from home?  Of course not!  ...Except that many people do, even near earthquake faults, in the form of holiday or commemorative candles.

One poorly timed earthquake, and those people will have to consider themselves lucky if they just burned down their own home and not the entire city block.

Consider: candles in jack-o’-lanterns, candles in menorahs, memorial candles, etc., can change in an earthquake from fun, beauty, and devotion, to destruction and death; not just by falling themselves and starting fires, but also if some other object falls onto the candles and catches on fire.

A burning question: what happens to unattended holiday/memorial candles in an earthquake?
Catholic votive candle and Jewish
Yahrzeit candle (M. Springer)
Think I'm overly worried?  San Francisco is no stranger to killer fires caused by earthquakes, as much of the city burned after the 1906 earthquake thanks to "broken gas lines and toppled candles and lamps that fueled raging fires" according to historynet.com .  In fact, fires after earthquakes "are often caused by ruptured gas lines, electrical shortages and fallen candles, among other things," according to Dr. Rachel Davidson of the University of Delaware, who is studying how fires start and spread after earthquakes .  It's not new; according to a UC Berkeley study , after the 1755 Lisbon earthquake, "several fires broke out, mostly started by cooking fires and candles."  The resulting catastrophic fire burned Lisbon for five days.  The Pacific Northwest Seismic Network points out that "Fire has long been recognized as a major hazard following earthquakes.  Before the 20th Century, earthquakes would often upset burning candles and lamps and stoves and fireplaces with dangerous fuels were common.  Today in the US ruptured gas lines and arcing electrical wires are the most common sources of ignition."  But the candles are still there.

The purpose of this article is to get you thinking about things that you may have taken for granted your entire life, but that could cause a destructive fire in the event of an earthquake; and about strategies for avoiding that risk.

more
Halloween jack-o’-lanterns

A burning question: what happens to unattended holiday/memorial candles in an earthquake?
A jack-o’-lantern with candle inside.  Original
photo “ Pumpkin Pie ” by huk_flickr,  Creative 
Commons Attribution 2.0 Generic license
The unique sight of the flickering flame inside a jack-o’-lantern with its orange ghostly aura is one of the best parts of Halloween.  The top of the pumpkin mostly contains the flame.  The pumpkin flesh is so thick and moist that by the time you are finished with your jack-o’-lantern, you may have a charred area in the middle of the lid, but no actual ignition has occurred.

A burning question: what happens to unattended holiday/memorial candles in an earthquake?
Electric jack-o’-lantern lights
So this sounds pretty good, although if your jack-o’-lantern takes a tumble in an earthquake, it could potentially catch something on fire.  Even though it is more likely that the flame will just go out, the risk is there.  Fortunately, unlike some of the religious situations discussed below, there is no law or rule or religious tradition that requires the use of flame in a jack-o’-lantern.  Therefore, this seems like a no-brainer to me for people living in earthquake zones: use electric lights in your pumpkins if you plan to leave them unattended.  They sell small lights expressly for this purpose, and you can even get electric candles that have color and flickering properties that mimic flame (see video below).  Let’s make sure that earthquakes on Halloween don’t cause more problems than earthquakes on any other day!


Menorahs

Many Jews light candles in menorahs over the eight-day holiday of Chanukah.  Tradition strongly prefers candles (or olive oil) over the widely available electric menorahs because the holiday commemorates the miracle of a tiny bit of oil keeping the Temple’s seven-branch menorah burning.  The Chanukah menorah light is supposed to be supported by a fuel reserve of at least 30 minutes, and electricity from power outlets is considered to be constant rather than a reserve, so it doesn’t satisfy this requirement.  Battery powered menorahs could fit the description, but my research turned up many examples of religious authorities not being satisfied with electric lights for Chanukah, saying that they are appropriate only for decoration.

A burning question: what happens to unattended holiday/memorial candles in an earthquake?
A traditional Chanukah menorah.
The 8th Night ” by Dov Harrington
  Creative Commons Attribution 2.0 Generic license
Fortunately, these are short-lived candles, about half an hour, so it is relatively easy to not leave them unattended.  I would emphasize then that if you light candles for Chanukah, make sure someone is always in the room with them; and at the first signs of even the smallest earthquake (because you don’t know if it will get bigger), plan ahead to extinguish the flames before seeking cover.  After all, what good is it to emerge in one piece from under your sturdy table only to burn to a crisp?  (That last sentence should be read out loud with a good New York Yiddish Jewish Grandmother accent.)


Yahrzeit candles

Another Jewish tradition: Yahrzeit candles are small candles that burn for a little over 24 hours and are lit each year on the anniversary of a loved one’s death (see earlier photo), with similar candles burning for the first week of mourning.  Given that they are supposed to burn for 24 hours, you presumably need to leave them unattended while asleep or at work or away for other reasons.  That’s a whole 24 hours in which an earthquake could turn your remembrance of tragedy into a new tragedy.  Since people keep each candle lit for a whole day, and there are ~365 days/year, roughly one out of every 365 people who light Yahrzeit candles will have one lit at any given time.  That means the odds are nearly certain that a huge number of Yahrzeit candles will be lit and unattended during any earthquake that occurs.

Since all of these Yahrzeit candles will be burning unattended during any earthquake, the chances of one starting a fire during a quake are pretty good!

A burning question: what happens to unattended holiday/memorial candles in an earthquake?
Example of electric
Yahrzeit candle (eBay)
Fortunately, from my reading, there does not appear to be a traditional or religious objection to electric Yahrzeit candles, and I see many references to people using electric lights for safety reasons, even among Orthodox Jews .  I can understand the preference for flames.  Full disclosure: I’m a completely non-practicing but culturally Jewish atheist, and nonetheless, the sight of a Yahrzeit flame is deeply moving to me; a bulb would not have the same effect.  Still, it seems to me that people who live in earthquake zones have no choice; leaving a flame unattended is simply a very dangerous idea and I urge people in earthquake country to use the electric ones.  You might stick a real candle down well with quake putty, but something else could still fall into it.

Sabbath candles

I’ve got several Jewish examples here because of my own familiarity and because candles are so pervasive in Jewish traditions.  Once each week, shortly before sundown, observant Jews are supposed to light “Shabbat” candles and I’ve seen several accounts on Judaism informational websites about lighting the candles, then going to services, then returning home for the Sabbath meal; and the people are not allowed to extinguish the candles.
A burning question: what happens to unattended holiday/memorial candles in an earthquake?
Shabbat candles.   Photo  by
Olaf Herfurth;  Creative Commons
Attribution-Share Alike 3.0 Unported license

Here are some distressing instructions from the Jewish content website  aish.com :  Q: “What if we won't be home for dinner Friday night?”  A: “Light your candles at home if you will be returning to sleep there, as long as they will still be burning when you return home. Otherwise, light your candles at home and stay until after dark before leaving for your dinner ‘out.’ If you are afraid of candles burning unsupervised, simply light them in a sink that you won't be using during Shabbat!”

The first sentence in that quote gives me heartburn and could give them homeburn.  At least they dealt with the problem at the end, and I suppose leaving lit candles in the sink avoids the problem of the candles falling in a quake, although there is still the smaller possibility that something falls into the flame, ignites, and then floats elsewhere and burns down your home.

What about electric alternatives for the Sabbath?  I was somewhat surprised to find numerous references on the web stating that the consensus holds incandescent lights (I guess not CFLs or LEDs, but even this is debated), especially those powered by batteries (fuel reserve), to be an acceptable equivalent to fire for this purpose, such as this quote from a website about Jewish law  that says: “However, in situations where lighting an open flame may be hazardous or subject to regulation, one may use electric lights. This is the case for patients in a hospital, or guests staying at a hotel...”  Perhaps you can light real candles if you will remain at home and use electric candles if you plan to leave them unattended.

Another potential compromise is discussed at the end of an interesting article about the debate over electric Shabbat lights  ...“Third, there is a certain element of danger in lighting actual candles, especially when left unattended. Incorporating electric lights into the candle lighting service provides a means of minimizing the danger. By incorporating electric lights, one can use a candle or oil that will only burn for a short amount of time, and the electric lights will fulfill the task of providing oneg Shabbat after the candles are extinguished.”

(There’s been at least one reported instance  of an electric candle falling onto a carpet and burning a hole in it, so perhaps a dab of quake putty is still wise if it is above flammable surfaces.)

My bottom line: in earthquake regions, if you leave an open flame in your home while nobody is there, you are risking your home and putting your neighbors in danger.  Hopefully by using the ideas in this blog, you can fulfill your traditional obligations without ignoring the realities of living in an earthquake zone.

Thanks to Rabbi Joel Landau of Adath Israel Congregation (Orthodox) and Rabbi Aubrey Glazer of Congregation Beth Shalom (Conservative) in San Francisco for helpful discussions about the Jewish traditions.

Kwanzaa 

A burning question: what happens to unattended holiday/memorial candles in an earthquake?
Lighting a candle in a kinara during
Kwanzaa ( photo  by Christopher Myers)
This modern African cultural holiday presents another multi-candle burning situation in homes around the world.  The candles in the kinara, one black, three red, and three green, each representing a different principle of Kwanzaa, are lit on successive days in a manner reminiscent of the Chanukah menorah.  Because it isn’t religious per se, it is easier to opt for electric alternatives without running afoul of cultural laws, and it is quite easy to find electric kinaras.

However, that probably isn’t even necessary, because unless the several references I found on the web were all incorrect, the daily ceremony of candle lighting involves extinguishing the candles at the end of the ceremony and then relighting them at the beginning of the next day’s ceremony, so they aren’t left unattended.  I wish all candle traditions were this sensible!

Diwali

The Indian festival of Diwali probably beats Jewish traditions with respect to fire.  I know far less about Diwali than the Jewish traditions, but from what I have read, Hindus celebrate Diwali by lighting candles, oil lamps (diyas), and fireworks; and I’ve seen references on the web to releasing floating oil lamps into streams and to leaving flames burning all night.  Jains and Sikhs have their own variations of this festival.  By doing internet searches, one sees various references to destructive fires and to burn injuries, although these appear to be due to fireworks, rather than falling candles.

A burning question: what happens to unattended holiday/memorial candles in an earthquake?
A diya – Indian oil lamp.   Photo  by
K.S. Sreekumar,  Creative Commons
Attribution 2.0 Generic license
Nonetheless, the same principles apply here: any unattended flame can be dangerous in an earthquake.  Fortunately, electric lights for Diwali not only appear to be non-heretical, but are actually preferred by many people; these sound like they are similar to western multi-colored Christmas lights that people string inside and outside their homes.  However, not the religious sector, but Indian Prime Minister Narendra Modi himself has requested  this year that people celebrate Diwali using traditional diyas made in India, rather than electric lights that tend to be made in China.

To my unsophisticated understanding of the issue, it sounds like people can opt for electric lights or any other measures to avoid insufficient earthquake flame safety if they so choose, so please consider the issues in this article when deciding what kinds of Diwali lights will be unattended.

Christian votive candles

Then we have the whole range of votive candles in Western Christianity (some of which are lit in the home), and Eastern Orthodox Christianity (in many homes).  I’ve seen discussions on the web about the use of electric candles for Catholics, and not surprisingly, there’s a whole range of opinions out there...but it sounds like electric votive candles are not that unusual and are generally allowed in Western Christianity.  I saw one reference to a church switching to electric candles because their fire insurance premiums were much lower that way, surprise!

A burning question: what happens to unattended holiday/memorial candles in an earthquake?
Eastern Orthodox hanging votive lamp
(photo supplied by Archpriest S. Pavlenko)
Some Eastern Orthodox homes have holy icon corners in which candles or oil lamps are lit for periods ranging from just during prayer to daily and overnight.  According to Archpriest Stefan Pavlenko of the Church of All Russian Saints in Burlingame, CA, “a lamp in the home is an Orthodox Christian tradition ... when setting up the Holy Icon corner one should be aware of common sense safety precautions ... I know that many Orthodox Faithful put out their votive flames when they are out of their home.”

One interesting aspect of the Eastern Orthodox votive lamps that was unknown to me until Father Stefan described them to me is that frequently, these lamps are hanging, rather than sitting on a surface.  To me, this would reduce the potential impact of an earthquake because the lamps could swing with the quake and then settle back to position at the end, rather than being knocked permanently off of the surface.  Still, remember that in a major quake (think San Francisco, 1906), there is still a chance that they could come down if they fling off of their hook or if the structure holding the hanging lamp collapses itself.  It might be worthwhile to directly fasten the chain to the hook rather than just hanging it on the hook, and to ensure that the part that holds the flame can't easily fall away from the part attached to the chain.

Middle Eastern and East Asian traditions

In contrast, my friends from different Muslim cultures tell me that Pakistani and Arab traditions don’t include religious candle burning.  Toward the end of Ramadan, Iranian Muslims stay awake by candlelight or with dimmed room lights; certainly safer than lighting candles and going to sleep!  For Muslims in Indonesia, Malaysia, and Burma, Eid al-Fitr at the end of Ramadan involves placing oil lamps outside of the home, and I am not sure if they are left burning unattended.  While various East Asian cultures use candles as part of their shrines, I’ve been told that Japanese and Taiwanese homes typically avoid unattended flames due to safety concerns including earthquakes; a refreshing attitude.  I’ve heard that Chinese celebratory candles are only lit during the celebrations.  However, some (not all) Vietnamese Buddhists leave candles burning unattended at home shrines to honor the spirits of deceased relatives.  I’ve been told that in some cases, they are unattended intentionally to let the spirits have peace.  An earthquake could topple these unattended candles. [Note added 2/23/16: Even without an earthquake, 1000 celebratory candles left burning unattended overnight yesterday at an Oakland Cambodian Buddhist temple led to a massive fire that destroyed the temple and seriously damaged two neighboring homes; what was probably a rare mishap would have become a certainty if there was a large earthquake on the Hayward Fault!]

(Admittedly, this one paragraph covered a vast number of diverse cultures, and there could easily be traditional variations that I didn’t encounter.)

THE BIG PICTURE

The religious issues may differ from culture to culture, but the laws of physics are the same for all religions: shaking plus flame plus gravity equals fire hazard.  Despite not being a religious authority, I’m going to go out on a limb and suggest that none of these religions would condone putting one’s home and one’s neighbors’ lives in danger.  Traditions and religious obligations can be followed without ignoring special local circumstances, like a long and repetitive history of earthquakes.

Put another way, when asked to comment for this article, San Francisco Fire Department Chief Joanne Hayes-White made the following statement: “People would be surprised at how many fires we respond to that are caused by unattended candles, fires that cause millions of dollars in property damage, injuries and even deaths. Every one of those fires could have been avoided. Leaving an open flame unattended is never a good thing to do, under any circumstance.”

And that’s without earthquakes to knock them over.

“But Matt,” you protest, “seriously, what are the odds that an earthquake will hit during that one hour that I am leaving the candle unattended as I run my errands?”  Well, here’s a variation of something I say in my talks about equating earthquake precautions with locking your door and carrying keys because your home might be robbed.  In this case, consider that you lock your door whenever you leave even if it is just to run a 10 minute errand, not because you think a burglar will try to enter your home in the next 10 minutes, but because you want to ensure that IF a burglar ever does try to walk through your door when you are away, it will be locked.

Earthquake safety Rule Number One is to ensure that WHEN the next substantial earthquake strikes, you won’t have falling swords or rattlesnakes or land mines...or flames!

Back to article index

Link to this article Back to top

Should I stay or should I go?...the inevitable dilemma about staying in the building during an earthquake
This month, we are taking a break from the actual preparedness issues and will instead delve further into this annoyingly counter-intuitive recommendation to not run out of buildings during earthquakes.
If you have attended or otherwise watched my talks about earthquake preparedness, you know that I make a point about not running out of a building during an earthquake.  I know, it just seems like the thing to do, when everything is shaking around you, and you picture yourself trapped under pancaked and collapsed buildings.  But the point I make in my talks, and want to emphasize with a bit more discussion here if you read further, is that at least in modern industrialized nations, statistically, you are taking a bigger risk of being injured as you run from your nice strong building into the DANGER ZONE that exists right next to buildings. 
While the structure is designed to remain intact, lots of less-secure parts of the building are attached on the outside with much less thought (or attached with nothing BUT thought…), waiting to come crashing down as it shakes (bricks, window glass, ornamental masonry, signs, etc.).   From what I hear, most injuries from earthquakes in places like California are sustained by people getting hit by the OUTSIDES of buildings, not the insides. 
(Here’s an important disclaimer: I have not sat there and watched people get hit indoors or outside during large earthquakes.  What I know comes from the official recommendations of groups like the American Red Cross and the US Geological Survey, which I am passing along.)
Many people assume that inside a building = not safe, and outside of the building = safe, based in part on photos they see after major earthquakes.  The problem is that when large earthquakes occur, do you think the photographers are interested in photographing the store sign over the front door that crashed down to the ground, or the metal light fixture that fell and dented a sidewalk, or a piece of window glass that fell from the neighboring 15-story building like a falling dagger?  Of course not, even if things like that were 99.9% of the damage.  They want to photograph the extremes, so after the Christchurch, New Zealand quake in early 2011 that killed a couple of hundred people, I saw a bunch of photos of collapsed buildings on the web and was just starting to think that all buildings in Christchurch looked alike when I realized that I was seeing the same three collapsed buildings over and over.  (I’ve since read that there were 4 high-profile building collapses; of course that means that the vast majority of buildings DIDN’T collapse.)  
Should I stay or should I go?...the inevitable dilemma about staying in the building during an earthquake
Should I stay or should I go?...the inevitable dilemma about staying in the building during an earthquake The Pyne Gould building, for example, showed up a lot; amazing collapse; check out these photos (from AFP/Getty Images through newsfeed.time.com, and National Geographic).  Of course, I’m guilty of this also in my talks; when I show notable damage from the Northridge quake for example, I show a collapsed department store, a collapsed apartment building, and a partially collapsed parking structure; and I guarantee you that I did not randomly select a cross section of the typical damage!  I went for the photos that make the biggest impression, and then of course I have to mention to people that most of the damage didn’t look like that.
If I knew for a fact that the building I was in was going to completely collapse, I might be tempted to try to get out; but of course we can’t know this.  Our buildings’ structural supports are much stronger than their “skins”; the outer walls and windows and all the trimmings.  Even if the building does not collapse, those outer walls still can collapse and they tend to collapse outward.  During a large quake, I’d be happier in an open field than inside a building, but where I want to be the least is next to buildings for those reasons.  In fact, I’ve heard that there is no safe place to be outside in a city downtown area, where any skyscraper window glass that dislodges can sail diagonally like an airborne machete…and I suspect that if I were on the streets of San Francisco’s Financial District, I might just be running into a building while everyone else is running out of it!
Here’s the unfortunate fact: we just can’t know ahead of time.  Let’s say a large quake strikes and one out of a thousand buildings completely collapses, killing or injuring or trapping a total of 50 people.  And let’s say that the other 999 out of 1000 buildings don’t collapse, and people who remain inside are fine under desks, etc., while 200 people who run out of the buildings get crushed by falling bricks and rubble.   Was staying inside the “right” thing to do?  Well, not if you are one of those 50 people who were in the few collapsed buildings; but without knowing ahead of time if yours is one that will collapse, you would have had the best odds of surviving if you had not run outside.  Of course, I completely made up those numbers to serve my purpose, but I think it is a reasonable scenario for a Northridge or Christchurch style quake.  It is the kind of situation where it’s simply not valid to show a photo or two and say “see, this proves what people should have done.”
Speaking of which, I will now show a photo or three and say “see, this proves that being next to a building CAN be a pretty bad idea.”  These photos from Christchurch came from the original external source and from CNN and are all over the web with numerous attributions.  (I am focusing on Christchurch rather than Japan because the Japanese tragedy was compounded by the tsunami and it seems most of the damage photos are tsunami-related; it’s difficult to know when photos of rubble are entirely due to the quake itself.)  I also think these photos are a good illustration of why it is not automatically a good idea to be NEXT to an object during a quake (think back to my article posted a couple of months ago about the  Triangle of Life spam e-mail ).

Should I stay or should I go?...the inevitable dilemma about staying in the building during an earthquake
Should I stay or should I go?...the inevitable dilemma about staying in the building during an earthquake Should I stay or should I go?...the inevitable dilemma about staying in the building during an earthquake

And in case you are thinking that all this rubble fell into the streets AFTER people finished running out of buildings and on to safety, this quote is telling: "There are bodies littering the streets, they are trapped in cars and crushed under rubble," Police Supt Russell Gibson said.” (BBC News, Feb 23, 2011)
At any rate, I wish there was an iron-clad rule: “do this and you will be fine.”  Unfortunately, all we can do is play the odds.  Back in Christchurch, in the collapsed Pyne Gould or Canterbury TV buildings, well, I would NOT want to be inside those buildings.  The much publicized ordeal of the woman who was trapped in the building and called her family to tell them she was probably not going to make it before being rescued a whole day later, and her co-workers who indeed did not make it, make us feel like clearly we should get out in case the building collapses; but people who ran out of non-collapsing buildings only to get buried underneath the rubble of the outer walls collapsing into the streets would have been better off staying inside.  How many of us know someone who says that if they HAD been wearing their seatbelt, they would not have been thrown free of the car wreck before it exploded, etc., but we still (hopefully) wear our seatbelts because it gives us the best odds of being protected from harm. 
To me the safest strategy to consider ahead of time if inside a California building in a large quake is to plan on finding a relatively safe spot under a table and to hope that my building won’t be one of the rare buildings to completely collapse, unless I have reason to believe in that specific instant that the building really is going to collapse.  I’ll follow the plan that might hurt me in 1% of the possible outcomes and will save me in 99% of the possible outcomes (again, numbers are just for illustration). 
And the next time I get in my car and I’m about to put on my seatbelt, I might have a brief moment of uncertainty, but then I’m pretty sure I’ll buckle up.

>> Back to article index

Link to this article Back to top

Important information about the recurring "Triangle of Life" e-mail spam

One more "catch-up" post taken from my website:
Many people ask me about an e-mail that circulates with regularity describing the so-called Triangle of Life approach to avoiding injury during an earthquake.  This theory, which holds that one should get NEXT to something uncompressible rather than UNDER something sturdy, has been rejected by many emergency management organizations as being based on a number of incorrect assumptions and questionable premises, and these organizations have predicted that this approach is more likely to cost lives than to save them if the earthquake occurs in a country like the U.S. that has well-constructed buildings. The following is a summary of the issue with links to more information:

Recently, the American Red Cross has taken an aggressive stance against what it views as dangerous mis-information that is continuing to propagate.  I recommend that you read their statement .
It is also well worth looking at the links accumulated here by an impressive array of emergency organizations that reject the Triangle of Life approach and explain why.  Especially interesting as well is a point-by-point rebuttal of the different recommendations that comprise the Triangle theory.  Here are just a few examples of the interesting points raised:
- While safe pockets have been found next to large objects like cars in collapsed parking structures, the object would have shifted or rolled over and the person would have been crushed before the "safe" pocket found its final home.  (Similarly, just because protected zones are sometimes found next to non-compressible objects does not mean that all non-compressible objects will result in a protected zone.)
- In developed countries, the vast majority of building failures result in crumbling and rubble, rather than intact ceilings coming down.  Being next to an object does not shelter you from being buried under the rubble.
- In a Turkish study referenced by the creator of the Triangle of Life concept, a simulation of a tall building being knocked down resulted in collapse of whole floors onto each other (pancaking), but that was not a real earthquake simulation.  It simply rammed the pillars and did not include side-to-side motion that creates much of the damage and that may send objects sideways into potential safe pockets.
It is also extremely interesting to see what the reputable myth-busting Snopes website has to say about the issue (search for "triangle").  Notably, some variations of the e-mail claim that it has been "approved by Snopes," while in fact, the opposite is true; further eroding the credibility of the circulated e-mail.
Furthermore, some of the background given in the e-mail is questionable.  For example, the e-mail claims that after the 1985 Mexico City earthquake, every child in a particular school was under their desk and they were all crushed; but the earthquake occurred well before the beginning of the school day (7:19 a.m.) and Mexico City officials claim that children were not in school at the time.
Important information about the recurring "Triangle of Life" e-mail spam
Please tell the kids to get UNDER the desks, not next
to them! (1983 Coalinga earthquake, photo from
Wayne Bennett, see URL to the left of picture.)
If you have received this e-mail (who hasn't?), and especially if you have forwarded it on yourself, I urge you to look at these links and pass along the information to anyone to whom you may have forwarded the "Triangle of Life," or to those who send it to you.
The major emergency organizations still agree: the best thing to do in an earthquake is to "drop, cover, and hold."  That is, get under something sturdy and hold on to it so that you can move with the object if it moves itself.

5/30/12 update: I happened across this very cogent extra perspective from a fire fighter and felt it was worth pointing out.

Back to article index

Link to this article Back to top

Quaketips reference section

After an Earthquake

Evaluate immediate hazards before making decisions about fire, gas, utilities, and buildings.

After an Earthquake

4 articles

Fire, gas, building hazards, and immediate post-quake decisions.

People who live in glass houses shouldn't have earthquakes: How well do modern glass-covered buildings hold up?

There’s been a building boom in downtown San Francisco over the past decade, and it can be summed up in one word (several times): glass, glass, glass.  Lots of new towers going up completely covered with shiny reflective glass.  Cool futuristic gleaming towers...or a major disaster waiting to happen in the next big earthquake?  What will conditions on the street downtown among these towers be during a large quake?  I’ve wondered about this and I’m certainly not the only one, and here’s what I’ve managed to learn.  

People who live in glass houses shouldn't have earthquakes: How well do modern glass-covered buildings hold up?
Figure 1.  Floor-to-ceiling windows in a modern condo, 
built ~2007.  This photo is from my previous home.
I have to admit, I like glass on skyscrapers; I like the way it reflects the sky and blends in without the stark concrete that makes up most of each building built in earlier days.  I like the sleekness.  I even like it in mid-rise buildings like where I used to live, where I enjoyed the fact that there were floor-to-ceiling glass walls so that the little dog could sit on the floor and look down, watching the world go by, rather than staring at a white wall (Figure 1).  However, in a quake, will the windows break and shower the street below with fragments of glass?  Will the panes of glass separate from the structure and fall intact, creating open gaps in the walls that are hazards indoors for people during the shaking and pets afterward who may not realize that they will fall out if they try to lean against what has always been an invisible wall?  What about the people outside, and particularly in downtown areas where anything that falls will fall a long way? 

The reasons to not run out of a building during an earthquake (like things falling right outside the building) are magnified in a downtown area because anything that separates from a building will fall quite a bit farther and will likely be very destructive.  I’ve long had the impression that there would be no safe place to be outside in a downtown city center during a quake, and I’ve wondered if, as people are running out of those buildings (despite it being unwise), I would be fighting against the current to get INTO the building!  To better understand the potential hazards, I've been looking into what happens to high-rise glass during quakes and into how far away from the building one can expect skyscraper rubble to fall.

It has been VERY difficult to get answers from the building engineering/inspection community about this, and a friend of mine who is a building engineer specializing in seismic safety astutely suggested to me that this is probably because the results are so hard to predict.  I can see that; each situation will be different.  Still, to give you an idea of the frustrations encountered along the way, one contact at a major city Department of Building Inspections actually answered my line of questions with the advice to “avoid standing under falling objects at all cost.”  I kid you not.

Another inquiry to an SF Dept of Building Inspections engineer resulted in the advice that if glass DID fall from a skyscraper, it would fall straight down, so we shouldn’t be on the sidewalk but would probably be relatively safe out on the street.  But think about that; ok, even in the absence of wind, there are other influences that will likely be there: (1) If there’s sideways shaking of the whole building, then there’s a sideways force on any glass that separates from the building for whatever reason, probably enough to send it at least a few more feet away from the building.  (2) Even if the base doesn’t move very much, tall buildings sway even in high wind and their highest floors can move by several feet by wind alone (apparently the tall and slender 432 Park Ave building in New York City sways up to 5 feet at the top in the wind).  I’ve heard anecdotal accounts of people watching the tops of tall buildings move in large quakes in places like Japan (there are various videos on the web).  This could amplify the effects of sideways shaking.  (3) It just takes a slight temporary tilt of the ground on which a tower sits to make the top move to the side.  Bottom line: I would not assume that debris from the top of a skyscraper in a major earthquake will fall straight down and land right next to the base of the building. 

In the hopes of finally cornering a building engineer on this, I went to a San Francisco Dept. of Building Inspections workshop on seismic safety in downtown SF a few years ago, and listened to a presentation about tall building safety.  There was a long line of people who wanted to ask questions after the talk, and one woman asked about exactly what I had been wondering; the topic of this article.  The speaker evaded the question similarly to the responses I had gotten before.  I later went to an info table that they had after the formal presentations were finished, and posed the same questions to the people at the table, who said basically the glass won’t shatter and it won’t pop out, and I simply could not pin them down with a “what if” question.

And I’ve lost count of the number of times that building engineers have told me that downtown San Francisco in a major quake would not become a shower of glass because modern buildings don’t do that, to which I’ve replied that many buildings in downtown San Francisco aren’t modern.  That’s typically met with a shrug (figuratively).

So let me try to put this together based on what I’ve learned and seen and read, and remember, I’m not able to officially advise you on where to be in this situation if the experts can’t!  But I will describe my thoughts and you readers can be the judge.  I’ll be curious to see if any comments come in.

First, glass and building design have both evolved considerably over the last century.  The glass itself, in very old buildings, breaks into shards.  You can see in photos of older glass that you get jagged edges and what are essentially glass daggers; if these fall, you don’t want to be in their way (Figure 2).  If larger panes of glass dislodge, I have heard that they can sail quite far if they are falling from a tall enough building in the wind, but I can’t verify this.
People who live in glass houses shouldn't have earthquakes: How well do modern glass-covered buildings hold up?

Figure 2. Some older windows break as shards (click images to zoom in).  Counterclockwise from top: A building in downtown San Francisco after the 1989 Loma Prieta quake (KTVU Fox 2). Broken windows in a building in Fukuoka, Japan after the 2005 quake (By Oarih (Own work), CC BY-SA 3.0via Wikimedia Commons ).  Two buildings in Nepal after the 2015 quake, one with no visible window damage and the other with extreme damage and windows broken into shards (photo taken by my friend Laura Whitehurst, used with permission; she points out that we have very different building construction in California!).

In contrast, modern window glass is tempered glass, and frequently laminated.  This is extremely strong glass that fractures without falling apart unless there is an extreme impact, so you get that fracture spiderweb pattern so often seen in car windshields after something hits them, or a familiar pebbly texture.  It’s likely that if an interior piece of furniture fell against a glass window in a modern building, even if the glass cracked, it would still be there but with the fracture pattern.  If the quake was strong enough to truly break the glass, then this glass breaks into pellets rather than sharp jagged shards, as you know if you have seen the aftermath of a smash-and-grab auto burglary (Figure 3).  Still, pellets falling from high up are probably going to be like bullets when they hit the ground.  

People who live in glass houses shouldn't have earthquakes: How well do modern glass-covered buildings hold up?
Figure 3.  Tempered glass fractures into pellets (click on the image to zoom in).  All photos taken by me, showing shattered tempered glass (probably laminated) in a bus stop ad window and a grocery store display case (I guess people get upset about late buses and expensive dairy products?), a familiar sight of smashed car window glass on the ground, individual pellets, and a smashed window that I photographed (no, I didn’t do it) shortly before finalizing this article.  The lamination membrane of the smashed car window is visible around the top of the hole.  (For readers born in the 21st Century, that round copper thing for size comparison is a penny.  You know, a 1-cent coin that will buy you approximately one pellet of smashed tempered glass.  Um, a coin; you know, cash?  The thing you don’t need a cell phone to—oh never mind…)

There’s an interesting website about laminated and tempered glass  that was supposed to also have a video at that site showing how tempered glass breaks, but it’s not there.  Instead, I found this YouTube video  of two guys who clearly have the best job in the world, not to mention the best accents in the world, showing the breaking process in slow motion and I highly recommend you take a few minutes out to watch this whole thing because it just keeps getting better and better; best on a full screen of a computer monitor to be effective.  (They say in the video that the glass was laminated, but I confirmed with one of them via e-mail that it was not laminated, and that it was indeed tempered.)

People who live in glass houses shouldn't have earthquakes: How well do modern glass-covered buildings hold up?
Figure 4.  Breakage patterns of different kinds of
glass, from a   Peerless Products blog .
To my surprise, basic skyscraper glass is not even tempered nor laminated; rather it is heat-strengthened, according to several trade websites including this one from ThermomaxFigure 4 is a nice graphic comparing how different kinds of glass breaks.  Somehow the breakage pattern of heat-strengthened glass is not comforting to me.  Apparently, heat-strengthened glass is preferred over tempered or laminated glass due to better optical qualities (giving new meaning to the phrase “killer views”?).  However, I did get confirmation from the SF Dept of Building Inspections and online sources like that Thermomax website that floor-to-ceiling windows are required to be tempered and/or laminated glass; in fact, I believe that applies to any glass panel with a bottom edge less than 18 inches from the floor.  So it sounds to me like, ironically, the all-glass towers about which the typical person worries the most are probably tempered/laminated and will remain intact, whereas the older style towers in which windows are interspersed within a concrete façade are likely to have the more dangerous consequences of glass breakage.

However, advances in how windows sit in their frames make modern buildings safer.  The main expected challenges to window glass in a quake would be twisting and torquing of the window frame, rather than impact, unless something heavy flies toward the window and hits it.  If the glass was securely attached to the frame, a little twisting could stress the pane, but glass panes that make up the envelope of modern glass towers are in flexible gasket mounts that allow them to float a bit in the frame, so the building can undergo a bit of flexing and twisting without forcing the glass panes to break. 

It sounds to me that in my old mid-rise condo in SF’s Mission Bay neighborhood with floor-to-ceiling windows (Figure 1), even if furniture flew right toward the window, the glass would be unlikely to shatter or fall out; this is reassuring with regard to safety for the two-legged and four-legged occupants of such modern condos.  Still, I tried to have relatively light furniture by those windows.

However, we are more concerned here with what is happening out on the street, and wondering if we can be safe in the middle of the street around tall buildings during a major quake in the typical downtown area, whether in the US or elsewhere in the world.  I’ve found very few images of windows in tall buildings after major quakes, intact or otherwise, but the ones that I have found suggest that even if your downtown has a lot of modern buildings, the presence of older ones in the mix could make the ground below dangerous.

Here are some photos of post-quake glass that I think are notable.  In Figure 5, the top shows sharp glass shards on the ground after the 2011 Christchurch, New Zealand quake. The lower left shows the area outside of a store in Napa, California after the 2014 quake; you can see tempered glass pellets but also an intact window pane that fell out (notably, ground floor commercial windows use glass that doesn’t have the same standards as tall building windows since it won’t fall very far, but I wanted to include it as an example of what windows can do).  The lower right is probably the most compelling to me; it’s an actual sharp large glass fragment after the 1994 Northridge, California quake that fell from higher up and landed quite a few feet away from the building; apparently not from the broken window that is shown (note the shapes don’t match).  The information accompanying the photo online says “Shard of broken untempered glass that fell several stories from a multistory building in the 1994 Northridge Earthquake” and this is exactly the sort of thing that concerns me in areas with a lot of older tall towers.  

People who live in glass houses shouldn't have earthquakes: How well do modern glass-covered buildings hold up?

Figure 5.  More distressing street-level glass after earthquakes (click images to zoom in).  Attributions counterclockwise from top: Glass shards on the ground, by Andy Miah [ CC BY-SA 2.0 ], via Wikimedia Commons .  Shattered and intact glass in Napa,  the original external source used with permission, @WayneFreedman and Abc7news.com.  Glass shard on Northridge lawn, from a  FEMA report , Figure 6.3.1.4-1; photo courtesy of Wiss, Jenney, Elstner Associates.


I have one more photo by itself as Figure 6 so that you can more practically zoom in, as there is a lot of interesting detail when you do that; from the 2010 Chile quake, described at the source as “Glazing damage, due in part to pounding with the structure at right during the 2010 Chile Earthquake.”  Notice all the glass out in the street, even from this relatively short building, and some of it is sharp shards.  I’m not sure which structure on the right did the pounding, and you might suspect that the red ledge caused some of the glass to divert further out in to the street, but extenuating circumstances and exceptions tend to be, well, the rule.

People who live in glass houses shouldn't have earthquakes: How well do modern glass-covered buildings hold up?
Figure 6.  Chile 2010 glass shards in street from building (click image to zoom in), from FEMA report
Figure 6.3.1.4-4; photo courtesy of Antonio Iruretagoyena, Rubn Boroscheck & Associates. 

So what are we to conclude from all this?  I will say that I’ve come out of this with a much better appreciation of the strength of glass than before.  If people are looking up at glassy towers and picturing the kind of glass in pitchers and single-family home plate glass windows that get shattered by a wayward baseball, that’s not what’s up there; it’s MUCH more resilient and the panels can float a bit within their frames, as I mentioned earlier.  Many of these modern all-glass towers might get fractures in the glass but it will still stay intact.  A retired building inspector pointed out to me that while the lowest floors of skyscrapers might experience flexing and torquing, the upper parts of the towers will be moving as a whole unit, and any damage to the windows would probably be mostly limited to that caused by impact from within, rather than the shaking.  In fact, to be fair, all of the examples that I showed of smashed tempered glass in Figure 3 are from intentional impact, not shaking.  

Building construction standards have varied greatly around the world and over time, and older buildings without strengthened/tempered/laminated glass probably lead to riskier street-level situations in major earthquakes than modern buildings do.  My examples in Figures 2, 4, and 5 show that window glass CAN break.  However, my investigation suggests to me that this breakage is relatively unlikely to occur high up in glassy towers, where panes will move within their gaskets and even any glass that fractures will be resistant to shattering, suggesting that the risks of being outside around skyscrapers are not worse in downtown tower areas than in regular commercial areas.  And practically, trying to run into a building while other people are (erroneously) trying to run out isn’t going to work.  I suppose getting as far from the buildings as possible out in the street (assuming traffic has stopped) is probably still the best thing to do, getting down on the ground and curling up as small as possible while covering your head, trying to avoid downed electrical wires.

Even still, I wonder if I can make a few bucks selling bullet-proof umbrellas in downtown San Francisco on the anniversary of the 1906 quake.  Just a thought.

Link to this article Back to top

So how did Matt react to the largest jolt in 10 years? (1/4/2018 Hayward fault quake)
As those in the SF Bay Area could not help but notice, we had a small but intense earthquake in the early morning of January 4th, a 4.4 on the Hayward Fault located near UC Berkeley. As far as I'm concerned, it was still late night January 3rd because I was still up, working in my den at home.

I have not been posting much recently because I've been so busy, but wanted to make this quick post because it's interesting to note how I reacted during this quake, given how much I think about these things.

First of all, the article title that mentions the largest jolt in 10 years is referring to the way it felt to me, here in the Outer Richmond District of San Francisco, near the ocean and the offshore San Andreas Fault. The 6.0 Napa quake in 2014 was quite a bit larger than this 4.4 and it did far more damage, but to me in San Francisco's Mission Bay district at the time, it was pretty mild and I even slept through most of it, just groggily waking up at the end. In contrast, this was sudden and intense where I was. Some people have described it as rolling but in my home, it shook us with a very fast side-to-side motion, not gentle at all. In fact, it was distressing enough that for the first time since the 5.4 quake further south in the East Bay in 2007, I was seriously considering that this could be the beginning of a major quake.

(By the way, for anyone who was here in this earthquake and has not experienced a larger one, it would be worthwhile to review  my article about small quakes and what they mean .)

So how did I react? Did I practice what I preach? Well, yes and no. I successfully made use of " situational awareness ," which I wrote about 2016. This is the practice of being aware of your surroundings and making last-minute judgement calls about what needs to be done that may not be consistent with the default generic advice. Milo the Dog was in the den with me resting on a cushion on the other side of the room, and the first thing I did (to my credit) after the few seconds of realizing that this was actually happening was to look at him. He was freaking out and looked like he was about to bolt, and not knowing what would happen next, I did what I had told myself I would do in the past: I scooped him up in my arms and prepared to take him with me to get under the desk , rather than have him run into some less safe place. The quake ended before I could even start to get under the desk.

Ok, that's good. But actually I did NOT do the other things that I had practiced in my mind many times before, the steps I planned to take if a quake occurred while working at my laptop in my office. My plan has been to first shut the laptop lid ( the laptop is not stuck down for obvious reasons and this would help protect it from damage), and to grab my iPhone on my way to wherever I went so that it would be with me. I did neither of those things; didn't even think about them until the quake was over.

I guess that must mean I put Milo ahead of all other considerations, which is nice, but it would have taken 1 extra second to shut the laptop and grab the phone, and would still be worth doing. Of course, remember that if I had had a flame going somewhere, like a candle or something simmering on the stove, the first thing to do would be to put it out.

The other thing that kind of annoyed me is that I forgot to follow the current advice ( "drop, cover, hold on" ), which is to drop down to the floor and cover your head before moving to wherever you need to go.  This prevents you from being knocked down by the shaking or hit by something before you get to your safe spot.  Darn it, we keep saying the words and doing the drills but in that moment, I was focused on Milo and the need to get to him as quickly as possible.  I actually think that if I had dropped down, I might not have reached him before he ran, so it was probably the right thing to do, but if the quake was much larger, this could have been a problem.  Perfection is difficult to achieve!

Back to article index

Link to this article Back to top

Should I turn my gas off after an earthquake? Don't guess about gas...
This topic took several months to research, so I haven’t posted in a while.  I’m finally wading into this after years of giving talks without being able to give clear advice on how to handle gas after an earthquake.  It can be confusing.  On the one hand, it seems safest to turn off your gas, but on the other hand, the official advice from various utility companies and emergency organizations is to not turn the gas off unless you suspect a leak...and yet on the third hand, many sources are telling you to get automatic gas shut-off valves.  How do we fold our three hands together to make sense of these seemingly mixed messages?  I’ve spoken over the last few years, and especially the last few months, with various earthquake safety experts, fire marshals, fire department representatives, Pacific Gas & Electric (PG&E) , and Southern California Gas (SoCalGas) , and here’s my attempt to make sense of it all.


Turning it off
First of all, should you turn it off?  If a quake occurs, and you are in your home because you wisely did not attempt to run out of it in the middle of the quake , first determine if you smell gas.  If you do smell gas, open a window if you easily can, and get everyone out of the building right away; do not flip electrical switches on or off, do not open refrigerators with door-switched interior lights, do not use telephones, and do not do anything else that could cause a spark.  Then turn off the gas that leads into the home.
Should I turn my gas off after an earthquake?  Don't guess about gas...
(The wrench is attached to a
different pipe not visible in
this photo)
This means you need to already know how to turn off the gas.  Single-family homes and small apartment complexes typically have pretty obvious gas meters outside; you should know where yours is, and know how to turn it off.  This photo shows a typical gas meter.  See that simple metal circle on the pipe with the raised ridge (tang) that is parallel to the pipe?  That means the gas is on.  If you were to turn it 90 degrees with the wrench so that the ridge is perpendicular to the pipe, as if it was blocking it, then the gas would be off.  If you live in a large complex, ask the manager (ahead of time) how to shut off the gas.
If you don’t smell gas, then listen for hissing noises, and go down to the meter and see whether the dial is spinning even when you aren’t using any gas appliances.  These would also indicate gas leaks, and you should turn the gas off.  The gas companies say: if you don’t suspect a leak, don’t turn off the gas (see below).
(LEGAL DISCLAIMER: the advice to not turn off the gas if you don’t suspect a leak is from PG&E and SoCalGas, not from me.  I am reporting what the utilities companies, and the Red Cross, officially recommend.)
Three things for you to do this week:
1)  Find your meter so you know where it is.
2)  Get an appropriate wrench that can fit the tang and is capable of turning the valve, and attach it with wire to the meter so that you don’t have to go find one at the last minute.
3)  Test the valve by turning it slightly; not off, but just a little bit.  There’s a good chance that you can’t move it!  These valves freeze in position due to being exposed to outside conditions for years, and if you can’t turn off the gas when you need to, that’s what is technically known in emergency management circles as “A Bad Thing.”  Fortunately, if you can’t move it, you can call your utilities company and they will send someone out to fix it for free; at least that is the case with PG&E.
If you suspected a leak and turned off your gas, don’t even THINK about turning it back on until you have the utilities company come to check and possibly repair the gas lines.

Leaving it on (if you turn it off, don’t turn it back on!)
While it may seem like the safest thing to do is to simply turn off your gas even if you don’t suspect a leak, turning it off has consequences also because you are not supposed to turn it back on afterward.  If you turn it off without suspecting a leak, then there’s no way to know if there is actually a leak that would have just taken longer to be noticed.  Then you turn the gas back on and start filling your home with gas if there really was damage to the gas line.  That is, your reason for turning off the gas in the first place will never end until someone like PG&E or a qualified inspector can tell you if there is a leak.  Plus, there are various scenarios in which re-establishing the main gas flow to pilot lights and appliances could be dangerous, especially with post-quake uncertainties.  For these reasons, the gas companies don’t want you to turn your gas back on if you have turned it off after an earthquake.  Note that it can take weeks for them to visit large numbers of customers throughout the metropolitan area, so if you turn off your gas, you may be without gas for weeks. 
After the 1989 Loma Prieta earthquake, PG&E tried in vain to convince their customers to NOT turn off the gas unless they suspected a leak, including use of local media; but 80% of the customers in San Francisco turned off their gas and it took 3 weeks for PG&E to restore gas for everyone, despite the use of outside contractors to augment their ranks.
SoCalGas gives advice on its website that is identical to PG&E’s advice: only turn off the gas if you suspect a leak, and don’t turn it back on yourself.  The Red Cross’ advice is similar: turn off gas if you smell it or suspect a leak, and don’t turn it back on.
Despite this, I have spoken with a couple of independent earthquake safety experts and a local fire marshal who think everyone should turn off their gas, figuring that it could cause annoyance to large numbers of people but could also prevent hundreds of fires.  If you do this, though, be prepared to wait a long time before you have gas again.  I do not believe that complete consensus will be reached on this point, but it may be moot if you have an automatic shut-off valve; read on.

Automatic gas shut-off valves in earthquakes
“Now wait a minute,” you say, “if I am not supposed to automatically turn off my gas, why am I being urged to install an automatic gas shut-off valve??”  PG&E is officially neutral about automatic shut-off valves.  The City of Berkeley recently adopted a policy that requires automatic gas shut-off valves to be installed in all buildings being built or renovated (although the Berkeley Fire Department is neutral), various other communities have similar policies, and some insurance companies give you a discount on premiums if you have an automatic gas shut-off valve.  But doesn’t this contradict the official recommendation to not turn off your gas unless you suspect a leak?
PG&E is taking a very pragmatic view of this issue: even though they might shudder at the idea of a whole community having its gas turned off, they are also aware that it’s being required and encouraged in many places and won’t try to interfere with that.  Berkeley initially did not require these valves for several reasons, including that the earlier versions of the valves were so sensitive that they would get shut down by passing trucks, but they are better now, and should only trip if the building moves in a ~5.4 magnitude earthquake or higher.
Plus, there are real advantages to automatic shut-off valves that I find compelling.  The concept of only turning off the gas if you suspect a leak assumes that you are home to be able to make this decision.  If nobody is home and there is a leak, you’ll come home to a house full of gas and potentially blow it up when you turn on the lights.  If you have pets who are home while you are at work, they could inhale gas.  Furthermore, the gas that builds up in your home may impact your neighbors in various ways.  So an automatic shut-off valve minimizes the chances that a gas leak will cause problems while you are away.
However, turning off the gas is turning of the gas, whether you did it or an automatic shut-off valve did it.  These automatic shut-off valves are sometimes marketed as being very easy and straightforward for the consumer to reset, which sends mixed messages to the public about whether they should reset their automatic valves after a quake.  PG&E says: leave it off.  If your automatic valve shut off due to an earthquake, then it’s the same story as if you had turned it off yourself: wait for the utilities company to turn it back on in case there was damage to the lines.  SoCalGas has said on its website that you may reset an automatic valve after a quake, but they recommend that you don’t ( the original external source accessed 4/27/13; I’ve pointed out the mixed message to them, and this wording may change).  

(5/9/13 update:  While some communities are mandating installation of the automatic shut-off valves in new developments to prevent fires, the prospect of wide-spread automatic gas shut-downs lasting for several weeks has made San Francisco seismic safety officials reluctant to pursue extensive installation of these valves.  They are concerned that the potentially extended lack of heat and hot water could cause hardship for elderly or otherwise vulnerable residents whose gas didn't need to be turned off in the first place.  It could also encourage many residents to leave the city during the post-quake period, which would delay recovery by depressing services and business operations, not to mention volunteer recovery efforts.  I feel that a potential solution to these conflicting priorities could be for cities and gas companies or the Public Utilities Commission to establish guidelines making it easier for automatic valves to be reset rapidly.  This might include official training and certification of large building property managers to reset automatic valves and check for leaks, creating a registry of residences with frail occupants who are the first priority for gas check/restoration, and perhaps inspection of residences by gas companies to determine ahead of time which of them fall into specific situations that allow safe valve resets by occupants, to be followed by the same leak evaluations that most people would undertake immediately after the quake anyway.  This is just my opinion.)

Automatic gas shut-off valves in the absence of an earthquake
The reason that these automatic valves are sometimes described as being easy to reset is that if your automatic valve keeps turning off because of a passing garbage truck (or some kid bouncing a basketball off your house, or perhaps an errant overfed butterfly if you have one of the old valves), then they make it theoretically possible to turn it back on IF YOU KNOW WHAT YOU ARE DOING.  You would need to follow the manufacturer’s instructions and ensure that you are not restoring gas to unlit pilot lights that are allowing that gas to seep into your home, even in the absence of a quake.  Many modern appliances use spark igniters rather than constantly lit pilot lights, and modern pilot lights have safety features that shut off the gas flow if the flame is not lit; these require you to turn a dial to a special pilot light position to light it.  If you have older pilot lights, then re-establishing gas to an unlit pilot light and lighting it afterward can be dangerous; have the utilities company do it.  However, PG&E makes the blanket statement that they want you to never reset an automatic shut-off valve, even if it shut down for non-earthquake reasons; they want to do it.  SoCalGas states that the California Public Utilities Commission requires that “only SoCalGas or its certified contractors are authorized to operate the gas shut-off valve” (in its jurisdiction).  There’s no way I’m going to make a recommendation that contradicts the law and official safety recommendations of utilities companies.  You might think you know what you are doing, but you might end up surprising yourself the hard way.  At least in a non-earthquake situation, you won’t have to wait very long for the gas company to reset your service.  And if the kid keeps hitting your valve with the basketball, sign her up for a league.

Getting your gas restored after an earthquake
If you need to have your gas turned back on, don’t assume the utilities company will know that you need restoration; you may need to inform them.  If phones and computers are down, this could be difficult, but between flagging down utilities workers in the street, waiting for communications to be restored, or finding other ways to communicate, you’ll reach them one way or another.  They will also sweep through neighborhoods sooner or later.

A word to the self-sufficient
Some of you might be thinking to yourself that you turn your pilot lights on and off all the time, so what difference does it make to restore gas and relight the pilot lights?  However, there’s a fundamental difference between turning gas on and off to a furnace or stove, and restoring it to the whole building, especially given the uncertainty caused by an earthquake.  In this case, leave it off.
This is a good reason to keep some compact foldable camping thermal blankets in your emergency kit!

Last word
Those of us who have gas appliances deal with them every day, and it’s easy to take gas safety for granted.  Please remember that many fires after earthquakes would not have occurred if people had been more respectful of the explosive fumes coursing through the pipes in their homes.  Firm knowledge of how, when, and if to turn gas on and off after an earthquake is wiser than basing your actions on shaky grounds.
EndFragment

Link to this article Back to top

Double feature Part II: Can I get a fire hose to use after a quake if my house is burning down and the fire department is not coming?

(Haven't posted in a while, so this month you get a double feature.)

I got this question at the end of one of my recent talks and said I’d look into it and post an answer.  The question went something like this:  “I was around in the 1989 quake and in parts of the city, it was impossible to find a firefighter or policeman.  There’s a fire hydrant across the street from my house.  Can I purchase and keep my own fire hose to hook up to that hydrant if my house is burning down and the fire department can’t make it due to other emergencies?”
Of course, after the 1989 Loma Prieta quake, the firefighters were busy dealing with too many emergencies, which is what gave rise to the SF Fire Department Neighborhood Emergency Response Team (SFFD NERT) program .  But regardless of the good reason, it’s certainly understandable to want to be self-sufficient in the absence of the firefighters.
I had never really thought about the fire hose issue, and on one level, it makes sense because the fire is there, the water is there, the person who wants to bring the water to the fire is there, and the Fire Department isn’t coming.  But on other levels, there could be concerns about legality, liability, safety, and feasibility.  So I checked with the SF Fire Department.
The official answer is: no.  The unofficial answer is: no.  The water that comes out of a fire hose is extremely pressurized.  In the SFFD, it takes two trained fire fighters to wield one of those things; we are not talking garden hose here.  If the average Joe or Josephine hooks up a hose to a hydrant and turns it on, they probably are not going to have much effect on the burning house, but could injure themselves and cause other damage.  And then if there’s nobody able to turn it off again, now you are losing the precious water from that local bank of hydrants.
I could add one suggestion, which is that if enough of us join the NERT program (or CERT programs in other cities ) and take care of the smaller problems after an earthquake, then the firefighters will be available to save that house.
By the way though, did you know that in the City of San Francisco, there are 67 special low-pressure hydrants that actually dispense potable water that you can drink if the normal water supply is interrupted?  There is a map of these special hydrants at the original external source .  Nice to know, although I’d still want to have my own emergency water.

Back to article index

Link to this article Back to top

Quaketips reference section

Pets

Include animals in supply, containment, identification, and evacuation planning.

Pets

1 article

Preparing for the needs and behavior of household animals during an earthquake.

Special considerations for pets

I decided to lift one more of the articles on my website for this blog, which makes it a quote of a quote because that web article is based on a previous article that I wrote for a newsletter.  It's timely because the CNN website just had an article about plants that are poisonous to dogs and cats.  The following is from my website (at the end, I'm adding a little bit more today). THEN I'll start sticking to my promise and post infrequently!

Pets present many special problems, especially if you have to leave your home in a major disaster.  However, here's one big problem that I think people frequently overlook.  Even a small earthquake that causes just a few things to fall over in your home can still cause major problems if you have a dog or cat that stays home alone during the day.  If you have anything that you would not want to leave your pet with unattended, you should make sure that it can't fall and be accessible to your pet before you can get home.  The following is an article that I wrote for the April 2010 Cole Hardware newsletter, Hardware Hotline.

For more information on common foods and household plants that are toxic to dogs and cats, see the ASPCA's toxic-to-pets lists  (several relevant lists are at that website).
Earthquake Preparedness in the Home: Remember Your Pets
Matt Springer
         Cole Hardware's Hardware Hotline, April 2010
   You’ve probably all heard that you are supposed to take various precautions around your home to lessen the chances of damage or injury from earthquakes.   Hopefully you even have some idea of what do to (that is, don’t hang heavy or sharp-corner items on the wall over your bed, keep an emergency kit, brace tall furniture, use quake-proof cabinet latches, stick down important loose items with quake putty or buckles, hang pictures with quake-proof hooks, etc.).   But here’s something that is frequently overlooked: how can you protect dogs or cats who are left alone at home during part of the day?
    I first realized that this was a concern a couple of years ago when I was setting up the standard “earthquake proofing” in a new apartment and a puppy joined our family.   I had been installing stretch cords in front of heavy books on upper bookshelves (to stop them from walking forward and falling during the vibration of an earthquake), and I realized that the rows of CDs on the upper shelves of a bookcase would be hazardous for the puppy if they all fell on him.   The CD cases consisted of hundreds of sharp plastic corners, so I installed stretch bands in front of the CDs also.   It then dawned on me that I had a whole new set of concerns that I needed to consider because of the dog.
    I think of these in two categories.   First, the small members of the family, be they two- or four-legged, are shorter than adult humans; and that means that in addition to bracing tall items that might fall and injure you, shorter items that could fall should be braced as well if they could hurt a small child or pet.   Second, unlike a small child, the family dog or cat may be home alone during the day, so anything that might fall to the floor in a quake could easily be eaten, licked, or otherwise touched by your pet before the humans get home.   Will your cat try licking anything at least once?   Better make sure your sharp knives cannot fall on the ground.   Does your dog eat anything?   If so, a little bit of broken glass that would not bother you may end up in the dog’s mouth and stomach, so make sure that nothing can fall and shatter.   Likewise, given the list of human foods that are toxic to dogs (most notably, chocolate, coffee grounds, onions, garlic, grapes, raisins, and macadamia nuts), perhaps you should not have a bowl of chocolates or a bunch of grapes lying around that can fall to the floor in a quake.   Similarly, if you have houseplants, it would be wise to look them up to see if they are toxic to your pet; and if they are, either make sure that they can’t fall or shed leaves in a quake, or consider getting new plants. And of course, make sure that your household cleaning chemicals can’t spill.
    Remember, your pets are counting on you to keep them safe, and a little bit of thought now may prevent a tragedy when the ground starts to move!

A couple of additional thoughts today (4/2/11):  

First, it was recently pointed out to me that all these nasty things that the dog shouldn't eat are in the garbage bin, which could easily fall over in a minor quake and spill while the dog is home alone; a real weak link in the safety chain.  Point well-taken, and so I put a loose strap around the basket attached to the wall, loose enough that it's still easy to replace the garbage bags (garbage, compost--same problems).  

Second, I've gotten occasional questions about bird cages, aquariums, etc.  I think these are best handled as furniture and braced.  That is, the biggest problem with such pet houses is that they might fall if they are loose, creating an annoyance for the bird and a disaster for the fish (although the cat may be happy).

Back to article index

Link to this article Back to top

Quaketips reference section

History, Case Studies & Archive Notes

Historical accounts and observations provide context for preparedness today.

Earthquake History & Case Studies

5 articles

Personal accounts, notable earthquakes, infrastructure, and historical observations.

Reflections on the San Francisco Bay Area’s largest earthquake since 1989
I only post articles here about once a month or less, but I’m posting just a few days after my previous article because the San Francisco Bay Area got woken up last night by a moderately strong earthquake, magnitude 6.0.  This is the largest quake to hit this region since the 1989 Loma Prieta earthquake, and the first since then to result in substantial damage to buildings and infrastructure (in Napa and Vallejo, north of the San Francisco Bay).  I don’t have any information about this earthquake that people aren’t already getting from the news, so I haven’t attempted to rush to post something.  Instead, having followed the news out of Napa during the day, a few thoughts have come to mind.

First, ironically, I had just given one of my talks earlier that afternoon, in the library in my own neighborhood.  I’ll bet the people who attended are marveling at my ability to deliver real live examples of my subject matter!

I do have a couple of more substantial observations though.  Nobody wants to experience structural damage and injuries at any level, but these moderately large quakes provide a good reminder of what can occur, if viewed through the appropriate lens.  Some of you may have read my article from 2011 about benefits and dangers of small earthquakes to our preparation for large earthquakes.  The bottom line was that when people who have never experienced a strong earthquake feel some small earthquakes, they might vastly underestimate the potential risks of the larger ones and not feel the urgency to prepare.  This Napa quake, at a 6.0, was roughly 10-fold smaller than the 6.9 Loma Prieta quake that caused substantial damage, injury, and mortality.  The residents in the hardest hit portions of Napa have a very good concept now of what may happen in an even larger quake, but for many of us in San Francisco and the rest of the Bay Area, our experience with a 6.0 quake was a rolling in the middle of the night, followed by going back to sleep.  Don’t limit your personal experience with 6.0 earthquakes to what you personally experienced; base it on what they experienced in Napa.

It is also notable that the photos and personal accounts from Napa are consistent with what you have been hearing all along from me and from emergency preparedness organizations: don’t attempt to run out of the building during an earthquake, and get UNDER something stable, not next to it .  The piles of bricks and other rubble directly next to buildings are what you could encounter if you were exiting the building, and the rubble also should remind us of the fallacy of seeking safety next to a sturdy object rather than under it.  Napa residents interviewed by the news described being hit by objects from the wall, and said that everything that could fall did fall; and there were lots of photos from inside people’s homes showing many objects that fell off of shelves or out of kitchen cabinets that swung open.  In fact, much of this interior damage could have been prevented by appropriate bracing , quake-resistant cabinet latches , sticking objects to surfaces with quake putty , etc.

That is, at the risk of hitting you over the head with it, you can greatly reduce the probability of many of the problems encountered in Napa by taking the recommended home preparedness precautions against earthquakes beforehand!

So, I hope that the worst is over for Napa and that they don’t experience strong enough aftershocks to cause more problems.  Nonetheless, we should derive as much benefit as we can from these occasional 6’s by imagining what we might experience in the 7’s and 8’s, and then taking the appropriate precautions now.

As for me, believe it or not, I slept through most of it.  Because I think about earthquakes frequently as I give my talks or write this blog, I occasionally wake up from an earthquake dream that simply consists of the whole room shaking, some of which are darned scary.  For the real thing, by the time I realized something was really going on, it was almost over.  I’m disappointed!

Link to this article Back to top

The new Bay Bridge opened today: A Loma Prieta earthquake repair 24 years in the making
I normally try to keep this blog pretty general, keeping in mind that people are reading it all over the world. This month, however, we are focused on the San Francisco-Oakland Bay Bridge (or just the “Bay Bridge” as everyone calls it here), because it’s a momentous weekend. The eastern span that was damaged in the 1989 Loma Prieta earthquake is being replaced by a new eastern span that opened Monday night, almost exactly 24 years later (but half a day earlier than scheduled), after a 5-day long closure of this vital transportation link while they move the connections from the old bridge to the new one.

The new Bay Bridge opened today:  A Loma Prieta earthquake repair 24 years in the making
New eastern span in front of the old eastern span
(Steve Jurvetson, Menlo Park, the original external source(8859593785).jpg)

Nonetheless, this is an earthquake story coming and going; having been started because of an earthquake in the previous millennium and resulting in new structure built to withstand the type of quake that is expected every one and a half millennia.

I’ll give a bit of background here and then will link to a very interesting and informative story that appeared in the San Francisco Chronicle on Sunday, about the preparations for what was to have been Tuesday’s grand opening of the new Bay Bridge (although it opened ahead of schedule, Monday night).

The new Bay Bridge opened today:  A Loma Prieta earthquake repair 24 years in the making
Bay Bridge western span
©  Túrelio  (via Wikimedia-Commons)
For those who live farther away, who may not be familiar with the Bay Bridge, this is the less-famous but more economically vital cousin of the Golden Gate Bridge. The two bridges opened within a year of each other: the Bay Bridge opened in 1936 and the Golden Gate Bridge opened in 1937. The Bay Bridge is a graceful double decker suspension bridge (actually two of them in a row, with an anchorage in the middle) connecting San Francisco’s east coast to Yerba Buena Island in the middle of the Bay, then turns into a two-level tunnel through the island, and then continues to the East Bay (Emeryville and Oakland) via what has been a utilitarian double decker cantilever bridge full of metal girders that looks, well, let’s just say that San Francisco definitely got the better end of the deal from an aesthetic standpoint. It’s about 4.5 miles from start to finish and is the main auto transportation link between San Francisco and Oakland.

The new Bay Bridge opened today:  A Loma Prieta earthquake repair 24 years in the making
Bay Bridge eastern span (original)
(the original external source)
The new Bay Bridge opened today:  A Loma Prieta earthquake repair 24 years in the making
Collapsed section
(C.E. Meyer, U.S. Geological Survey, public domain)
On October 17, 1989, the Loma Prieta earthquake hit the San Andreas Fault just south of the San Francisco Bay Area, 6.9 on the Richter Scale. In addition to the many other problems caused by the quake, a section of the top roadway on the eastern span of the Bay Bridge collapsed onto the lower deck, killing a motorist and causing transit havoc. The eastern span was built on Douglas fir tree trunks driven about 100 ft into the mud at the bottom of the Bay, which is subject to liquefaction during large earthquakes. Furthermore, the bridge was not built to withstand the horizontal movement and one section of the top deck literally slid off of its support. The bridge was repaired and reopened, but it was clear that something had to be done about its continued inability to withstand earthquakes of the size that occur here every few decades. The western span was retrofitted a few years ago, but it was decided that completely replacing the eastern span was more economical than retrofitting it. After years of arguing about engineering and aesthetic design, construction begin in 2002 on a much safer, much prettier bridge.

Despite cost overruns, continued design debates, and ironically, the discovery earlier this year that many of the bolts and seismic safety rods in the bridge were defective, the technologically cutting-edge, self-anchored single tower suspension span started carrying traffic today.

For some pretty incredible information about its seismic design (basically, just about every piece is only loosely connected to every other piece!), check out this article that the San Francisco Chronicle ran on Sunday. I encourage you to flip through the photo gallery; some of those pictures give you a great contrast between the old and new bridges . One of them is actually a short video , which is also worth watching. There is a lot of extra information in a diagram that shouldn't be missed  (this graphic on the Chronicle site currently has a technical glitch so that it can't be enlarged and is unreadable; I've notified them and have temporarily posted an enlargeable version  here ).

Next, they start dismantling the old bridge. That should take them about 3 years. Unless, of course, the next big quake hits before they finish; that could shorten the job!

Back to article index

Link to this article Back to top

Experience an earthquake! And then go see the ostrich chicks and have lunch.
About a week ago, I and about 14 other people experienced two earthquakes in a row; and then another ~15 people experienced them about 10 minutes later, and it continued that way all afternoon.  Micro-aftershocks?  No, it was the new Earthquake exhibit at San Francisco’s California Academy of Sciences in Golden Gate Park, where they have a “shake house” that first simulates the 1989 Loma Prieta earthquake and then simulates the 1906 San Francisco quake.  That was a fascinating experience for me, because when I felt the real 1989 quake, I was outdoors, which is a very different experience; and when I went through the 1971 Sylmar earthquake, I was a little boy in my bed, and was more bounced around than shaken.  Standing on the floor and having the walls shake and the floor rock and shift certainly does feel different.
While experiencing these simulations, a few things occurred to me.  First, the books didn’t fall off the shelves, the picture didn't crash down to the ground, the fishbowl did not slide off the shelf, the cabinet doors did not swing open, and the glasses did not break all over the floor.  That was because this was an exhibit rather than a real home and everything was fastened; which is a great example of why in your real home, it’s a good idea to have everything fastened!  Second, it sure is useful for the kitchen to have a hand-rail with capacity for ~15 people to hold on to it, and to have advance warning; but of course those exhibit features presumably will NOT make it into your real home.  And lastly, and this will be more meaningful to actual San Franciscans, the view out the fake window from this shake house of the famous “Painted Ladies” Victorian houses seems to put the location of this hypothetical house right in the middle of Alamo Square Park...but we’ll let that one slide.
One more thing that occurred to me is that experiencing the feel of these quakes is good preparation for the real thing.  It is hard to respond effectively to the unfamiliar; easier if you have already gone over in your mind the sounds and sensations that you will probably experience.  Amanda Ripley, in her truly excellent and gripping book “ The Unthinkable ,” describes various real disasters and discusses how the simple act of knowing what you will do before the unexpected occurs can make a crucial difference in the outcome.   I imagine that not just knowing what you will do, but also knowing what you will likely be experiencing, will help save those extra few seconds that are better spent responding than freezing like a deer in the headlights.
Other nice aspects of this exhibit were the planetarium show in which you can see cool simulations of the continents drifting, fly through the San Andreas Fault, and be part of a very realistic CGI simulation of San Francisco’s Market Street in the early morning as the 1906 quake was hitting; and also the real live ostrich chicks running around in the pen as an example of the speciation that has occurred due to tectonic plate movement.
I’m glad I finally got the chance to attend this Earthquake exhibit, especially since one of my recent earthquake preparedness talks was at the SF Main Library in partnership with the California Academy of Sciences itself, so I was part of their lecture program associated with this exhibit.  Presumably I was not as cute as the ostrich chicks but I’m glad to have been able to contribute a bit to the effort!

Back to article index

Link to this article Back to top

A personal account from the aftermath of the 1989 Loma Prieta earthquake
Well, I’m pretty busy this month so I will cheat a little and not really write a blog entry, but instead will link to a truly amazing account of one person’s experiences in the hardest-hit section of San Francisco immediately after the 1989 Loma Prieta earthquake.  This is written by Stewart Brand, who is perhaps better known as having been the editor of the Whole Earth Catalog.  Brand just happened to be in the Marina District during the earthquake and helped with the civilian rescue attempts that are credited with having been the genesis of the San Francisco Fire Department’s Neighborhood Emergency Response Team (NERT) program and ultimately the Community Emergency Response Team (CERT) programs throughout the country.  It’s interesting that Brand encapsulates the lessons that he learned during the experience, things that should be done before this happens again, and this basically sounds like a blueprint for how these programs are run and what they teach to the participants; a very forward-thinking individual!
In fact, this article was brought to my attention just last month by Dennis Hyde, the Co-Coordinator of the Inner Sunset/Golden Gate Heights NERT group.  I’ve linked to it instead of reprinting it here to avoid any copyright problems.
It’s quite long...but honestly, when I started reading it, I could not put it down, due to a combination of his excellent writing style and the no-holds barred and brutally honest account of how he and other people acted that day.  
By the way, there’s been a bug in the last few months in which people who receive this blog by e-mail have gotten messages in which some words are run together, despite looking normal in the blog.  I did some testing and I can’t reproduce the problem right now, so hopefully it is fixed...and of course the e-mail people might be laughing as they read this if it is missing spaces...

Link to this article Back to top

Small quakes: Good or bad for geology and psychology?
On Thursday, 10/20/11, 8.6 million people in California participated in the annual Great California ShakeOut, according to the organizers.  They pretended there was a large theoretical earthquake and then ducked under desks and other furniture and held on, and hopefully had discussions or at least thought a bit about what they would do in a quake (and hopefully none of them just got next to something , waiting to be hit in their theoretical head by theoretical flying rubble). 
Then, a couple of hours later, there was a real one, a 4.0 on the Hayward Fault!  Then a few hours after that, there was another real one, a 3.8 on the Hayward Fault!  The first one, at least, was unusually noticeable considering its small size (I can’t comment about the second quake because I didn’t notice it).  Then there were a couple of smaller quakes in the same place the following day.  These bring to 7 the number of small quakes on the Hayward fault this year, also known as the predicted spot of the next very large Bay Area earthquake; and they continue a line of small “feel-able” quakes in the Bay Area that have been occurring for several years.  
This invariably raises the question of whether small earthquakes are desirable or not.
And typically, when someone raises that question, they are referring to whether the small earthquakes are slowly releasing pressure on a fault (perhaps desirable) or are foreshocks of a larger event to come.  And I’m not qualified to say one way or another; I understand that the energy released in the small quakes is small compared to what has been built up and one could argue it either way.  Besides, if I were to venture a guess, the Italian authorities would probably have me arrested .
More of interest to me: are the small earthquakes good for promoting earthquake preparedness?  Most people would say yes; they are constant reminders that earthquakes occur, and each time we feel them, we get a reminder to check the expiration dates on our supplies, to see if there are precautions we’ve been meaning to take that still need to be finished, and so on.  However, I must admit that these small earthquakes make me nervous, because the more 3’s and 4’s that we experience, the more people are likely to think to themselves that “I’ve been through earthquakes and they are no big deal.”
I usually like to be very positive and upbeat about earthquakes to those around me, to reassure people that they are not taking undue risks simply by living in the San Francisco Bay Area (or other moving cities).  However, I’m concerned that as the population continues to become more post-Loma Prieta (1989) residents whose experience with earthquakes are limited to these little things, the more likely they are to not care, so I’d like to come at you from the other side in the name of real preparedness and do this little exercise if you live in this region and felt the small shakes this week:
Take the 4.0 afternoon quake, which, at least at UCSF Medical Center on bedrock, lifted us, dropped us, and shoved us over the side.  Make it 10 TIMES LARGER in terms of motion (I’m not going to get into motion vs. energy right now), and you have…something smaller than the moderate 5.4 jolt in 2007 that got our attention and didn’t do much else. 
Make it ANOTHER 10 TIMES LARGER and you have a 6.0 that is capable of doing some damage.
Now make it YET ANOTHER 10 TIMES LARGER and you have the ~7.0 1989 Loma Prieta earthquake that disrupted everyday life but was not “The Big One.”  In case you’re not counting, we’re at 1000 times larger than this week’s little things. 
And sure, why not, now make that EVEN YET ANOTHER 10 TIMES LARGER and you get the ~8.0 (estimated) 1906 earthquake that I hear is about the largest size that this region is capable of experiencing.
Sorry, I am not trying to be Mr. Doom-and-Gloom here; the dangers of even the larger quakes are substantially mitigated by taking proper in-home precautions and making sure that your home is on a quake-resistant foundation.  But if you find yourself asking why you should brace your bookcase and file cabinet when you’ve already been through a bunch of earthquakes where nothing fell down, just start multiplying by 10.

Back to article index

Link to this article Back to top

Archive Notes & Personal Updates

6 articles

Original site announcements, archive milestones, presentations, and personal notes.

Murphy eats procrastination for breakfast, and a personal note to my readers

Long-time readers of this blog may have noticed that new posts have been very sporadic over the last couple of years.  A series of issues kept arising, including the pandemic and various personal matters that resulted in there always being a bunch of matters that needed to be addressed ASAP and always had to take priority to writing blog articles.  That's ok, writing a blog is something that can go in fits and starts... however, the same issues have affected staying up to date with my quake preparations and making sure emergency supplies like food and medicines aren't expiring.  And that's the reason for me mentioning all this: it underscores that there will always be reasons to put off taking quake precautions or keeping them up to date, and there will sometimes be reasons that make such postponements unavoidable, until the point is reached that the risk to the future of putting them off starts to outweigh the risk at the present of not doing them now.  Where that line is, is a matter for personal choice and priorities, of course.

I'm distressingly late in checking my food supplies to replace any that are no longer good, and as I reported the last time I replaced my expired supplies , this is a real issue!  Some stored foods really do go bad, there was the amazing exploding vitamin pill incident, and even the plugs for emergency power of mobile devices become defunct!  The problem is that earthquakes can hit at inconvenient times.  And lest you figure you typically keep enough food around and usually are not near the end of your prescription refill cycle, remember that quakes can occur when you are low on food and medicine.  In fact, Murphy’s Law would seem to dictate that this is exactly when the next large quake will occur!  After all, how many times have you gotten a bad cold right when it was time to buy more Kleenex?

"Fortune favors the prepared mind" (yes, yes, I know, there are different translations ), to which Murphy laughs and says, “I eat procrastination for breakfast.”

So one purpose of writing this article, along with needing to finally break the silence and get these articles flowing again, is to goad myself into pulling out the emergency supplies and doing the expiration check that I have not done since early 2019 (too long!) even though I have a bunch of other things I need to do.  Hopefully, some of you will also realize you have been saying about basic earthquake precautions that “it’s on my to-do list” for the past 10 years.

Murphy eats procrastination for breakfast, and a personal note to my readers
The other purpose: one of the matters that kept me from blog writing was the passing away of my mother Joyce about half a year ago, after the better part of a year of many health problems.  It's ironic because she was the main inspiration for a lot of my insights about quake safety, the talks I give (which have recently also been sporadic), and the blog articles that I write.  She went through the 1971 Sylmar quake in the San Fernando Valley, along with me and our family.  Then she lost her apartment in the 1994 Northridge quake, and went through the whole ordeal that those who have seen my talk know about, including being stuck in her apartment until being freed, and losing just about everything.  She moved to nice safe Simi Valley, where earthquakes don't seem to cause as much of a problem, and ironically ended up having to evacuate a few times due to wildfires; then ended up in an assisted living facility in her final year where she had to deal with COVID outbreaks.  (There's no perfect solution to avoiding earthquakes.)  It was seeing all the stuff she had stuck down to surfaces in her Simi Valley apartment that initially made me think she was over-reacting, but then got me seriously thinking about the issue and realizing how sensible it was.

During her health issues last year, at one point when she was a bit out of it due to the health problem du jour, she asked me out of the blue without context "is this the end of the blog?"  I thought she might have been a little disoriented since we had been talking about something else, but then realized that even in her state, she must have noticed the absence of Quaketips update e-mails.  I assured her that it was not the end of the blog, and indeed, it isn't.

Next time, I'll be reporting on my field trip to the earthquake supplies section of a major department store in Tokyo.


Back to article index

Link to this article Back to top

IMPORTANT changes coming soon to Quaketips e-mail subscriptions; subscribers please read this

Quaketips is alive and well, even though I haven't had a chance to write new articles since January.  However, the e-mail subscription system is changing and this affects all current subscribers.  Until now, the previous blogging platform has used Feedburner to collect subscriber e-mail addresses to automatically send new articles to them, but Google is ending this functionality at the end of June.

Therefore, I'm experimenting with alternatives, and I will try to use Mailchimp, which strikes me as a very responsible service with robust options to report spam.  In setting up Mailchimp, I have turned off ALL of the options to track clicks or collect any information about what e-mail recipients are doing.

Because I have promised for years to not do anything with e-mail addresses that subscribers provide, I decided to not move everyone to Mailchimp en masse myself.  Instead, in the spirit of using an "opt in" rather than "opt out" approach, all e-mail subscribers will have to go to the blog itself and put their e-mail address into the little e-mail subscription box again, just like what you did initially.  I don't think there is a verification e-mail step for Mailchimp like there was for the old system; I think you just enter your e-mail and you're signed up.

Apologies in advance but I'm a novice at this and there might be some extra or duplicate messages that get sent out; please just bear with me as I work through it.

I hope you have all been enjoying Quaketips and that you'll take this extra step to show up on the new subscription list!  


Back to article index

Link to this article Back to top

An index of topics so far, broken down by category
This blog has been around for almost 4 years now, and it occurred to me that now at the beginning of a new year would be a good time to pause and provide a helpful index of what articles have been written about several broad categories of topics.  It's probably my least imaginative post ever, but hopefully is one of the most useful posts.  I'll try to keep this index visibly accessible even after regular articles have resumed, one way or another.  (4/25/15 update: a current version of this index is now accessible directly at the top of the blog.)

During and after a quake:

3/31/11
Important information about the recurring "Triangle of Life" e-mail spam
7/9/11
Should I stay or should I go?...the inevitable dilemma about staying in the building during an earthquake
2/8/12
Double feature Part II: Can I get a fire hose to use after a quake if my house is burning down and the fire department is not coming?
5/7/13
Should I turn my gas off after an earthquake? Don't guess about gas...

Emergency lighting and batteries:

2/2/14
Don’t be left in the dark: which kinds of power failure back-up lights work best in an earthquake?
6/28/14
Choosing the right kinds of batteries for your emergency supplies in the 21st Century
11/11/14
A simple way to keep your flashlight within reach if your bedroom is shaking

Emergency food and water:

5/24/11
Your MREs (emergency rations) are good for up to 10 years--or are they?? An update...
7/1/13
Does bottled water really expire? The FDA says no!
10/7/13
MRE shelf-life follow-up: Ever wonder what a 14-year-old MRE tastes like?
11/29/13
The ethical dilemma of being prepared when other people aren't
8/19/14
Most people don’t know about San Francisco’s emergency drinking water hydrants, but it’s probably just as well...
10/16/14
Can you use a portable camping water filter to safely drink tap water after an earthquake in case your emergency water is gone? (Spoiler alert: the answer is no.)

Emergency kits:

12/22/11
Where should I keep that emergency kit?
1/8/13
Big emergency kit for home, little emergency kits for work and car

Tips for bracing and fastening:

4/18/11
An amazing story from the past, AND more about hanging pictures that won’t come crashing down (the wired and non-wired varieties)
9/7/11
“Be sure to bolt your furniture bracing straps to a wall stud”…ok, now for the other 95% of the population who doesn’t know how to find a wall stud:
2/8/12
Double feature Part I: If you install a closet organizer system, don’t skimp on that last screw.
4/15/12
Do I really have to stick down EVERYTHING? What about my TV remote?
8/2/12
At last, helpful hints on installing push-latches for cabinets!
4/27/14
20 things you can do with quake putty – and helpful hints for Quakehold Gel

Product evaluations and recommendations:

2/2/14
Don’t be left in the dark: which kinds of power failure back-up lights work best in an earthquake?
6/28/14
Choosing the right kinds of batteries for your emergency supplies in the 21st Century
10/16/14
Can you use a portable camping water filter to safely drink tap water after an earthquake in case your emergency water is gone? (Spoiler alert: the answer is no.)

General earthquake safety considerations:

4/2/11
Special considerations for pets
10/23/11
Small quakes: Good or bad for geology and psychology?
6/17/12
Experience an earthquake! And then go see the ostrich chicks and have lunch.
11/10/12
Earthquake safety at work is good medicine
8/24/14
Reflections on the San Francisco Bay Area’s largest earthquake since 1989
12/19/14
A burning question: what happens to unattended holiday/memorial candles in an earthquake?

Earthquake history:

3/31/11
"Why the heck do you live in that place with earthquakes??"
4/18/11
An amazing story from the past, AND more about hanging pictures that won’t come crashing down (the wired and non-wired varieties)
5/14/12
A personal account from the aftermath of the 1989 Loma Prieta earthquake
9/2/13
The new Bay Bridge opened today: A Loma Prieta earthquake repair 24 years in the making

Other ways to be prepared:

5/25/14
The Honey Quake story: Back up your recipes!

Earthquake warnings and predictions:

3/31/11
Thoughts about the much-publicized North American earthquake prediction for late March 2011

Back to article index

Link to this article Back to top

Special note to my readers: An updated video of my presentation is now available
In addition to this month's article (which follows), this is just a quick extra note to let people know that they can now watch a current version of my presentation, Home Preparedness in Earthquake Country, online.  Previously, I had a link available to a UCTV broadcast of a talk that I gave in early 2010, which was not only shown on UCTV's cable network but also remained online for viewing, where it picked up over 200,000 hits over the last 4 years.  However, since 2010, I have been updating the talk to include information about more recent quakes of note, such as the massive Japan quake and our local Napa quake, have found many more informative photos, and have generally streamlined the presentation to remove less useful material to make room for newer and more useful material.

After the Napa quake in August 2014, I gave a special cluster of extra talks at UCSF and in my neighborhood, and the UCSF tech folks made a video of a September 2014 talk that is now accessible online through Vimeo in SD and HD formats.  It doesn't have the professional editing that the UCTV version had, but it is quite sufficient as is and I'd prefer that people watch the 2014 version rather than the 2010 version at this point.  You can access the talk from my main video webpage .

Of course, it is still better to attend the talk in person if you are able to, so that you'll get the most up-to-date material and will be able to ask questions.

Back to article index

Link to this article Back to top

My earthquake preparedness website is moving!
I really do plan on doing a new real post soon, but I want to send a quick note to people who follow this blog that my companion earthquake preparedness website, which contains information like the schedule of presentations and streaming video of an older presentation, is moving to a new URL.  Apple's web hosting service is closing down in June 2012, and the old site will go away.  I have already reconstituted it at:

the original external source

...and I recommend it as an additional set of informational resources.

Coming soon, one of the most common questions that I get asked: just where are you supposed to keep your emergency kit?

Back to article index

Link to this article Back to top

A blog is launched; opening thoughts
This is my first experience authoring a blog, and there will probably be a few technical bumps along the way.  Earthquake safety is an important topic in a place like the San Francisco Bay Area, and I hope that the information and occasional thoughts and tips here will be of interest to people who are trying to maximize their safety in our occasionally moving region.

It's important to remember that even though we live in a place that is subject to earthquakes, which are occasionally pretty big, most of the risks associated with California earthquakes can be minimized by taking some precautions ahead of time.  Just like one knows not to go jogging alone in the middle of the night in a dark park in a dangerous part of town, one should know what to do and not to do in regions subject to natural disasters.

I'm kick-starting this blog with a few entries in a row, first introductory and then a few entries that have already been on my website.  After that, I'll post occasionally; perhaps even relatively rarely so that I don't add to people's e-mail burdens.  I've got no idea about how many people will be signing on to this, but welcome to those that do!

-Matt Springer

Back to article index

Link to this article Back to top

About Dr. Springer

Remembering the scientist, musician, mentor, educator, and friend whose work forms the foundation of this earthquake-preparedness archive.

In Memoriam

Matthew L. Springer, PhD

(10/21/1963 - 06/15/2026)

Dr. Matthew Springer was a UCSF scientist, devoted mentor, accomplished musician, and longtime public educator whose earthquake-preparedness presentations helped communities throughout the San Francisco Bay Area.

Earthquake Resources
Important Disclaimer: The earthquake information and advice provided herein are for general informational and educational purposes only. Elfenworks Foundation makes no representations or warranties of any kind, express or implied, regarding the accuracy, completeness, or reliability of this information. In no event shall the providers be liable for any direct, indirect, or consequential damage, injury, or death arising from the use of or reliance on this information. Always follow official directives from emergency management authorities and consult qualified professionals for structural safety assessments. For additional information, please see our full Earthquake Information Disclaimer.

Earthquake Information Disclaimer

  1. Informational Purpose Only

    This website displays earthquake information for general educational and awareness purposes only.

  2. No Warranty of Accuracy ("As-Is")

    All data is provided "as-is" and "as available" without warranties of any kind. We do not guarantee the completeness, accuracy, or reliability of any earthquake data, information, or advice shown on this platform.

  3. Professional Advice & Structural Safety

    Content on this site does not constitute professional engineering, geological, or legal advice. Users must consult licensed structural engineers or seismic experts for property evaluations, construction decisions, or official risk assessments.

  4. Limitation of Liability

    To the maximum extent permitted by law, Elfenworks Foundation, its owners, and its contributors shall not be held liable for any direct, indirect, incidental, or consequential damages. This includes, but is not limited to, property damage, financial loss, personal injury, or death resulting from the use of, reliance on, or inability to access this website's information.

  5. Primary Emergency Sources

    This website is not an official emergency response channel. In the event of an active seismic disaster, always prioritize alerts from authoritative public safety bodies, such as the USGS or your local emergency management agency.

  6. Links

    Links and pointers to non-Elfenworks Foundation sites, including the USGS, are provided for information only and do not constitute endorsement by Elfenworks Foundation of the referenced organizations, their suitability, content, products, or services, whether they are governmental, educational, or commercial. Hypertext links and other references to non-Elfenworks Foundation products and services are provided for information only and do not constitute endorsement or warranty by Elfenworks Foundation as to their suitability, content, usefulness, functioning, completeness, or accuracy.